我们都知道Oracle数据库是世界上最流行和广泛使用关系数据库管理系统(RDBMS)。 这篇文章描述了一步Oracle数据库的一步式安装11g第在CentOS 6.4 32位32位2。 安装步骤应该不会对大多数基于Red Hat Linux 的发行版进行而变化。
安装Oracle数据库11g第2版
第1步:安装Oracle依赖关系
我们使用“ 甲骨文公共Yum ”库提供的“Oracle的RDBMS的服务器11gR2中,预安装 ”软件包。 Oracle公共yum存储库提供了一种免费和最简单的方法来自动安装所有最新的Oracle Linux依赖项。 要设置yum存储库,请按照下面提供的说明。
使用“wget的 ”命令来下载相应的yum配置文件/etc/yum.repos.d/目录作为root用户下。
RHEL / CentOs 6.x
# cd /etc/yum.repos.d
# wget https://public-yum.oracle.com/public-yum-ol6.repo
RHEL / CentOs 5.x
# cd /etc/yum.repos.d
# wget https://public-yum.oracle.com/public-yum-el5.repo
RHEL / CentOs 4.x
# cd /etc/yum.repos.d
# wget https://public-yum.oracle.com/public-yum-el4.repo
现在执行下面的“ 荫 ”命令自动安装所有必要的先决条件。
[root@oracle]# yum install oracle-rdbms-server-11gR2-preinstall
在导入GPG密钥,你可能会得到如下图所示“GPG键检索失败 ”的错误。 在这里,你需要输入正确的GPG密钥您的操作系统版本。
Retrieving key from file:///etc/pki/rpm-gpg/RPM-GPG-KEY-oracle
GPG key retrieval failed: [Errno 14] Could not open/read file:///etc/pki/rpm-gpg/RPM-GPG-KEY-oracle
下载和验证最适合您的RHEL / CentOS的兼容的操作系统版本相匹配的相应的Oracle Linux的GPG密钥。
RHEL / CentOs 6.x
# wget https://public-yum.oracle.com/RPM-GPG-KEY-oracle-ol6 -O /etc/pki/rpm-gpg/RPM-GPG-KEY-oracle
RHEL / CentOs 5.x
# wget https://public-yum.oracle.com/RPM-GPG-KEY-oracle-el5 -O /etc/pki/rpm-gpg/RPM-GPG-KEY-oracle
RHEL / CentOs 4.x
# wget https://public-yum.oracle.com/RPM-GPG-KEY-oracle-el4 -O /usr/share/rhn/RPM-GPG-KEY-oracle
第2步:设置主机名
打开“ 的 / etc / sysconfig / network中 ”文件并修改主机名匹配FQDN( 完全合格域名 )的主机名。
[root@oracle]# vi /etc/sysconfig/network
HOSTNAME=oracle.youcl.com
打开“ 的/ etc / hosts”文件,并添加完全合格的主机服务器。
[root@oracle]# vi /etc/hosts
192.168.246.128 oracle.youcl.com oracle
现在,您需要重新启动网络服务器上,以确保变化将在重新启动持久。
[root@oracle]# /etc/init.d/network restart
第3步:Oracle用户设置
为“oracle”用户设置密码。
[root@oracle]# passwd oracle
Changing password for user oracle.
New password:
BAD PASSWORD: it is based on a dictionary word
Retype new password:
passwd: all authentication tokens updated successfully.
添加条目,如下所述到文件“/etc/security/limits.d/90-nproc.conf”。
[root@oracle]# vi /etc/security/limits.d/90-nproc.conf
# Default limit for number of user's processes to prevent
# accidental fork bombs.
# See rhbz #432903 for reasoning.
*          soft    nproc     1024
# To this
* - nproc 16384
编辑文件“ 的/ etc / SELinux的/配置 ”设置了SELinux为“ 许可 ”模式。
[root@oracle]# vi /etc/selinux/config
SELINUX=permissive
一旦你做出改变,不伪造重新启动服务器 ,以反映新的变化。
[root@oracle]# reboot
登录为Oracle用户,并打开文件“ 的.bash_profile”,这是可以在Oracle用户的主目录,请按如下所述的条目。 请务必设置正确的主机名“ORACLE_HOSTNAME = oracle.youcl.com”。
[root@oracle]# su oracle
[oracle@oracle ~]$ vi .bash_profile
# Oracle Settings
TMP=/tmp; export TMP
TMPDIR=$TMP; export TMPDIR
ORACLE_HOSTNAME=oracle.youcl.com; export ORACLE_HOSTNAME
ORACLE_UNQNAME=DB11G; export ORACLE_UNQNAME
ORACLE_BASE=/u01/app/oracle; export ORACLE_BASE
ORACLE_HOME=$ORACLE_BASE/product/11.2.0/dbhome_1; export ORACLE_HOME
ORACLE_SID=DB11G; export ORACLE_SID
PATH=/usr/sbin:$PATH; export PATH
PATH=$ORACLE_HOME/bin:$PATH; export PATH
LD_LIBRARY_PATH=$ORACLE_HOME/lib:/lib:/usr/lib; export LD_LIBRARY_PATH
CLASSPATH=$ORACLE_HOME/jlib:$ORACLE_HOME/rdbms/jlib; export CLASSPATH export PATH
切换到root用户,并发出以下命令允许Oracle用户访问X服务器 。
[root@oracle]# xhost +
创建目录并设置将安装Oracle软件的适当权限。
[root@oracle]# mkdir -p /u01/app/oracle/product/11.2.0/dbhome_1
[root@oracle]# chown -R oracle:oinstall /u01
[root@oracle]# chmod -R 775 /u01
第4步:下载Oracle软件
使用以下链接注册和下载Oracle软件。
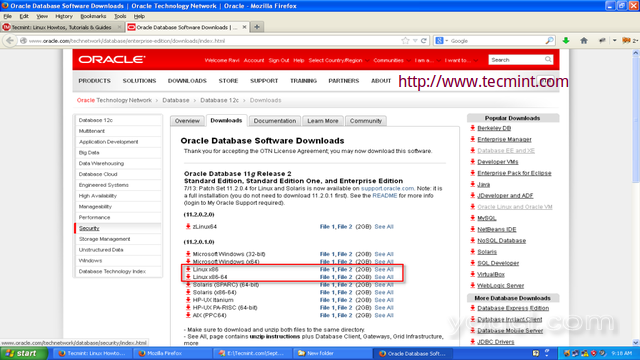
下载Oracle 11g第2版
Oracle包包含2个zip文件,你必须首先下载前先接受许可协议 。 我已经给这些文件的名称为您参考,请下载这些文件为你的系统架构下的某处“ 的 / home / ORACLE /”。
对于Linux x86系统
http://download.oracle.com/otn/linux/oracle11g/R2/linux_11gR2_database_1of2.zip
http://download.oracle.com/otn/linux/oracle11g/R2/linux_11gR2_database_2of2.zip
适用于Linux x86-64系统
http://download.oracle.com/otn/linux/oracle11g/R2/linux.x64_11gR2_database_1of2.zip
http://download.oracle.com/otn/linux/oracle11g/R2/linux.x64_11gR2_database_2of2.zip
第5步:Oracle安装
现在让我们开始Oracle安装。 首先,需要切换为“甲骨文用户安装数据库。
[oracle@oracle ~]$ su oracle
提取压缩Oracle数据库的源文件在同一目录“ 的 / home / ORACLE /”。
[oracle@oracle ~]$ unzip linux_11gR2_database_1of2.zip
[oracle@oracle ~]$ unzip linux_11gR2_database_2of2.zip
解压缩后的源文件,目录名为将要创建数据库 ,转到目录内,执行以下脚本启动Oracle数据库安装过程。
[oracle@oracle database]$ cd database
[oracle@oracle database]$ ./runInstaller
1。R 卸载程序将调用Oracle通用安装程序(OUI),其中的外观和感觉与步骤是在所有的操作系统一样。
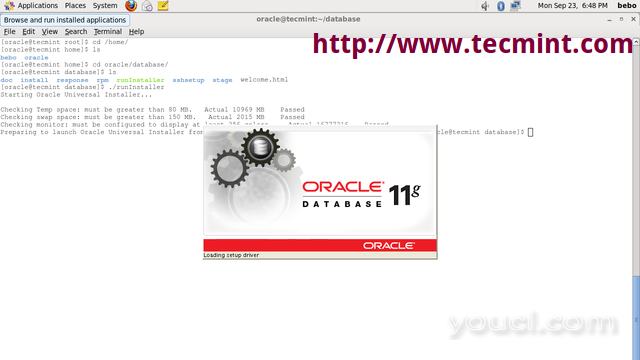
Oracle通用安装程序
2.提供您的电子邮件地址被告知的安全问题和接收安全更新。
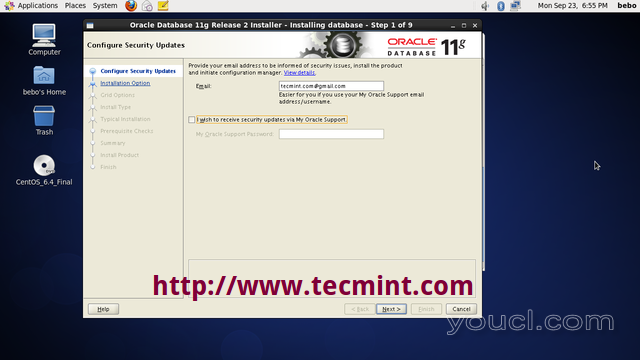
配置Oracle安全更新
3.创建并配置数据库
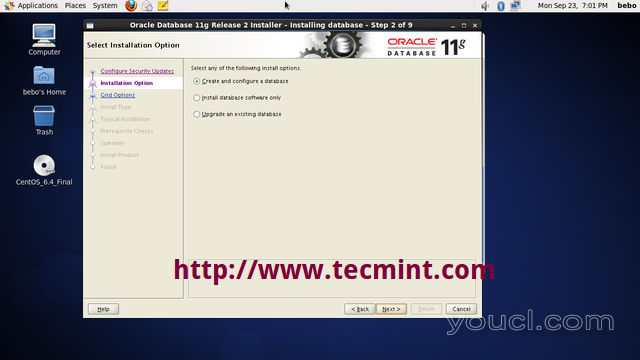
创建Oracle数据库
4.选择系统类,无论是台式机或服务器 。
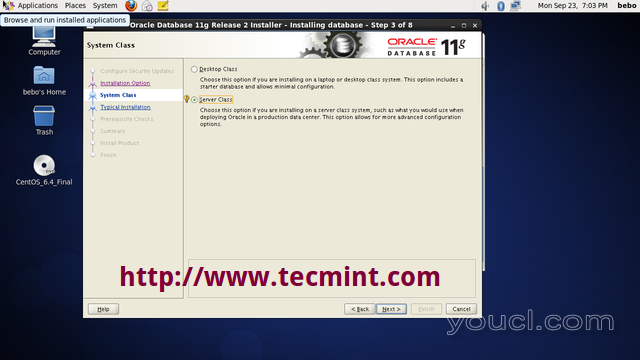
选择Oracle系统类
5.选择要执行数据库的安装类型。
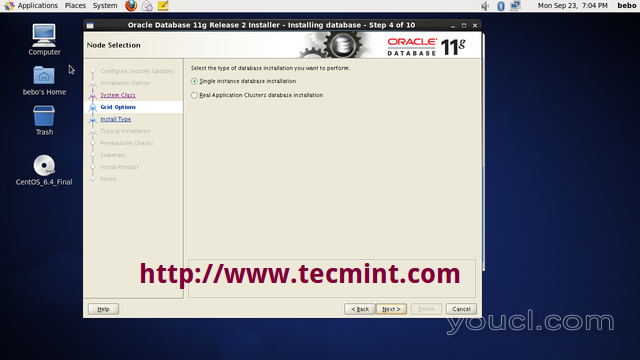
选择数据库安装类型
6.选择“ 典型安装 ”选项来安装完整的Oracle安装与基本配置。
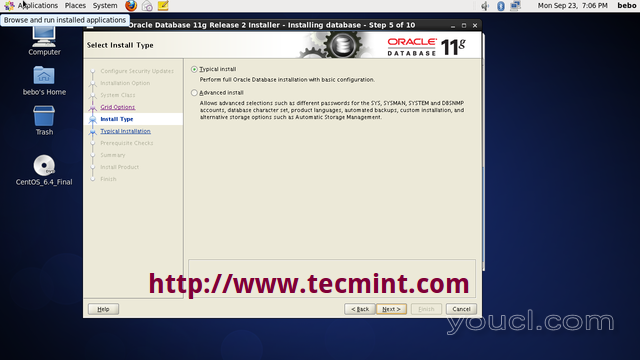
选择典型安装
7.设置管理密码 ,并与基本配置执行完整数据库安装。
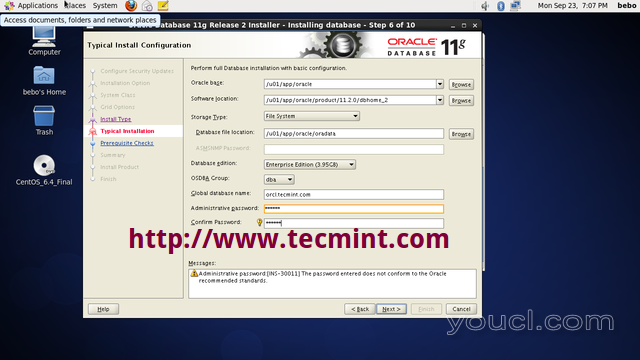
设置Oracle管理密码
8.请点击“ 是 ”继续安装。
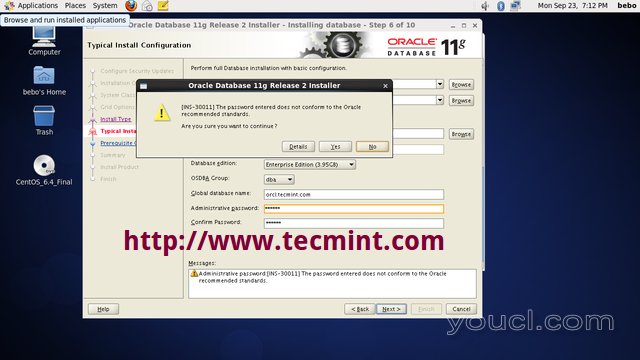
典型安装配置确认
9.创建库存
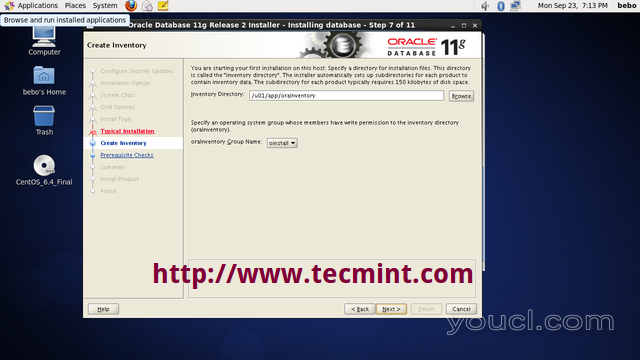
创建库存
10.如果你面对的先决条件安装过程中的警告。 点击“ 修复并再次检查 。” Oracle自己修复先决条件。 这是Oracle数据库11g的新功能。
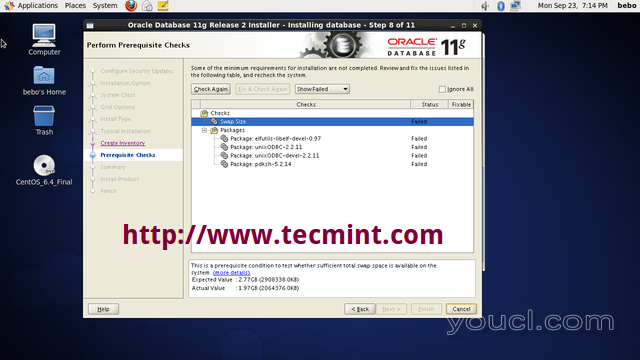
执行先决条件检查
由于您需要下载并手动安装pdksh程序包是不是在甲骨文库中找到。
[root@oracle]# wget ftp://rpmfind.net/linux/redhat-archive/6.2/en/os/i386/RedHat/RPMS/pdksh-5.2.14-2.i386.rpm
在pdksh程序包安装可能会遇到的ksh包冲突的错误。 强力去除KSH封装,下面命令给出安装pdksh软件包: -
[root@oracle]# rpm -e ksh-20100621-19.el6_4.4.i686 --nodeps
[root@oracle]# rpm -ivh pdksh-5.2.14-2.i386.rpm
11.执行的先决条件检查:它的测试是足够的总交换空间,可用的系统上。
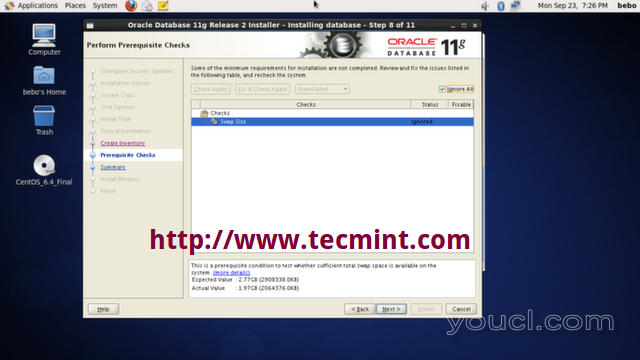
执行先决条件SWAP检查
12.安装摘要:点击保存响应文件 。 这个文件是Oracle静默模式安装有用
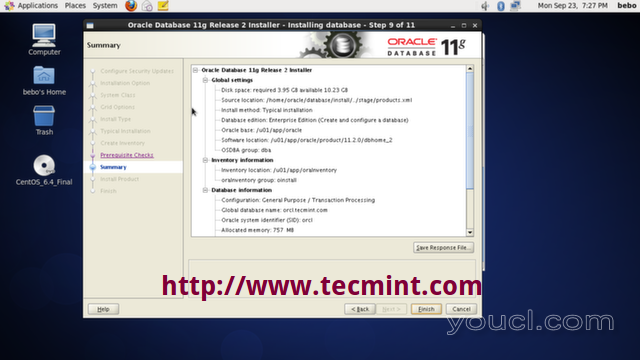
Oracle安装摘要
13. 保存响应文件中的某个地方你的系统。
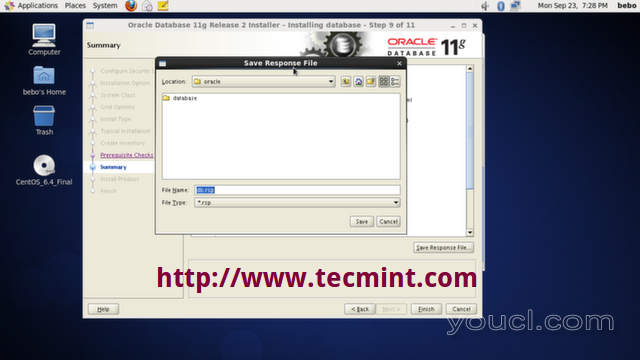
保存响应文件
14. 产品安装进度
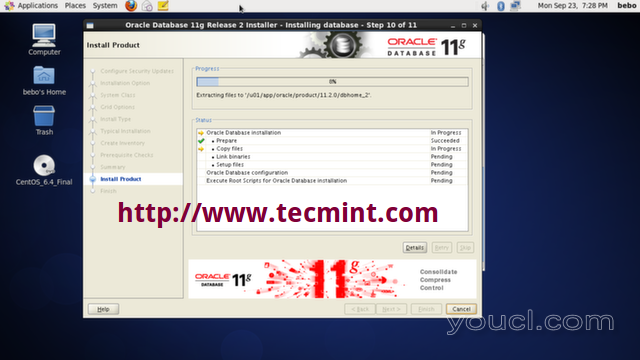
产品安装
15.复制数据库文件
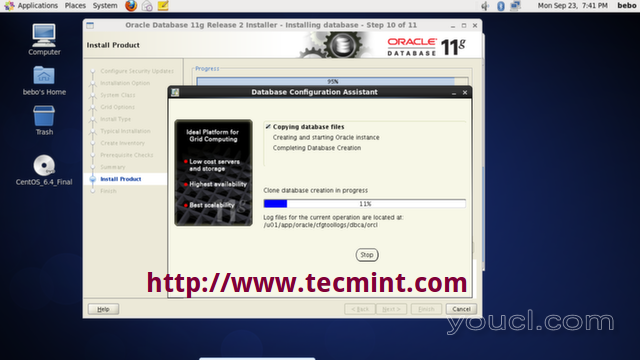
复制数据库文件
16.单击“ 密码管理 ”。
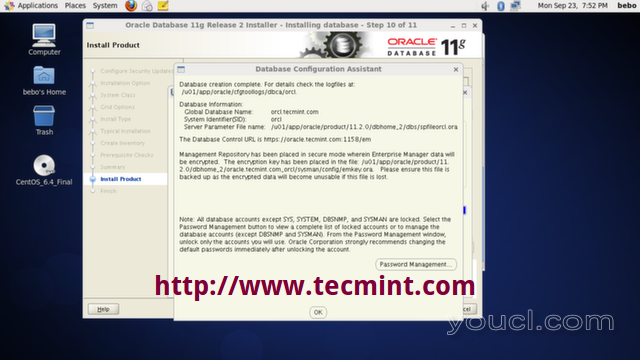
Oracle密码管理
17.用户“SYS”设置密码,并点击确定继续。
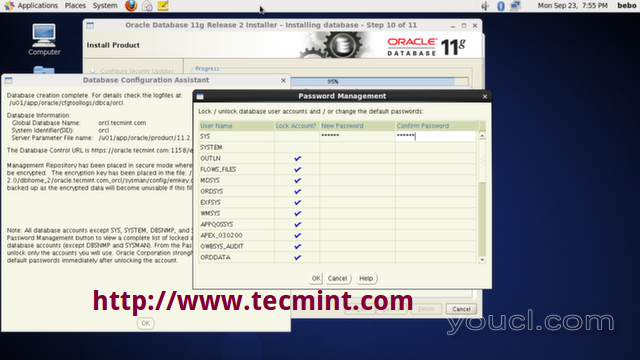
设置SYS用户密码
18.配置脚本需要为“root”用户执行。 转到屏幕中给出的路径,并逐个执行脚本。 一旦脚本执行,点击“OK”。
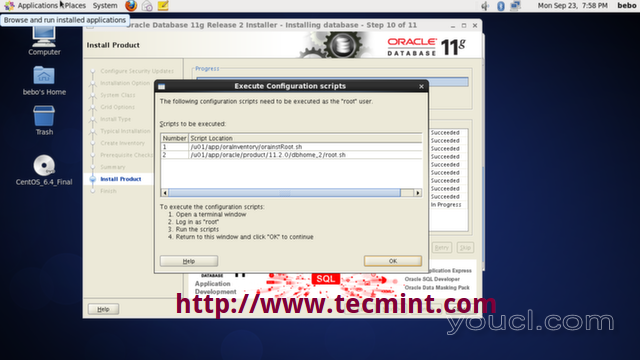
执行配置脚本
[root@oracle]# cd /u01/app/oraInventory
[root@oracle oraInventory]# ./orainstRoot.sh
Changing permissions of /u01/app/oraInventory.
Adding read,write permissions for group.
Removing read,write,execute permissions for world.
Changing groupname of /u01/app/oraInventory to oinstall.
The execution of the script is complete.
[root@oracle]# cd /u01/app/oracle/product/11.2.0/dbhome_2/
[root@oracle dbhome_2]# ./root.sh
Running Oracle 11g root.sh script...
The following environment variables are set as:
ORACLE_OWNER= oracle
ORACLE_HOME=  /u01/app/oracle/product/11.2.0/dbhome_2
Enter the full pathname of the local bin directory: [/usr/local/bin]:
Copying dbhome to /usr/local/bin ...
Copying oraenv to /usr/local/bin ...
Copying coraenv to /usr/local/bin ...
Creating /etc/oratab file...
Entries will be added to the /etc/oratab file as needed by
Database Configuration Assistant when a database is created
Finished running generic part of root.sh script.
Now product-specific root actions will be performed.
Finished product-specific root actions.
19. Oracle数据库的安装成功。
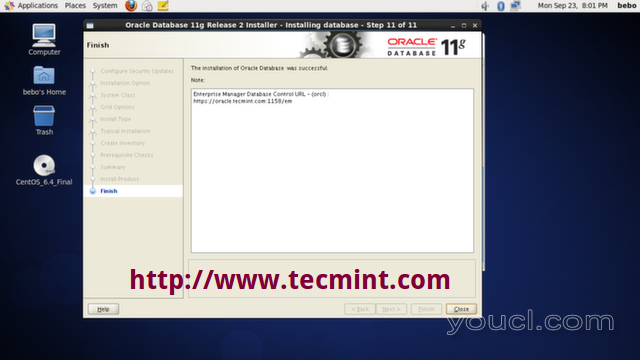
Oracle安装完成
20.要测试你的Oracle安装导航到基于Web的管理界面,为您的系统在“ 本地主机 ”的用户名“SYS”连接为“SYSDBA”,用您在安装Oracle的设置密码 。 请记住,打开防火墙上的端口1158,并重新启动iptables服务。
[root@oracle]# iptables -A INPUT -p tcp --dport 1158 -j ACCEPT
[root@oracle]# service iptables restart
https://localhost:1158/em/
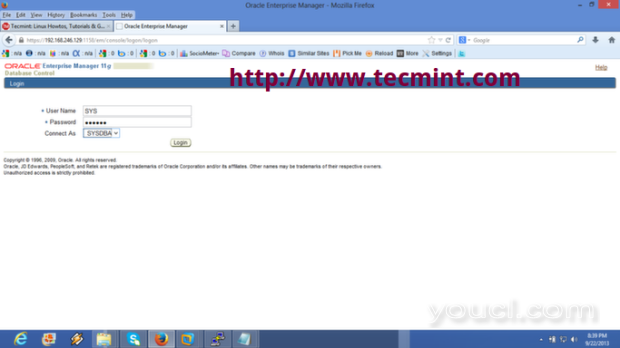
Oracle企业管理器登录
21. Oracle企业数据库控制管理
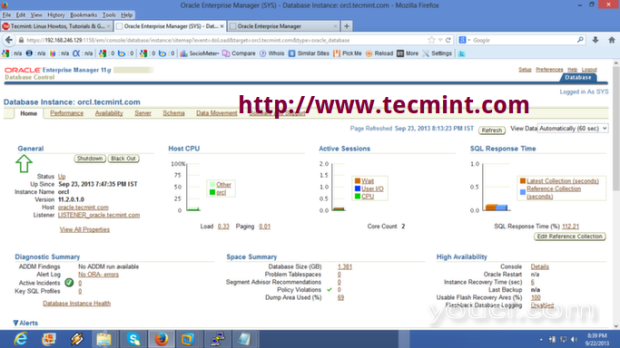
Oracle数据库控制管理器
现在你可以开始使用甲骨文 。 我强烈建议你遵循Oracle文档以获得更多帮助。 还有的客户端应用程序在那里,它可以帮助你,就像所谓的命令行工具数量Oracle即时客户端和Oracle SQL Developer中的用户界面程序。
这是Oracle数据库软件安装结束。 在我们即将推出的文章中,我们将涵盖如何使用DBCA以及如何启动和关闭 Oracle数据库来创建数据库。 请继续关注...!


