在CentOS 6.3上安装使用PHP5(和PHP-FPM)和MySQL支持的Nginx
Nginx (发音为“引擎x”)是一个免费的,开放源码的高性能HTTP服务器。 Nginx以其稳定性,丰富的功能集,简单的配置和低资源消耗而闻名。 本教程将介绍如何在支持PHP5(通过PHP-FPM )和MySQL支持的CentOS 6.3服务器上安装Nginx。
我不会保证这将为您工作!
1初步说明
在本教程中,我使用IP地址为192.168.0.100的hostname server1.example.com 。 这些设置可能会有所不同,因此您必须在适当的情况下更换它们。
2启用其他存储库
php-fpm不能从官方CentOS存储库中获取,而是来自本身依赖于EPEL存储库的Remi RPM存储库; 我们可以启用这两个存储库,如下所示:
rpm --import https://fedoraproject.org/static/0608B895.txt
 rpm -ivh http://dl.fedoraproject.org/pub/epel/6/x86_64/epel-release-6-7.noarch.rpm
rpm --import http://rpms.famillecollet.com/RPM-GPG-KEY-remi
 rpm -ivh http://rpms.famillecollet.com/enterprise/remi-release-6.rpm
yum install yum-priorities
编辑/etc/yum.repos.d/epel.repo ...
vi /etc/yum.repos.d/epel.repo
...并将行优先级= 10添加到[epel]部分:
[epel] name=Extra Packages for Enterprise Linux 6 - $basearch #baseurl=http://download.fedoraproject.org/pub/epel/6/$basearch mirrorlist=https://mirrors.fedoraproject.org/metalink?repo=epel-6&arch=$basearch failovermethod=priority enabled=1 priority=10 gpgcheck=1 gpgkey=file:///etc/pki/rpm-gpg/RPM-GPG-KEY-EPEL-6 [...] |
然后对/etc/yum.repos.d/remi.repo中的[remi]部分执行相同操作,并将更改启用为1 :
vi /etc/yum.repos.d/remi.repo
[remi] name=Les RPM de remi pour Enterprise Linux $releasever - $basearch #baseurl=http://rpms.famillecollet.com/enterprise/$releasever/remi/$basearch/ mirrorlist=http://rpms.famillecollet.com/enterprise/$releasever/remi/mirror enabled=1 priority=10 gpgcheck=1 gpgkey=file:///etc/pki/rpm-gpg/RPM-GPG-KEY-remi failovermethod=priority [remi-test] name=Les RPM de remi en test pour Enterprise Linux $releasever - $basearch #baseurl=http://rpms.famillecollet.com/enterprise/$releasever/test/$basearch/ mirrorlist=http://rpms.famillecollet.com/enterprise/$releasever/test/mirror enabled=0 gpgcheck=1 gpgkey=file:///etc/pki/rpm-gpg/RPM-GPG-KEY-remi |
3安装MySQL 5
首先我们像这样安装MySQL 5:
yum install mysql mysql-server
然后,我们为MySQL创建系统启动链接(以便每当系统启动时,MySQL自动启动)并启动MySQL服务器:
chkconfig --levels 235 mysqld on
 /etc/init.d/mysqld start
现在检查网络是否启用。 跑
netstat -tap | grep mysql
应该显示如下:
[root@server1 ~]# netstat -tap | grep mysql
 tcp        0      0 *:mysql                     *:*                         LISTEN      1799/mysqld
 [root@server1 ~]#
如果没有,编辑/etc/my.cnf并注释掉选项skip-networking :
vi /etc/my.cnf
[...] #skip-networking [...] |
并重新启动MySQL服务器:
/etc/init.d/mysqld restart
跑
mysql_secure_installation
为用户root设置密码(否则任何人都可以访问您的MySQL数据库!):
[root @ server1〜]#mysql_secure_installation 注意:运行本脚本的所有部分是为所有MySQL推荐的 服务器生产使用! 请仔细阅读每一步! 为了登录MySQL来保护它,我们需要当前的 root用户的密码。 如果你刚刚安装了MySQL, 您还没有设置root密码,密码将为空, 所以你应该刚刚进入这里。 输入root的当前密码(输入无): < - ENTER
OK,成功使用密码,移动... 设置root密码确保没有人可以登录MySQL root用户没有正确的授权。 设置root密码? [Y / n] < - ENTER
新密码: < - yourrootsql 密码
重新输入新密码: < - yourrootsqlpassword
密码更新成功! 重新载入特权表.. ...成功! 默认情况下,MySQL安装有一个匿名用户,允许任何人 登录MySQL,而不必创建用户帐户 他们。 这仅适用于测试和进行安装 顺利一点 你应该删除它们,然后再进入 生产环境。 删除匿名用户? [Y / n] < - ENTER
...成功! 通常,root只能被允许从'localhost'连接。 这个 确保有人无法从网络的root密码猜测。 禁止root登录远程? [Y / n] < - ENTER
...成功! 默认情况下,MySQL附带一个名为'test'的数据库,任何人都可以 访问。 这也仅用于测试,应该删除 在进入生产环境之前。 删除测试数据库并访问它? [Y / n] < - ENTER
- 删除测试数据库... ...成功! - 删除测试数据库的权限... ...成功! 重新加载权限表将确保所有更改到目前为止 将立即生效。 现在重新加载权限表? [Y / n] < - ENTER
...成功! 打扫干净... 全做完了! 如果您已经完成了上述所有步骤,您的MySQL 安装应该是安全的。 感谢使用MySQL! [root @ server1〜]#
4安装Nginx
Nginx可作为CentOS 6.3(从EPEL)提供,可以安装如下:
yum install nginx
然后我们为nginx创建系统启动链接并启动它:
chkconfig --levels 235 nginx on
 /etc/init.d/nginx start
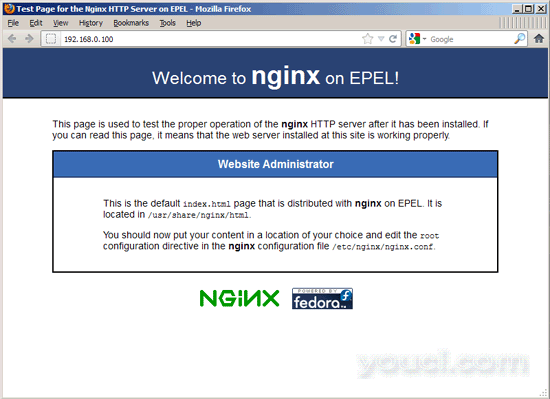
在浏览器中输入您的Web服务器的IP地址或主机名(例如http://192.168.0.100 ),您应该看到nginx的欢迎页面:
5安装PHP5
我们可以通过PHP-FPM使PHP5在nginx中工作(PHP-FPM(FastCGI Process Manager)是一种替代的PHP FastCGI实现,具有对任何大小的网站尤其是繁忙的站点有用的其他功能)。 我们可以像php-cli一样安装php-fpm ,还有一些PHP5模块,如php-mysql ,如果要从PHP脚本中使用MySQL,则需要如下所示:
yum install php-fpm php-cli php-mysql php-gd php-imap php-ldap php-odbc php-pear php-xml php-xmlrpc php-magickwand php-magpierss php-mbstring php-mcrypt php-mssql php-shout php-snmp php-soap php-tidy
APC是一个免费开放的PHP操作码cacher,用于缓存和优化PHP中间代码。 它类似于其他PHP操作码cacher,如eAccelerator和Xcache。 强烈建议您安装其中一个以加快您的PHP页面。
APC可以安装如下:
yum install php-pecl-apc
然后打开/etc/php.ini并设置cgi.fix_pathinfo = 0 :
vi /etc/php.ini
[...] ; cgi.fix_pathinfo provides *real* PATH_INFO/PATH_TRANSLATED support for CGI. PHP's ; previous behaviour was to set PATH_TRANSLATED to SCRIPT_FILENAME, and to not grok ; what PATH_INFO is. For more information on PATH_INFO, see the cgi specs. Setting ; this to 1 will cause PHP CGI to fix its paths to conform to the spec. A setting ; of zero causes PHP to behave as before. Default is 1. You should fix your scripts ; to use SCRIPT_FILENAME rather than PATH_TRANSLATED. ; http://www.php.net/manual/en/ini.core.php#ini.cgi.fix-pathinfo cgi.fix_pathinfo=0 [...] |
(请阅读http://wiki.nginx.org/Pitfalls了解为什么你应该这样做)
除此之外,为了避免错误等
[08-Aug-2011 18:07:08] PHP Warning: phpinfo(): It is not safe to rely on the system's timezone settings. You are *required* to use the date.timezone setting or the date_default_timezone_set() function. In case you used any of those methods and you are still getting this warning, you most likely misspelled the timezone identifier. We selected 'Europe/Berlin' for 'CEST/2.0/DST' instead in /usr/share/nginx/html/info.php on line 2
...在/var/log/php-fpm/www-error.log中,当您在浏览器中调用PHP脚本时,应在/etc/php.ini中设置date.timezone :
[...] [Date] ; Defines the default timezone used by the date functions ; http://www.php.net/manual/en/datetime.configuration.php#ini.date.timezone date.timezone = "Europe/Berlin" [...] |
您可以通过运行以下步骤找到正确的系统时区:
cat /etc/sysconfig/clock
[root@server1 nginx]# cat /etc/sysconfig/clock
 ZONE="Europe/Berlin"
 [root@server1 nginx]#
接下来创建php-fpm的系统启动链接并启动它:
chkconfig --levels 235 php-fpm on
 /etc/init.d/php-fpm start
PHP-FPM是在端口9000上运行FastCGI服务器的守护进程(具有init脚本/etc/init.d/php-fpm )。


