使用PHP5(和PHP-FPM)和MySQL支持(LEMP)在Debian Wheezy上安装Nginx
Nginx (发音为“引擎x”)是一个免费的,开放源码的高性能HTTP服务器。 Nginx以其稳定性,丰富的功能集,简单的配置和低资源消耗而闻名。 本教程将介绍如何使用PHP5支持(通过PHP-FPM )和MySQL支持(LEMP = L inux + nginx(发音为“ e ngine x”)+ M ySQL + P HP)在Debian Wheezy服务器上安装Nginx。
我不会保证这将为您工作!
1初步说明
在本教程中,我使用IP地址为192.168.0.100的hostname server1.example.com 。 这些设置可能会有所不同,因此您必须在适当的情况下更换它们。
2安装MySQL 5
为了安装MySQL,我们运行
apt-get install mysql-server mysql-client
您将被要求为MySQL root用户提供密码 - 此密码对用户root @ localhost以及root@server1.example.com有效 ,因此我们不必在以后手动指定MySQL根密码:
MySQL“root”用户的新密码: < - yourrootsqlpassword
重复MySQL“root”用户的密码: < - yourrootsqlpassword
3安装Nginx
Nginx可作为Debian Wheezy的软件包提供,我们可以安装如下:
apt-get install nginx
之后启动nginx:
/etc/init.d/nginx start
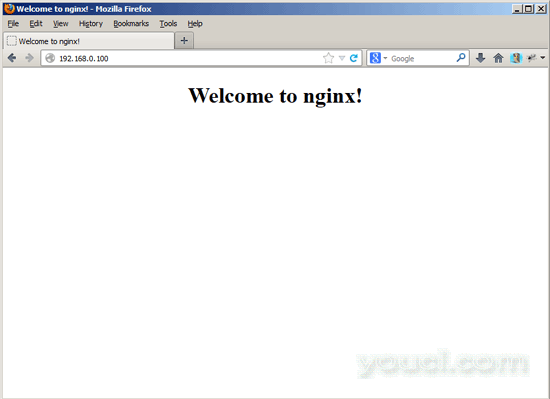
在浏览器中输入您的Web服务器的IP地址或主机名(例如http://192.168.0.100 ),您应该看到以下页面:

Debian Wheezy上的默认的nginx文件是/ usr / share / nginx / www 。
4安装PHP5
我们可以通过PHP-FPM使PHP5在nginx中工作(PHP-FPM(FastCGI Process Manager)是一种替代的PHP FastCGI实现,其中一些额外的功能对任何大小的网站尤其是繁忙的站点有用),我们安装如下:
apt-get install php5-fpm
PHP-FPM是在/var/run/php5-fpm.socksocket上运行FastCGI服务器的守护进程(初始脚本/etc/init.d/php5-fpm )。
5配置nginx
nginx配置在我们现在打开的/etc/nginx/nginx.conf中:
vi /etc/nginx/nginx.conf
配置很容易理解(您可以在这里了解更多信息: http : //wiki.nginx.org/NginxFullExample ,这里: http : //wiki.nginx.org/NginxFullExample2 )
首先(这是可选的)调整工作进程的数量并将keepalive_timeout设置为合理的值:
[...]
worker_processes  4;
[...]
    keepalive_timeout   2;
[...] |
虚拟主机在server {}容器中定义。 默认的vhost在文件/ etc / nginx / sites-available / default中定义 - 让我们修改如下:
vi /etc/nginx/sites-available/default
[...]
server {
        listen   80; ## listen for ipv4; this line is default and implied
        listen   [::]:80 default_server ipv6only=on; ## listen for ipv6

        root /usr/share/nginx/www;
        index index.php index.html index.htm;

        # Make site accessible from http://localhost/
        server_name localhost;

        location / {
                # First attempt to serve request as file, then
                # as directory, then fall back to displaying a 404.
                try_files $uri $uri/ /index.html;
                # Uncomment to enable naxsi on this location
                # include /etc/nginx/naxsi.rules
        }

        location /doc/ {
                alias /usr/share/doc/;
                autoindex on;
                allow 127.0.0.1;
                allow ::1;
                deny all;
        }

        # Only for nginx-naxsi used with nginx-naxsi-ui : process denied requests
        #location /RequestDenied {
        #       proxy_pass http://127.0.0.1:8080;
        #}

        #error_page 404 /404.html;

        # redirect server error pages to the static page /50x.html
        #
        error_page 500 502 503 504 /50x.html;
        location = /50x.html {
                root /usr/share/nginx/www;
        }

        # pass the PHP scripts to FastCGI server listening on 127.0.0.1:9000
        #
        location ~ \.php$ {
                try_files $uri =404;
                fastcgi_split_path_info ^(.+\.php)(/.+)$;
                # NOTE: You should have "cgi.fix_pathinfo = 0;" in php.ini

                # With php5-cgi alone:
                #fastcgi_pass 127.0.0.1:9000;
                # With php5-fpm:
                fastcgi_pass unix:/var/run/php5-fpm.sock;
                fastcgi_index index.php;
                include fastcgi_params;
        }

        # deny access to .htaccess files, if Apache's document root
        # concurs with nginx's one
        #
        location ~ /\.ht {
                deny all;
        }
}
[...] |
取消注释两个监听行使nginx监听端口80 IPv4 和 IPv6。
服务器名称 _; 使它成为默认的catchall vhost(当然,您也可以像www.example.com一样指定一个主机名)。
我已经将index.php添加到索引行。 root / usr / share / nginx / www; 意味着文档根目录是/ usr / share / nginx / www 。
PHP的重要部分是位置〜\ .php $ {}节。 取消注释以启用它。 请注意,我添加了try_files $ uri = 404; 以防止零日漏洞(请参阅http://wiki.nginx.org/Pitfalls#Passing_Uncontrolled_Requests_to_PHP和http://forum.nginx.org/read.php?2,88845,page=3 )。
现在保存文件并重新加载nginx:
/etc/init.d/nginx reload
接下来打开/etc/php5/fpm/php.ini ...
vi /etc/php5/fpm/php.ini
...并设置cgi.fix_pathinfo = 0 :
[...] ; cgi.fix_pathinfo provides *real* PATH_INFO/PATH_TRANSLATED support for CGI. PHP's ; previous behaviour was to set PATH_TRANSLATED to SCRIPT_FILENAME, and to not grok ; what PATH_INFO is. For more information on PATH_INFO, see the cgi specs. Setting ; this to 1 will cause PHP CGI to fix its paths to conform to the spec. A setting ; of zero causes PHP to behave as before. Default is 1. You should fix your scripts ; to use SCRIPT_FILENAME rather than PATH_TRANSLATED. ; http://php.net/cgi.fix-pathinfo cgi.fix_pathinfo=0 [...] |
重新加载PHP-FPM:
/etc/init.d/php5-fpm reload
现在在文件root / usr / share / nginx / www中创建以下PHP文件:
vi /usr/share/nginx/www/info.php
<?php phpinfo(); ?> |
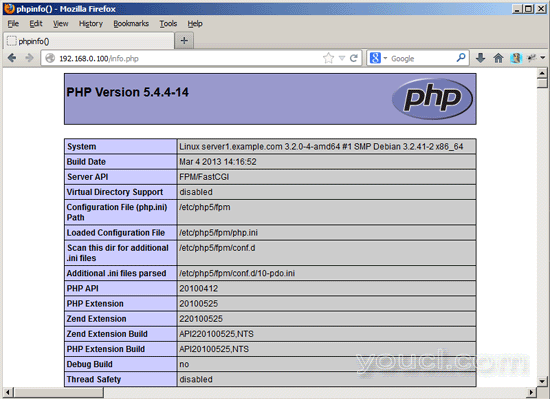
现在我们在浏览器中调用该文件(例如http://192.168.0.100/info.php ):

如您所见,PHP5正在工作,它正在通过FPM / FastCGI进行工作,如Server API行所示。 如果您进一步向下滚动,您将看到在PHP5中已启用的所有模块。 MySQL没有列出,这意味着我们还没有在PHP5中支持MySQL。


