Icinga(监控解决方案)CentOS上的安装和配置
Icinga是一个企业级开源监控系统,可以监控网络和任何可想到的网络资源,通知用户错误和恢复,并生成报告的性能数据。 可扩展和可扩展性,Icinga可以跨分散的位置监控复杂的大型环境。
我正在使用Icinga基本安装,这与Nagios类似,本文档也可以参考Nagios安装。 许多文档可以在Internet上使用,并且它们将使用nagios用户进行安装,但是对于我的设置,我使用了已经存在于系统中的默认用户( 守护进程 ),而且我也不会将它安装在默认路径上我会指/ opt,因为我觉得很方便。 Icinga的用户界面比Nagios好多了。
在本教程中,我将使用三个服务器:
192.168.1.20 - Icinga监控服务器(centos5)
192.168.1.30 - win 2008要监控
192.168.1.40 - 要监控的Ubuntu 10.10服务器
要求
注意:确保在安装期间安装开发工具和开发库:
- GCC编译器
- C / C ++开发库
- GD开发库
需要包装
1. Xampp for Linux:
[root@sunil~]# mkdir /software
 [root@sunil~]# cd /software
 [root@sunil software]# wget http://sourceforge.net/projects/xampp/files/XAMPP%20Linux/1.7.3/xampp-linux-1.7.3.tar.gz/download
Icinga核心:
[root@sunil software]# wget http://sourceforge.net/projects/icinga/files/icinga/1.2.1/icinga-1.2.1.tar.gz/download
安装Icinga
解释xampp包:
[root@sunil software]# tar -zxvf xampp-linux-1.7.3.tar.gz
 [root@sunil software]# mv lampp/ /opt/
Xampp包是非常整齐的包和提取相同的是更多的细节可以参考xampp页面:
http://www.apachefriends.org/en/xampp.html
解决Icinga包:
[root@sunil software]# tar -zxvf icinga-1.2.1.tar.gz
 [root@sunil software]# cd icinga-1.2.1
 [root@sunil icinga-1.2.1]# ./configure --prefix=/opt/icinga --with-icinga-user=daemon --with-icinga-group=daemon --with-httpd-conf=/opt/lampp/etc
注意:请确保您在编译时没有收到任何错误。 如果您收到错误,请确保已安装所需的软件包。
[root@sunil icinga-1.2.1]# make all
 [root@sunil icinga-1.2.1]# make install
 [root@sunil icinga-1.2.1]# make install-config
 [root@sunil icinga-1.2.1]# make install-commandmode
 [root@sunil icinga-1.2.1]# make install-webconf
3.现在需要使用Icinga配置Apache:
[root@sunil icinga-1.2.1]# cd /opt/lampp/etc/
 [root@suniletc]# vim httpd.conf
4.添加以下行:
Include etc/icinga.conf
5.设置登录密码:
[root@sunil /]# cd /opt/lampp/bin/
 [root@sunil bin]# ./htpasswd –c /opt/icinga/etc/htpasswd.users icingaadmin
New password:
 Re-type new password:
 Adding password for user icingaadmin
6.启动Apache:
[root@sunillampp]# cd /opt/lampp/
 [root@sunillampp]# ./lamp startapache
XAMPP: Starting Apache with SSL (and PHP5)...
 XAMPP: Error 1! Couldn't start Apache!
 XAMPP: Starting diagnose...
 XAMPP: Make the httpd.conf fit your system.
 XAMPP: Next try...
 XAMPP: Starting Apache with SSL (and PHP5)...
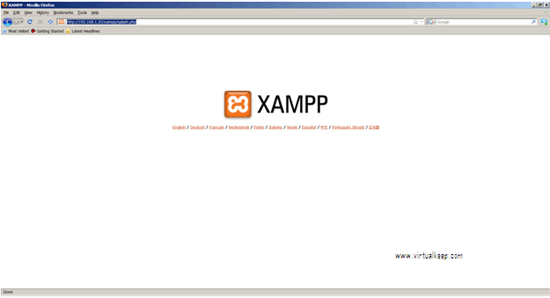
7.检查Apache是否正常工作:
http://192.168.1.20

8.现在我们需要启动Icinga,但在此之前,我们需要检查Icinga是否已经被正确编译,并且所有的配置都被设置:
[root@sunillampp]# cd /opt/icinga/
在配置Icinga之前,我们将开始看看我们是否获得了页面:
[root@sunilicinga]# /opt/icinga/bin/icinga –v /opt/icinga/etc/icinga.cfg
Total Warnings: 0
 Total Errors: 0
事情看起来不错 - 在飞行前检查期间没有发现严重的问题。
10.现在开始Icinga,因为我们没有得到任何错误:
[root@sunilicinga]# /opt/icinga/bin/icinga -d /opt/icinga/etc/icinga.cfg
 [root@sunilicinga]# ps -ef|grep icinga
daemon 6961 1 0 19:03 ? 00:00:00 /opt/icinga/bin/icinga -d /opt/icinga/etc/icinga.cfg
 root 6998 2929 0 19:05 pts/1 00:00:00 grep icinga
[root@sunilrw]# chmod 777 /opt/
 [root@sunilrw]# chmod 777 /opt/icinga/
 [root@sunilrw]# chmod 777 /opt/icinga/var/
 [root@sunilrw]# chmod 777 /opt/icinga/var/rw/
 [root@sunilrw]# chmod 777 /opt/icinga/var/rw/icinga.cmd
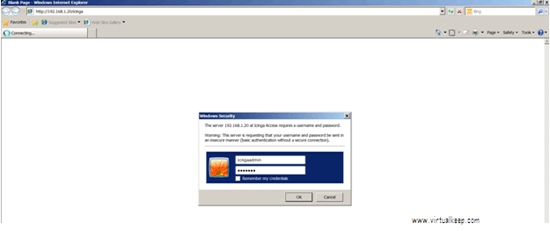
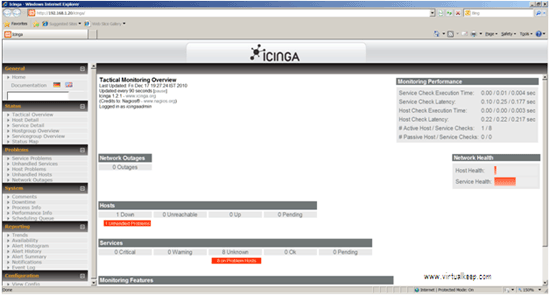
11.登录以查看Icinga网站是否打开:


