在Fedora 11上安装带有PHP5和MySQL支持的Lighttpd
Lighttpd是一款安全,快速,符合标准的Web服务器,专为速度至关重要的环境而设计。 本教程将介绍如何在具有PHP5支持(通过FastCGI)和MySQL支持的Fedora 11服务器上安装Lighttpd。
我不会保证这将为您工作!
1初步说明
在本教程中,我使用IP地址为192.168.0.100的hostname server1.example.com 。 这些设置可能会有所不同,因此您必须在适当的情况下更换它们。
2安装MySQL 5
首先我们像这样安装MySQL 5:
yum install mysql mysql-server
然后,我们为MySQL创建系统启动链接(以便每当系统启动时,MySQL自动启动)并启动MySQL服务器:
chkconfig --levels 235 mysqld on
 /etc/init.d/mysqld start
为MySQL用户root创建密码(将yourrootsql密码替换为您要使用的密码):
mysqladmin -u root password yourrootsqlpassword
 mysqladmin -h server1.example.com -u root password yourrootsqlpassword
3安装Lighttpd
Lighttpd可以作为Fedora软件包使用,因此我们可以这样安装它:
yum install lighttpd
然后我们创建Lighttpd的系统启动链接(以便Lighttpd在系统引导时自动启动)并启动它:
chkconfig --levels 235 lighttpd on
 /etc/init.d/lighttpd start
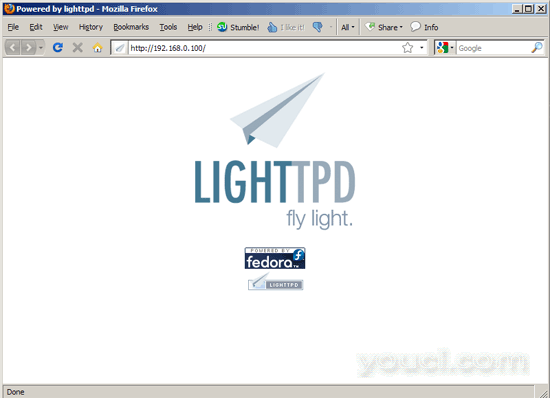
现在直接浏览器到http://192.168.0.100 ,你应该看到Lighttpd占位符页面:
Lighttpd的默认文件根是Fedora上的/ var / www / lighttpd ,配置文件为/etc/lighttpd/lighttpd.conf 。
4安装PHP5
我们可以通过FastCGI使PHP5在Lighttpd中工作。 所以我们安装软件包lighttpd-fastcgi和php-cli :
yum install lighttpd-fastcgi php-cli
5配置Lighttpd和PHP5
要在Lighttpd中启用PHP5,我们必须修改两个文件/etc/php.ini和/etc/lighttpd/lighttpd.conf 。 首先我们打开/etc/php.ini并在文件末尾添加行cgi.fix_pathinfo = 1 :
vi /etc/php.ini
[...] cgi.fix_pathinfo = 1 |
然后我们打开/etc/lighttpd/lighttpd.conf并取消注释“mod_fastcgi”,在server.modules节中:
vi /etc/lighttpd/lighttpd.conf
[...]
server.modules              = (
#                               "mod_rewrite",
#                               "mod_redirect",
#                               "mod_alias",
                                "mod_access",
#                               "mod_cml",
#                               "mod_trigger_b4_dl",
#                               "mod_auth",
#                               "mod_status",
#                               "mod_setenv",
                                "mod_fastcgi",
#                               "mod_proxy",
#                               "mod_simple_vhost",
#                               "mod_evhost",
#                               "mod_userdir",
#                               "mod_cgi",
#                               "mod_compress",
#                               "mod_ssi",
#                               "mod_usertrack",
#                               "mod_expire",
#                               "mod_secdownload",
#                               "mod_rrdtool",
                                "mod_accesslog" )

[...] |
然后,进一步下来的文件,有一个fastcgi.server节,我们取消注释:
[...]
#### fastcgi module
## read fastcgi.txt for more info
## for PHP don't forget to set cgi.fix_pathinfo = 1 in the php.ini
fastcgi.server             = ( ".php" =>
                               ( "localhost" =>
                                 (
                                   "socket" => "/var/run/lighttpd/php-fastcgi.socket",
                                   "bin-path" => "/usr/bin/php-cgi"
                                 )
                               )
                            )
[...] |
然后我们重新启动Lighttpd:
/etc/init.d/lighttpd restart
6测试PHP5 /获取有关您的PHP5安装的详细信息
默认网站的文档根目录是/ var / www / lighttpd 。 我们现在将在该目录中创建一个小型的PHP文件( info.php ),并在浏览器中调用它。 该文件将显示有关我们的PHP安装的许多有用的细节,例如安装的PHP版本。
vi /var/www/lighttpd/info.php
<?php phpinfo(); ?> |
现在我们在浏览器中调用该文件(例如http://192.168.0.100/info.php ):
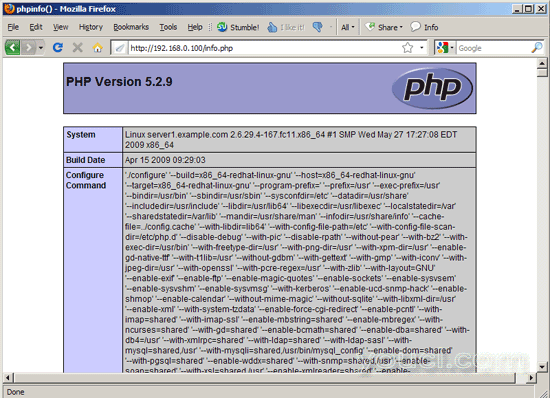
如您所见,PHP5正在工作,它正在通过FastCGI工作,如Server API行所示。 如果您进一步向下滚动,您将看到在PHP5中已启用的所有模块。 MySQL没有列出,这意味着我们还没有在PHP5中支持MySQL。
7在PHP5中获取MySQL支持
要在PHP中获得MySQL支持,我们可以安装php-mysql包。 安装一些其他PHP5模块是一个好主意,您可能需要它们用于应用程序。 您可以搜索可用的PHP5模块,如下所示:
yum search php
选择您需要的并安装它们:
yum install php-mysql php-gd php-imap php-ldap php-odbc php-pear php-xml php-xmlrpc
现在重启Lighttpd:
/etc/init.d/lighttpd restart
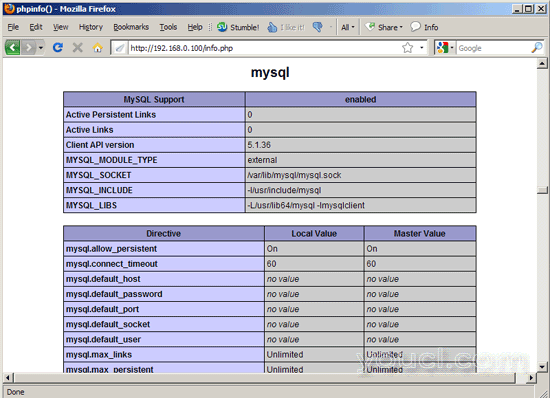
现在在您的浏览器中重新加载http://192.168.0.100/info.php并再次向下滚动到模块部分。 您现在应该会在那里找到很多新的模块,包括MySQL模块:
8链接
- Lighttpd: http : //www.lighttpd.net/
- PHP: http : //www.php.net/
- MySQL: http : //www.mysql.com/
- Fedora: http : //fedoraproject.org/


