Nginx (发音为“引擎x”)是一个免费的,开放源码的高性能HTTP服务器。 Nginx以其稳定性,丰富的功能集,简单的配置和低资源消耗而闻名。 本教程将介绍如何在支持PHP(通过PHP-FPM )和MySQL(MariaDB)支持的CentOS 7.2服务器上安装Nginx。
1初步说明
在本教程中,我将使用IP地址为192.168.1.100的hostname server1.example.com 。 这些设置可能会有所不同,因此您必须在适当的情况下更换它们。
我将在本教程中使用nano编辑器来编辑配置文件。 Nano可以这样安装。
yum -y install nano
我建议安装防火墙。 如果您尚未安装防火墙,并希望使用防火墙,请使用以下命令进行安装:
yum -y install firewalld
启动防火墙并使其在启动时启动。
systemctl start firewalld.service
systemctl enable firewalld.service
接下来,打开您的SSH端口,以确保您能够通过SSH连接到服务器。
firewall-cmd --permanent --zone=public --add-service=ssh
firewall-cmd --reload
2启用其他CentOS存储库
最新的Nginx从官方CentOS存储库中不可用,因此我们将Nginx项目的存储库安装在其中:
nano /etc/yum.repos.d/nginx.repo
[nginx]
name=nginx repo
baseurl=http://nginx.org/packages/centos/$releasever/$basearch/
gpgcheck=0
enabled=1
3安装MySQL(MariaDB)
首先,我们将MariaDB安装为MySQL替换。 MariaDB是MySQL的免费分支。 在shell上运行此命令以安装MariaDB数据库服务器:
yum -y install mariadb mariadb-server net-tools
然后,我们为MariaDB创建系统启动链接(使系统启动时自动启动)并启动MariaDB服务器:
systemctl enable mariadb.service
systemctl start mariadb.service
现在检查网络是否启用。 请注意,MraiDB服务名为mysql,因为它是兼容的数据库服务器。 跑
netstat -tap | grep mysql
应该显示如下:
[root@server1 ~]# netstat -tap | grep mysql
tcp 0 0 0.0.0.0:mysql 0.0.0.0:* LISTEN 19842/mysqld
跑:
mysql_secure_installation
为用户root设置密码(否则任何人都可以访问您的MySQL数据库!):
[root@example ~]# mysql_secure_installation
/usr/bin/mysql_secure_installation: line 379: find_mysql_client: command not found
NOTE: RUNNING ALL PARTS OF THIS SCRIPT IS RECOMMENDED FOR ALL MariaDB
SERVERS IN PRODUCTION USE! PLEASE READ EACH STEP CAREFULLY!
In order to log into MariaDB to secure it, we'll need the current
password for the root user. If you've just installed MariaDB, and
you haven't set the root password yet, the password will be blank,
so you should just press enter here.
Enter current password for root (enter for none):
OK, successfully used password, moving on...
Setting the root password ensures that nobody can log into the MariaDB
root user without the proper authorisation.
Set root password? [Y/n] <-- ENTER
New password: <-- yourrootsqlpassword
Re-enter new password: <-- yourrootsqlpassword
Password updated successfully!
Reloading privilege tables..
... Success!
By default, a MariaDB installation has an anonymous user, allowing anyone
to log into MariaDB without having to have a user account created for
them. This is intended only for testing, and to make the installation
go a bit smoother. You should remove them before moving into a
production environment.
Remove anonymous users? [Y/n] <-- ENTER
... Success!
Normally, root should only be allowed to connect from 'localhost'. This
ensures that someone cannot guess at the root password from the network.
Disallow root login remotely? [Y/n] <-- ENTER
... Success!
By default, MariaDB comes with a database named 'test' that anyone can
access. This is also intended only for testing, and should be removed
before moving into a production environment.
Remove test database and access to it? [Y/n] <-- ENTER
- Dropping test database...
... Success!
- Removing privileges on test database...
... Success!
Reloading the privilege tables will ensure that all changes made so far
will take effect immediately.
Reload privilege tables now? [Y/n] <-- ENTER
... Success!
Cleaning up...
All done! If you've completed all of the above steps, your MariaDB
installation should now be secure.
Thanks for using MariaDB!
[root@example ~]#
[root @ server1〜]#mysql_secure_installation
4安装Nginx
Nginx可以从nginx.org提供,我们可以这样安装:
yum -y install nginx
然后我们为nginx创建系统启动链接并启动它:
systemctl enable nginx.service
systemctl start nginx.service
有机会您收到80端口已经使用的错误,错误信息将如下所示:
[root@server1 ~]# service nginx start
Starting nginx: nginx: [emerg] bind() to 0.0.0.0:80 failed (98: Address already in use)
nginx: [emerg] bind() to 0.0.0.0:80 failed (98: Address already in use)
nginx: [emerg] bind() to 0.0.0.0:80 failed (98: Address already in use)
nginx: [emerg] bind() to 0.0.0.0:80 failed (98: Address already in use)
nginx: [emerg] bind() to 0.0.0.0:80 failed (98: Address already in use)
nginx: [emerg] still could not bind()
                                                           [FAILED]
[root@server1 ~]#
这意味着另一个Web服务器(可能是Apache)已经在此服务器上运行。 停止Apache服务,然后启动NGINX的服务:
systemctl stop httpd.service
yum remove httpd
systemctl disable httpd.service
然后尝试再次启动Nginx。
systemctl start nginx.service
打开防火墙中的HTTP和HTTPS端口
firewall-cmd --permanent --zone=public --add-service=http
firewall-cmd --permanent --zone=public --add-service=https
firewall-cmd --reload
shell上的结果输出如下所示:
[root@example ~]# firewall-cmd --permanent --zone=public --add-service=http
success
[root@example ~]# firewall-cmd --permanent --zone=public --add-service=https
success
[root@example ~]# firewall-cmd --reload
success
[root@example ~]#
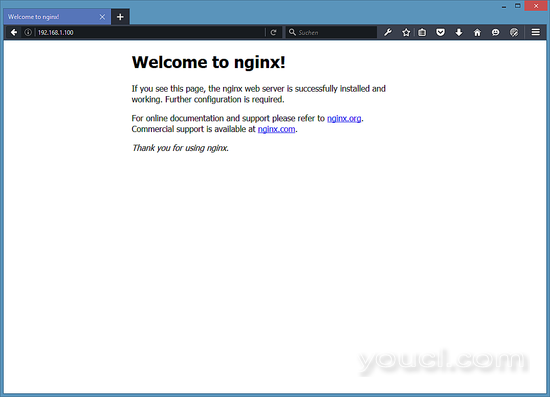
在浏览器中输入您的Web服务器的IP地址或主机名(例如http://192.168.1.100 ),您将看到Nginx的欢迎页面: