使用Linux-Dash监控Ubuntu 14.04和Debian Wheezy服务器
版本1.1.1
作者:Srijan Kishore <s [dot] kishore [at] ispconfig [dot] org>
在Twitter上关注youcl
最后编辑 16 / Sep / 2014
本文档介绍如何在Ubuntu 14.04和Debian Wheezy中安装和配置Linux-dash,轻松监控服务器性能。 Linux-dash是GNU / Linux机器的低开销监控Web仪表板。 简单地放入应用程序,然后去! Linux-dash是一种高效,低资源,易于安装的服务器统计监视脚本,用PHP编写。 网页统计页面允许您拖放各种小部件,并根据需要重新排列显示。 该脚本显示您的服务器的实时统计信息,包括RAM,CPU,磁盘空间,网络信息,已安装的软件,运行过程等等。 Linux-dash的主要优点是它可以实时工作。
1初步说明
本教程基于Ubuntu 14.04服务器,因此您应该在继续本教程之前设置基本的Ubuntu 14.04服务器和Debian 7服务器安装。 您的系统可能具有静态或动态IP。 在我的情况下,我使用静态IP地址。 我在本教程中使用192.168.0.100作为我的IP地址,将server1.example.com用作主机名。
2在Ubuntu和Debian服务器上安装
在linux-dash安装之前,我们需要一些每个配置。 我们可以使用Linux-dash与Apache或NGINX。 在我的情况下,我将使用Apache:
apt-get install apache2 apache2-utilslinux-dash是在PHP中创建的,所以我们需要安装PHP和php-json扩展名,我将安装如下:
apt-get install php5 curl php5-curl php5-json
我们还需要git包,它将被安装如下:
apt-get install git
现在启动Apache服务:
service apache2 start
2.1在Ubuntu 14.04中安装
现在,我们将在其Apache文档根目录中的Ubuntu 14.04服务器上下载Linux-dash,如下所示:cd /var/www/html
git clone https://github.com/afaqurk/linux-dash.git
现在我们准备好了仪表板,打开一个您选择的浏览器并打开URL http://192.168.0.100/linux-dash :
它将向我们展示有关Ubuntu服务器的一般信息。
基本信息:
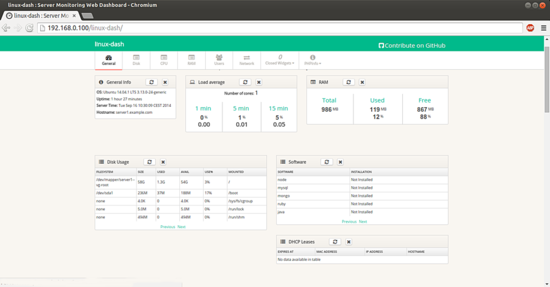
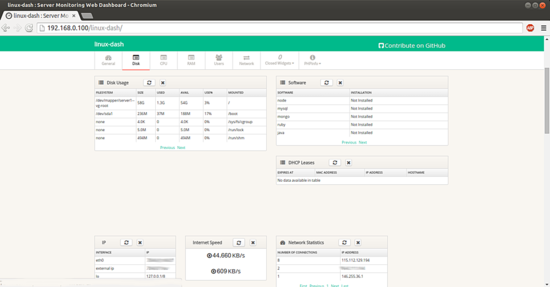
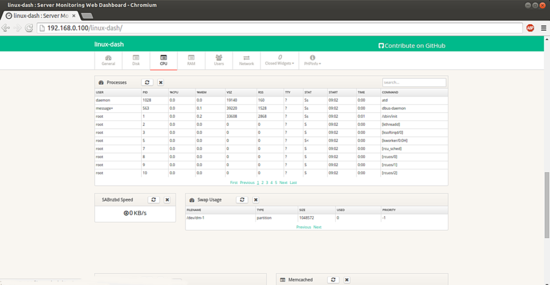
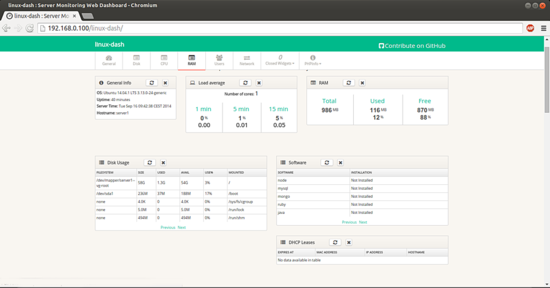
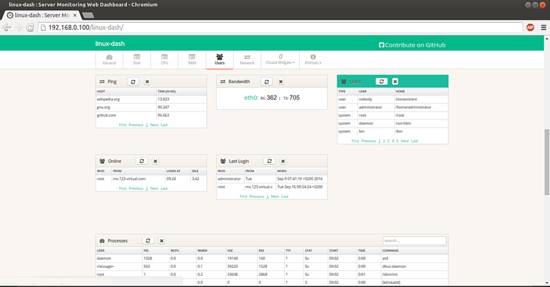
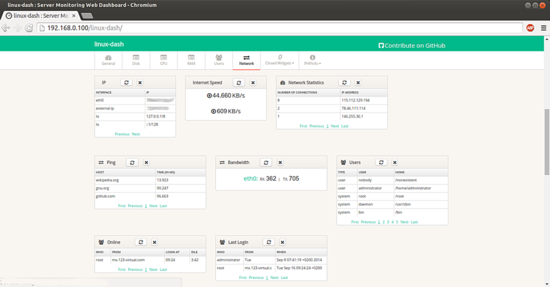
此外,我们可以检查其他信息,如磁盘使用情况,CPU使用情况,RAM使用情况,用户信息和网络使用情况如下:
磁盘:
中央处理器:
随机存取存储器:
用户:
网络:
2.2安装在Debian Wheezy中
现在我们将在其Apache文档根目录中的Debian Wheezy服务器中下载Linux-dash,如下所示:
cd /var/www
git clone https://github.com/afaqurk/linux-dash.git
我们可以通过URL http://192.168.0.100/linux-dash访问Linux-dash:
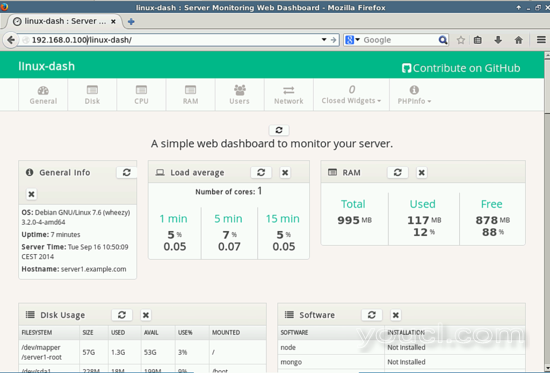
对于Debian,我们可以检查Ubuntu的所有参数。
3安全的Linux-dash访问
现在我们想在一个安全的环境中访问Linux-dash,即我希望Linux-dash必须受到密码保护。 为此,我们将继续如此:
htpasswd -c /etc/apache2/.htpasswd adminroot @ server1:〜#htpasswd -c /etc/apache2/.htpasswd admin
新密码: < - youcl
重新输入新密码: < - youcl
为用户管理员添加密码
root @ server1:〜#
我使用我的密码作为锻造,或者您可以使用您选择的任何密码。
3.1在Ubuntu 14.04
现在在Linux-dash文档根目录中创建一个.htaccess文件,并将以下内容添加到它:
touch /var/www/html/linux-dash/.htaccess
vi /var/www/html/linux-dash/.htaccess
并将条目作为:
AuthType Basic
AuthName "Restricted Files"
AuthBasicProvider file
AuthUserFile /etc/apache2/.htpasswd
Require valid-user
现在我们将把Ubuntu 14.04服务器的Apache2配置文件更改为:
vi /etc/apache2/apache2.conf
并将文件末尾的条目作为:
[...]
<Directory /var/www/html/linux-dash>
        Options Indexes FollowSymLinks
        AllowOverride Authconfig
        Require all granted
</Directory>
最后重新启动Apache的服务,你完成了。
service apache2 restart
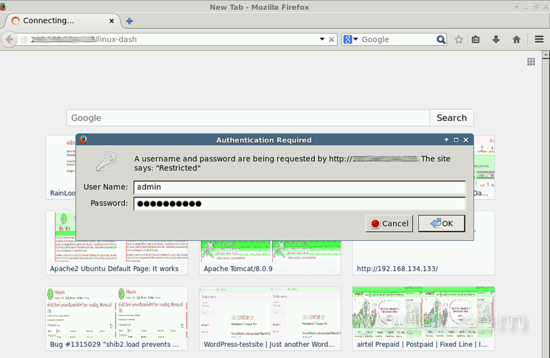
现在,当访问Linux-dash URL http://192.168.0.100时 ,系统将提示您输入密码。
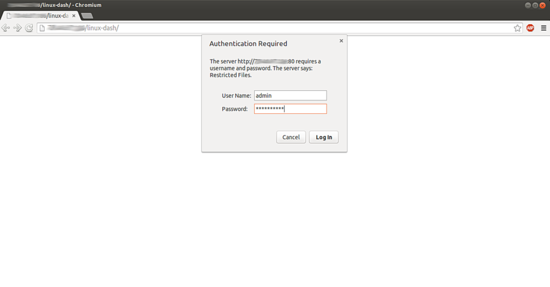
3.2在Debian Wheezy服务器中
现在在Linux-dash文档根目录中创建一个.htaccess文件,并将以下内容添加到它:
touch /var/www/linux-dash/.htaccess
vi /var/www/linux-dash/.htaccess
并将条目作为:
AuthName "Restricted"
AuthType Basic
AuthUserFile /etc/apache2/.htpasswd
AuthGroupFile /dev/null
require valid-user
现在我们将把Ubuntu 14.04服务器的Apache2配置文件更改为:
vi /etc/apache2/apache2.conf
并将文件末尾的条目作为:
[...]
<Directory /var/www/html/linux-dash>
        Options Indexes FollowSymLinks
        AllowOverride Authconfig
        Require all granted
</Directory>
最后重新启动Apache的服务,你完成了。
service apache2 restart
现在,当访问Linux-dash URL http://192.168.0.100时 ,系统将提示您输入密码。
恭喜! 我们已经在Ubuntu 14.04和Debian Wheezy中成功安装了Linux-dash工具,用于监控目的:)
5链接
- Linux-dash: http : //linuxdash.com/
- Ubuntu: http : //www.ubuntu.com/


