Zimbra与Samba集成 - 基于Ubuntu(类似于AD和Exchange)
版本1.0
作者:Mohamed Ghaleb <Mohamed_Ghaleb [at] msn [dot] com>(仅英文和德文)
本教程将介绍如何配置Zimbra Collaboration Server(ZCS)和Samba作为主域控制器(PDC),该控制器使用LDAP作为中央数据库,用于在Linux和Windows桌面上验证用户。
它应该使您能够基于开源服务器软件将Zimbra无缝集成到企业网络中。 然后,您可以使用Zimbra Admin GUI来管理Samba帐户,组和域。
在我们开始之前,我想先说说这不是设置这样一个系统的唯一方法。 实现这一目标有很多方法,但这是我所采取的方式。 我不会保证这将为您工作!
现在,您必须先进行DNS服务器,然后再进行任何步骤,如果您没有DNS服务器,可以在该教程中查看 。
你将需要什么
- Ubuntu 6.06 LTS iso映像CD http://releases.ubuntu.com/6.06/ubuntu-6.06.2-server-i386.iso
- 网络连接
为什么我使用Ubuntu 6.06 LTS? 不幸的是到目前为止,Zimbra提供了一个Ubuntu 6.06 LTS而不是8.04的软件包,您可以从其他社区组下载Zimbra源代码,这些社区组件被修改为安装在Ubuntu 8.04上,但我只是喜欢使用官方支持的版本,真的很重要,因为它是一个不同的服务器,但我也在本教程中使用6.06。
需要在两台服务器Zimbra和Samba上完成第1步到5!
1 - 基本操作系统安装
我不会详细介绍这部分内容,但是我们需要做的是安装Ubuntu 6.06 LTS,基本安装 没有任何内容,确保安装过程中具有正确的IP配置非常重要, sources.list文件(由apt-get使用)将被正确配置,否则我们将需要手动配置它。一个小提示:如果您在IP配置之前看到以下屏幕,那么您已经通过IP配置,建议按<返回>并选择手动配置网络。
之后,进行正常的安装,并确保您已经配置了互联网连接。
2启用根帐户
重新启动后,您可以使用先前创建的用户名(例如管理员 )登录。 因为我们必须以root用户身份运行本教程中的所有步骤,所以我们现在将启用root帐户。
跑
sudo passwd root
并给root一个密码。 之后,我们将通过运行切换到root
su
3安装SSH服务器(可选)
apt-get install ssh
从现在起,您可以使用SSH客户端(如PuTTY) ,并从工作站连接到Ubuntu服务器,并按照本教程中的其余步骤操作。
4确保网络配置正常
下面的IP地址将取决于您正在安装的服务器,下面的示例是我的Zimbra服务器。vi /etc/network/interfaces
# This file describes the network interfaces available on your system # and how to activate them. For more information, see interfaces(5). # The loopback network interface auto lo iface lo inet loopback # The primary network interface auto eth0 iface eth0 inet static address 192.168.0.107 netmask 255.255.255.0 network 192.168.0.0 broadcast 192.168.0.255 gateway 192.168.0.1 |
请确保您的网络配置设置正确,随时根据您的网络配置进行更改。
然后重新启动您的网络:
/etc/init.d/networking restart
然后编辑/ etc / hosts 。 根据您的主机名和IP,使其类似于:
vi /etc/hosts
127.0.0.1 localhost.localdomain localhost 192.168.0.107 zimbra.tm.local zimbra # The following lines are desirable for IPv6 capable hosts ::1 ip6-localhost ip6-loopback fe00::0 ip6-localnet ff00::0 ip6-mcastprefix ff02::1 ip6-allnodes ff02::2 ip6-allrouters ff02::3 ip6-allhosts |
现在跑
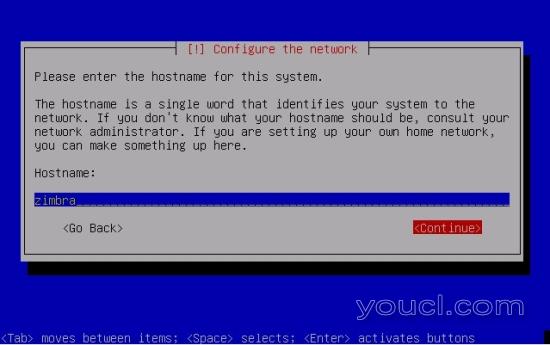
echo zimbra.tm.local > /etc/hostname
/etc/init.d/hostname.sh start
之后运行
hostname
hostname -f
现在都应该显示zimbra.tm.local 。
5 - 编辑/etc/apt/sources.list并更新安装
编辑/etc/apt/sources.list 。 从文件中注释或删除安装CD,并确保启用了Universe和multiverse存储库。 它应该是这样的:
vi /etc/apt/sources.list
# # deb cdrom:[Ubuntu-Server 6.06.2 _Dapper Drake_ - Release i386 (20080110.1)]/ dapper main restricted #deb cdrom:[Ubuntu-Server 6.06.2 _Dapper Drake_ - Release i386 (20080110.1)]/ dapper main restricted deb http://de.archive.ubuntu.com/ubuntu/ dapper main restricted deb-src http://de.archive.ubuntu.com/ubuntu/ dapper main restricted ## Major bug fix updates produced after the final release of the ## distribution. deb http://de.archive.ubuntu.com/ubuntu/ dapper-updates main restricted deb-src http://de.archive.ubuntu.com/ubuntu/ dapper-updates main restricted ## Uncomment the following two lines to add software from the 'universe' ## repository. ## N.B. software from this repository is ENTIRELY UNSUPPORTED by the Ubuntu ## team, and may not be under a free licence. Please satisfy yourself as to ## your rights to use the software. Also, please note that software in ## universe WILL NOT receive any review or updates from the Ubuntu security ## team. deb http://de.archive.ubuntu.com/ubuntu/ dapper universe deb-src http://de.archive.ubuntu.com/ubuntu/ dapper universe ## Uncomment the following two lines to add software from the 'backports' ## repository. ## N.B. software from this repository may not have been tested as ## extensively as that contained in the main release, although it includes ## newer versions of some applications which may provide useful features. ## Also, please note that software in backports WILL NOT receive any review ## or updates from the Ubuntu security team. # deb http://de.archive.ubuntu.com/ubuntu/ dapper-backports main restricted universe multiverse # deb-src http://de.archive.ubuntu.com/ubuntu/ dapper-backports main restricted universe multiverse deb http://security.ubuntu.com/ubuntu dapper-security main restricted deb-src http://security.ubuntu.com/ubuntu dapper-security main restricted # deb http://security.ubuntu.com/ubuntu dapper-security universe # deb-src http://security.ubuntu.com/ubuntu dapper-security universe |
注意:您不需要在Zimbra服务器上启用Universe存储库,但是在Samba服务器上是必需的。
然后跑
apt-get update
更新apt包数据库和
apt-get upgrade
安装最新的更新(如果有的话)然后重启。
第6步和7要在Zimbra服务器上完成!
6 - 安装Zimbra
我们首先下载Zimbra:wget http://files.zimbra.com/downloads/5.0.6_GA/zcs-5.0.6_GA_2313.UBUNTU6.20080522130240.tgz
我们需要安装要求:
apt-get install libidn11 fetchmail libpcre3 libgmp3c2 libexpat1 libxml2 libstdc++6 libstdc++5 openssl libltdl3 perl curl libtie-ixhash-perl
解压安装文件:
tar -xvf zcs-5.0.6_GA_2313.UBUNTU6.20080522130240.tgz
进入源目录并开始安装:
cd zcs-5.0.6_GA_2313.UBUNTU6.20080522130240
./install.sh
您可以继续执行以下默认值: EXCEPT
注意:现在我们来说说要安装Zimbra的服务器称为ZIMBRA.TM.LOCAL,所以服务器主机名是ZIMBRA,域名是TM.LOCAL,由于某种原因,zimbra安装认为你的域名称为ZIMBRA.TM。 LOCAL不是真的,所以它会联系DNS,要求不存在的ZIMBRA.TM.LOCAL MX记录,你应该只有TM记录的TM.LOCAL,因此在安装过程中会得到以下消息:
Zimbra安装
DNS错误解析zimbra.tm.local的MX
建议域名在DNS中配置MX记录
更改域名?
[是]
所以是的,我们将继续,按Enter键更改域名,然后您将获得以下信息:
创建域:[zimbra.tm.local]
那么你必须更改管理员密码,所以当你看到以下消息:
Address unconfigured (**) items (? - help)
键入3 ,然后按Enter键。
Select, or 'r' for previous menu [r]
键入4并按Enter键。
admin@tm.local的新密码,我将配置我的密码为
youcl 。
键入密码后,按Enter键 ,您将得到以下内容:
选择或'r'用于上一级菜单[r]
按回车键取得:
Select from menu, or press 'a' to apply config (? - help)
现在键入a应用更改并按Enter键 ,其他所有内容应该随默认值和逻辑答案一起出现。
现在,Zimbra正在运行,为了测试,您可以尝试访问: https : //192.168.0.107 : 7071/zimbraAdmin/ (更改IP以满足服务器的IP),并使用管理员和您配置的密码登录安装(在我们的例子中youcl是密码)。
现在,您需要记下在Samba安装期间需要的LDAP密码是什么,在Zimbra安装期间,创建一个名为zimbra的用户,大多数zimbra命令只能在zimbra用户下执行,才能切换到zimbra用户以root身份运行以下操作。
su zimbra要获取ldap密码,请运行以下zimbra用户:
zmlocalconfig -s zimbra_ldap_password您应该得到以下内容:
zimbra_ldap_password = 6Rf8hUwL
所以你的密码是6Rf8hUwL ,这是一个随机密码,所以你可能会有所不同。


