在CentOS 5.x(64位)上安装Zimbra Collaboration Suite 7
本文介绍如何在CentOS 5.x(64位)上安装Zimbra Collaboration Suite 7(ZCS)。 由BRLink Suporte Linux团队的Rafael Marangoni编写。
介绍
Zimbra是一个在世界上广泛使用的协作套件。 使用非常丰富的网页界面,用户可以共享文件夹,联系人,日程表等。 点击这里了解更多。
一个重要的注意事项是我们使用的是CentOS 5 64位,Zimbra团队并不支持(仅RHEL和SUSE)。 但是CentOS适用于Zimbra。
1一些先决条件
DNS和主机名设置
首先,我们需要配置指向服务器的DNS条目。 在这种情况下,我们使用的是主机名zimbratest.example.com
然后,我们需要在Linux框中配置主机名。
vi /etc/sysconfig/network
NETWORKING=yes
NETWORKING_IPV6=no
HOSTNAME=zimbratest.example.com
vi /etc/hosts
127.0.0.1       localhost.localdomain localhost
10.0.0.234      zimbratest.example.com zimbratest
安装软件包
接下来,我们需要安装一些软件包:
yum install -y sysstat perl sudo sqlite
我建议您重新启动Linux框,以应用所有配置。
2安装Zimbra 7 Opensource
首先,我们需要从Zimbra的网站下载tarball。 点击这里
mkdir /download
 cd /download
 wget http://files2.zimbra.com/downloads/7.0.1_GA/zcs-7.0.1_GA_3105.RHEL5_64.20110304210645.tgz
启动安装程序:
tar -zxvf zcs-7.0.1_GA_3105.RHEL5_64.20110304210645.tgz
 cd zcs-7.0.1_GA_3105.RHEL5_64.20110304210645
 ./install.sh --platform-override
PS:Zimbra安装脚本检查发行版是否为RHEL。 要忽略它并在CentOS上安装,您必须使用“--platform-override”。
安装脚本是一个向导。 对于几乎所有的选项,我们将选择默认选项。 这些是问题:
如果您将问题留空,它将选择默认选项。
首先,我们需要同意许可条款。
Do you agree with the terms of the software license agreement? [N] y
现在,Zimbra将检查所有的先决条件。 如果找不到任何东西,请停止向导并使用yum进行安装。
如果一切正常,脚本会询问要安装的软件包。 只需选择默认选项。
选择要安装的软件包 安装zimbra-ldap [Y] 安装zimbra-logger [Y] 安装zimbra-mta [Y] 安装zimbra-snmp [Y] 安装zimbra-store [Y] 安装zimbra-apache [Y] 安装zimbra-spell [Y] 安装zimbra-memcached [N] 安装zimbra-proxy [N]
之后,脚本会询问您是否要覆盖该平台。 当然,你说“是”。
您似乎正在安装不同平台的软件包 比他们建造的平台。 这个平台是CentOS5_64 找到的包:RHEL5_64 这可能或可能不工作。 使用软件包进行平台设计 可能导致不可用的安装。 你的支持 如果选择继续,选项可能会受到限制。 反正安装 [N] y 系统将被修改。 继续? [N] y
现在,我们需要等待安装程序。
当安装所有软件包时,将显示一些菜单,并显示一些配置选项。 我们只需要设置管理员密码。
要做到这一点,我们需要按3 。
Main menu

    1) Common Configuration:
    2) zimbra-ldap:                             Enabled
    3) zimbra-store:                            Enabled
         +Create Admin User:                    yes
         +Admin user to create:                 admin@zimbratest.example.com
 ******* +Admin Password                        UNSET
         +Anti-virus quarantine user:           virus-quarantine.kzpbrsgbx7@zimbratest.example.com
         +Enable automated spam training:       yes
         +Spam training user:                   spam.sd5fsqtdzi@zimbratest.example.com
         +Non-spam(Ham) training user:          ham.2qun60wc4@zimbratest.example.com
         +SMTP host:                            zimbratest.example.com
         +Web server HTTP port:                 80
         +Web server HTTPS port:                443
         +Web server mode:                      http
         +IMAP server port:                     143
         +IMAP server SSL port:                 993
         +POP server port:                      110
         +POP server SSL port:                  995
         +Use spell check server:               yes
         +Spell server URL:                     http://zimbratest.example.com:7780/aspell.php
         +Configure for use with mail proxy:    FALSE
         +Configure for use with web proxy:     FALSE
         +Enable version update checks:         TRUE
         +Enable version update notifications:  TRUE
         +Version update notification email:    admin@zimbratest.example.com
         +Version update source email:          admin@zimbratest.example.com

    4) zimbra-mta:                              Enabled
    5) zimbra-snmp:                             Enabled
    6) zimbra-logger:                           Enabled
    7) zimbra-spell:                            Enabled
    8) Default Class of Service Configuration:
    r) Start servers after configuration        yes
    s) Save config to file
    x) Expand menu
    q) Quit

 Address unconfigured (**) items  (? - help) 3
其次是4 。 并输入管理员密码。
Store configuration

    1) Status:                                  Enabled
    2) Create Admin User:                       yes
    3) Admin user to create:                    admin@zimbratest.example.com
 ** 4) Admin Password                           UNSET
    5) Anti-virus quarantine user:              virus-quarantine.kzpbrsgbx7@zimbratest.example.com
    6) Enable automated spam training:          yes
    7) Spam training user:                      spam.sd5fsqtdzi@zimbratest.example.com
    8) Non-spam(Ham) training user:             ham.2qun60wc4@zimbratest.example.com
    9) SMTP host:                               zimbratest.example.com
   10) Web server HTTP port:                    80
   11) Web server HTTPS port:                   443
   12) Web server mode:                         http
   13) IMAP server port:                        143
   14) IMAP server SSL port:                    993
   15) POP server port:                         110
   16) POP server SSL port:                     995
   17) Use spell check server:                  yes
   18) Spell server URL:                        http://zimbratest.example.com:7780/aspell.php
   19) Configure for use with mail proxy:       FALSE
   20) Configure for use with web proxy:        FALSE
   21) Enable version update checks:            TRUE
   22) Enable version update notifications:     TRUE
   23) Version update notification email:       admin@zimbratest.example.com
   24) Version update source email:             admin@zimbratest.example.com

 Select, or 'r' for previous menu [r] 4

 Password for admin@zimbratest.example.com (min 6 characters): [7M_lgfdx3B] secret
然后按r返回主菜单。
Store configuration

    1) Status:                                  Enabled
    2) Create Admin User:                       yes
    3) Admin user to create:                    admin@zimbratest.example.com
    4) Admin Password                           set
    5) Anti-virus quarantine user:              virus-quarantine.kzpbrsgbx7@zimbratest.example.com
    6) Enable automated spam training:          yes
    7) Spam training user:                      spam.sd5fsqtdzi@zimbratest.example.com
    8) Non-spam(Ham) training user:             ham.2qun60wc4@zimbratest.example.com
    9) SMTP host:                               zimbratest.example.com
   10) Web server HTTP port:                    80
   11) Web server HTTPS port:                   443
   12) Web server mode:                         http
   13) IMAP server port:                        143
   14) IMAP server SSL port:                    993
   15) POP server port:                         110
   16) POP server SSL port:                     995
   17) Use spell check server:                  yes
   18) Spell server URL:                        http://zimbratest.example.com:7780/aspell.php
   19) Configure for use with mail proxy:       FALSE
   20) Configure for use with web proxy:        FALSE
   21) Enable version update checks:            TRUE
   22) Enable version update notifications:     TRUE
   23) Version update notification email:       admin@zimbratest.example.com
   24) Version update source email:             admin@zimbratest.example.com

 Select, or 'r' for previous menu [r] r
然后按a应用配置。 然后保存配置数据。
Main menu

    1) Common Configuration:
    2) zimbra-ldap:                             Enabled
    3) zimbra-store:                            Enabled
    4) zimbra-mta:                              Enabled
    5) zimbra-snmp:                             Enabled
    6) zimbra-logger:                           Enabled
    7) zimbra-spell:                            Enabled
    8) Default Class of Service Configuration:
    r) Start servers after configuration        yes
    s) Save config to file
    x) Expand menu
    q) Quit

 *** CONFIGURATION COMPLETE - press 'a' to apply
 Select from menu, or press 'a' to apply config (? - help) a
 Save configuration data to a file? [Yes]
 Save config in file: [/opt/zimbra/config.11722]
 Saving config in /opt/zimbra/config.11722...done.
 The system will be modified - continue? [No] y
我们需要等待流程的结束。
Operations logged to /tmp/zmsetup.04042011-131235.log
 Setting local config values...done.
 Setting up CA...done.
 Deploying CA to /opt/zimbra/conf/ca ...done.
 Creating SSL certificate...done.
 Installing mailboxd SSL certificates...done.
 Initializing ldap...done.
 Setting replication password...done.
 Setting Postfix password...done.
 Setting amavis password...done.
 Setting nginx password...done.
 Creating server entry for zimbratest.example.com...done.
 Saving CA in ldap ...done.
 Saving SSL Certificate in ldap ...done.
 Setting spell check URL...done.
 Setting service ports on zimbratest.example.com...done.
 Adding zimbratest.example.com to zimbraMailHostPool in default COS...done.
 Installing webclient skins...
         steel...done.
         twilight...done.
         pebble...done.
         bare...done.
         lemongrass...done.
         beach...done.
         sand...done.
         sky...done.
         carbon...done.
         smoke...done.
         lavender...done.
         tree...done.
         waves...done.
         lake...done.
         oasis...done.
         bones...done.
         hotrod...done.
 Finished installing webclient skins.
 Setting zimbraFeatureTasksEnabled=TRUE...done.
 Setting zimbraFeatureBriefcasesEnabled=TRUE...done.
 Setting MTA auth host...done.
 Setting TimeZone Preference...done.
 Initializing mta config...done.
 Setting services on zimbratest.example.com...done.
 Creating domain zimbratest.example.com...done.
 Setting default domain name...done.
 Creating domain zimbratest.example.com...already exists.
 Creating admin account admin@zimbratest.example.com...done.
 Creating root alias...done.
 Creating postmaster alias...done.
 Creating user spam.sd5fsqtdzi@zimbratest.example.com...done.
 Creating user ham.2qun60wc4@zimbratest.example.com...done.
 Creating user virus-quarantine.kzpbrsgbx7@zimbratest.example.com...done.
 Setting spam training and Anti-virus quarantine accounts...done.
 Initializing store sql database...done.
 Setting zimbraSmtpHostname for zimbratest.example.com...done.
 Configuring SNMP...done.
 Checking for default IM conference room...not present.
 Initializing default IM conference room...done.
 Setting up syslog.conf...done.

 You have the option of notifying Zimbra of your installation.
 This helps us to track the uptake of the Zimbra Collaboration Suite.
 The only information that will be transmitted is:
         The VERSION of zcs installed (7.0.1_GA_3105_CentOS5_64)
         The ADMIN EMAIL ADDRESS created (admin@zimbratest.example.com)

 Notify Zimbra of your installation? [Yes] no
 Notification skipped
 Starting servers...done.
 Installing common zimlets...
         com_zimbra_bulkprovision...done.
         com_zimbra_phone...done.
         com_zimbra_attachmail...done.
         com_zimbra_linkedin...done.
         com_zimbra_srchhighlighter...done.
         com_zimbra_attachcontacts...done.
         com_zimbra_adminversioncheck...done.
         com_zimbra_url...done.
         com_zimbra_cert_manager...done.
         com_zimbra_date...done.
         com_zimbra_email...done.
         com_zimbra_webex...done.
         com_zimbra_dnd...done.
         com_zimbra_social...done.
 Finished installing common zimlets.
 Restarting mailboxd...done.
 Setting up zimbra crontab...done.

 Moving /tmp/zmsetup.04042011-131235.log to /opt/zimbra/log

 Configuration complete - press return to exit
3配置Zimbra 7
管理控制台
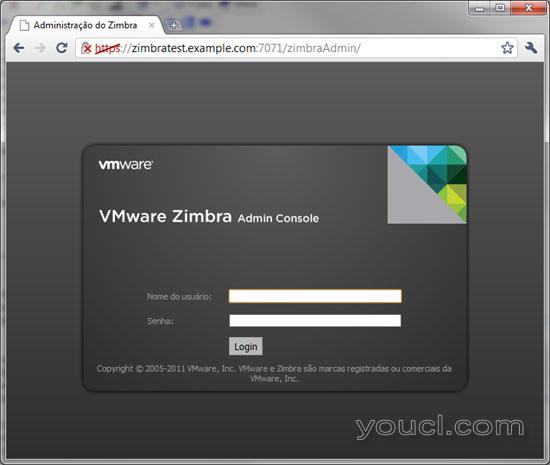
首先,我们需要访问管理控制台:
https://zimbratest.example.com:7071
或直接由IP:
https://10.0.0.234:7071
PS:您将需要接受SSL证书。

要登录,用户是admin和安装脚本中使用的密码。
使用管理控制台配置服务器。
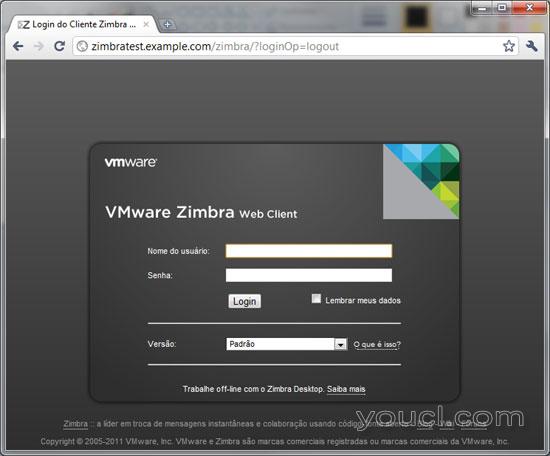
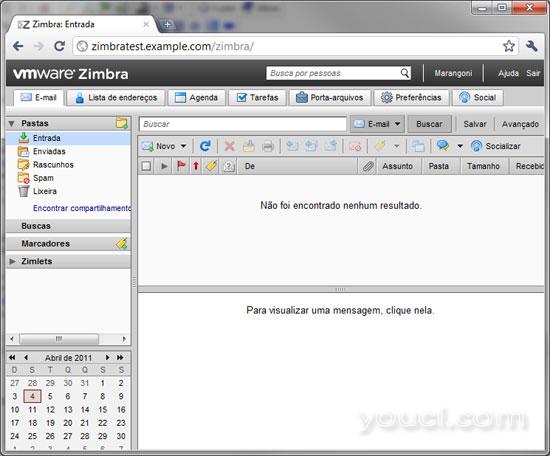
要使用webclient,只需将浏览器指向:
http://zimbratest.example.com
或直接由IP:
http://10.0.0.234


参考文献
Zimbra文档: http : //www.zimbra.com/support/documentation/


