使用mod_spdy与Apache2 On CentOS 6.3
SPDY(发音为“SPeeDY”)是一种新的网络协议,其目标是加快网络速度。 Google是HTTP协议的替代品,也是HTTP / 2.0的候选者。 SPDY增加了HTTP与多种速度相关的功能,如流多路复用和报头压缩。 要使用SPDY,您需要支持SPDY的Web服务器和浏览器(如Google Chrome和即将推出的Firefox)。 mod_spdy是一个开源的Apache模块,它将对SPDY协议的支持添加到Apache HTTPD服务器。 本教程将介绍如何在CentOS 6.3上使用mod_spdy与Apache2。
我不会保证这将为您工作!
1初步说明
SPDY通过HTTPS运行,因此我们需要一个支持HTTPS的网站来测试SPDY。 请注意,如果用户的浏览器不支持SPDY或出现问题,SPDY将返回HTTPS,因此安装mod_spdy不会损害您现有的设置。
我假设你有一个工作的LAMP设置,如在CentOS 6.3(LAMP)上使用PHP5安装Apache2和MySQL支持中所述 。
为了测试目的,我将简单地使用CentOS附带的Apache软件包附带的默认SSL网站(如果您的服务器上已经有一个SSL网站,则不需要这样做)。 如果您没有SSL网站,可以按如下方式启用默认SSL网站:
yum install mod_ssl openssl
openssl genrsa -out ca.key 4096
openssl req -new -key ca.key -out ca.csr
openssl x509 -req -days 365 -in ca.csr -signkey ca.key -out ca.crt
cp ca.crt /etc/pki/tls/certs
 cp ca.key /etc/pki/tls/private/ca.key
 cp ca.csr /etc/pki/tls/private/ca.csr
vi +/SSLCertificateFile /etc/httpd/conf.d/ssl.conf
[...] SSLCertificateFile /etc/pki/tls/certs/ca.crt [...] SSLCertificateKeyFile /etc/pki/tls/private/ca.key [...] |
/etc/init.d/httpd restart
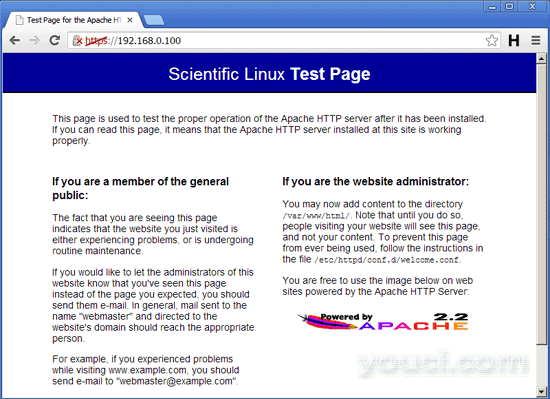
转到默认的SSL网站的URL(例如https://www.example.com )并测试它是否工作(我在这里使用默认的自签名证书,这就是为什么我有证书警告,但是这没有使用SPDY的效果):

2安装mod_spdy
首先确保安装:
yum install at
Google在https://developers.google.com/speed/spdy/mod_spdy/上为mod_spdy提供Fedora / CentOS软件包。 只需下载正确的架构(32位或64位)到您的服务器...
64位:
cd /tmp
 wget https://dl-ssl.google.com/dl/linux/direct/mod-spdy-beta_current_x86_64.rpm
32位:
cd /tmp
 wget https://dl-ssl.google.com/dl/linux/direct/mod-spdy-beta_current_i386.rpm
...并安装如下:
rpm -U mod-spdy-*.rpm
之后重新启动Apache:
/etc/init.d/httpd restart
好的是,mod_spdy不需要配置,它开箱即用!
(其实有一个配置文件,/ etc/httpd/conf.d/spdy.conf ,但默认设置应该是可以的。
cat /etc/httpd/conf.d/spdy.conf
LoadModule spdy_module /usr/lib64/httpd/modules/mod_spdy.so
<IfModule spdy_module>
    # Turn on mod_spdy. To completely disable mod_spdy, you can set
    # this to "off".
    SpdyEnabled on

    # In order to support concurrent multiplexing of requests over a
    # single connection, mod_spdy maintains its own thread pool in
    # each Apache child process for processing requests.  The default
    # size of this thread pool is very conservative; you can override
    # it with a larger value (as below) to increase concurrency, at
    # the possible cost of increased memory usage.
    #
    #SpdyMaxThreadsPerProcess 30

    # Memory usage can also be affected by the maximum number of
    # simultaneously open SPDY streams permitted for each client
    # connection.  Ideally, this limit should be set as high as
    # possible, but you can tweak it as necessary to limit memory
    # consumption.
    #
    #SpdyMaxStreamsPerConnection 100
</IfModule> |
您可以在https://developers.google.com/speed/spdy/mod_spdy/install上了解有关配置选项的更多信息。
)
3测试
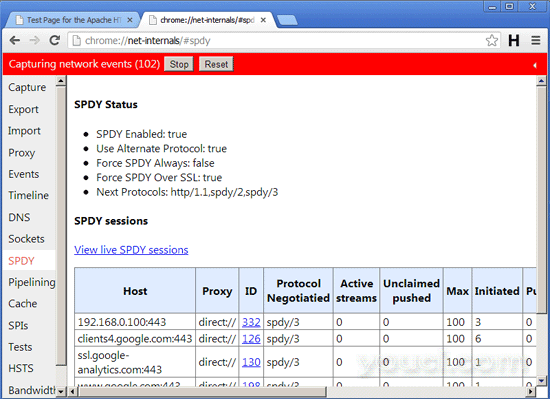
现在我们来测试SPDY是否正常工作。 我们需要一个支持SPDY的浏览器。 例如Google Chrome。 打开Chrome并重新加载您的SSL网站(例如https://www.example.com ) - 重要的是重新加载它,以便它可以使用SPDY(首次在第1章中加载它使用普通的HTTPS)。 之后,打开一个新的标签并输入URL
chrome://net-internals/#spdy
如果一切顺利,您的SSL vhost现在应该列在表中,这意味着SPDY支持正在运行。

(由于SPDY对HTTPS的回退机制,您的SSL vhost仍然可以在不支持SPDY的任何其他浏览器中使用。)
4链接
- SPDY: https : //developers.google.com/speed/spdy/
- Apache mod_spdy: http : //code.google.com/p/mod-spdy/
- mod_spdy二进制包: https : //developers.google.com/speed/spdy/mod_spdy/
- mod_spdy配置: https : //developers.google.com/speed/spdy/mod_spdy/install
- Apache: http : //httpd.apache.org/
- CentOS: http : //www.centos.org/


