运行phpMyAdmin在Nginx(LEMP)在Debian Squeeze / Ubuntu 11.04
来自Debian / Ubuntu存储库的phpMyAdmin软件包附带Apache和Lighttpd的配置文件,但不包含nginx。 本教程将介绍如何在nginx vhost中使用Debian Squeeze / Ubuntu 11.04 phpMyAdmin软件包。 Nginx是一个HTTP服务器,比Apache使用的资源少得多,并提供了更快的网页,特别是静态文件。
我不会保证这将为您工作!
1初步说明
我想使用phpMyAdmin在名为www.example.com / example.com的vhost中使用文档根/var/www/www.example.com/web 。
您应该有一个工作的LEMP安装(这包括MySQL安装),如这些教程所示:
Ubuntu用户注意事项:
因为我们必须使用root权限运行本教程的所有步骤,所以我们可以使用字符串sudo在本教程中添加所有命令,也可以通过键入来成为root
sudo su
2安装APC
APC是一个免费开放的PHP操作码cacher,用于缓存和优化PHP中间代码。 它类似于其他PHP操作码cacher,如eAccelerator和XCache。 强烈建议您安装其中一个以加快您的PHP页面。
APC可以安装如下:
apt-get install php-apc
如果您使用PHP-FPM作为FastCGI守护进程(如在Ubuntu 11.04中安装使用PHP5(和PHP-FPM)和MySQL支持)中安装Nginx ,请重新启动它,如下所示:
/etc/init.d/php5-fpm restart
如果您使用lighttpd的spawn-fcgi程序作为FastCGI守护进程(例如在使用Debian Squeeze安装Nginx with PHP5和MySQL支持 )中,我们必须终止当前的spawn-fcgi进程(在端口9000上运行),并创建一个新的。 跑
netstat -tap
找出当前的spawn-fcgi进程的PID:
root@server1:~# netstat -tap
 Active Internet connections (servers and established)
 Proto Recv-Q Send-Q Local Address           Foreign Address         State       PID/Program name
 tcp        0      0 *:sunrpc                *:*                     LISTEN      734/portmap
 tcp        0      0 *:www                   *:*                     LISTEN      2987/nginx
 tcp        0      0 *:ssh                   *:*                     LISTEN      1531/sshd
 tcp        0      0 *:57174                 *:*                     LISTEN      748/rpc.statd
 tcp        0      0 localhost.localdom:smtp *:*                     LISTEN      1507/exim4
 tcp        0      0 localhost.localdom:9000 *:*                     LISTEN      1542/php5-cgi
 tcp        0      0 localhost.localdo:mysql *:*                     LISTEN      1168/mysqld
 tcp        0     52 server1.example.com:ssh 192.168.0.198:2462      ESTABLISHED 1557/0
 tcp6       0      0 [::]:www                [::]:*                  LISTEN      2987/nginx
 tcp6       0      0 [::]:ssh                [::]:*                  LISTEN      1531/sshd
 tcp6       0      0 ip6-localhost:smtp      [::]:*                  LISTEN      1507/exim4
 root@server1:~#
在上面的输出中,PID是1542 ,所以我们可以杀死当前的进程如下:
kill -9 1542
之后我们创建一个新的spawn-fcgi进程:
/usr/bin/spawn-fcgi -a 127.0.0.1 -p 9000 -u www-data -g www-data -f /usr/bin/php5-cgi -P /var/run/fastcgi-php.pid
3 Vhost配置
如果您尚未设置nginx vhost,可以按如下方式设置:
我的www.example.com网站的文档根目录是/var/www/www.example.com/web - 如果不存在,创建如下:
mkdir -p /var/www/www.example.com/web
接下来,我们为/ etc / nginx / sites-available /目录中的www.example.com vhost创建一个基本的nginx vhost配置,如下所示:
vi /etc/nginx/sites-available/www.example.com.vhost
server {
       listen 80;
       server_name www.example.com example.com;
       root /var/www/www.example.com/web;
       if ($http_host != "www.example.com") {
                 rewrite ^ http://www.example.com$request_uri permanent;
       }
       index index.php index.html;
       location = /favicon.ico {
                log_not_found off;
                access_log off;
       }
       location = /robots.txt {
                allow all;
                log_not_found off;
                access_log off;
       }
       # Make sure files with the following extensions do not get loaded by nginx because nginx would display the source code, and these files can contain PASSWORDS!
        location ~* \.(engine|inc|info|install|make|module|profile|test|po|sh|.*sql|theme|tpl(\.php)?|xtmpl)$|^(\..*|Entries.*|Repository|Root|Tag|Template)$|\.php_ {
                deny all;
        }
       # Deny all attempts to access hidden files such as .htaccess, .htpasswd, .DS_Store (Mac).
       location ~ /\. {
                deny all;
                access_log off;
                log_not_found off;
       }
       location ~*  \.(jpg|jpeg|png|gif|css|js|ico)$ {
                expires max;
                log_not_found off;
       }
       location ~ \.php$ {
                try_files $uri =404;
                include /etc/nginx/fastcgi_params;
                fastcgi_pass 127.0.0.1:9000;
                fastcgi_param SCRIPT_FILENAME $document_root$fastcgi_script_name;
       }
} |
要启用该vhost,我们从/ etc / nginx / sites-enabled /目录创建一个符号链接:
cd /etc/nginx/sites-enabled/
 ln -s /etc/nginx/sites-available/www.example.com.vhost www.example.com.vhost
重新加载nginx以使更改生效:
/etc/init.d/nginx reload
4安装phpMyAdmin + phpMyAdmin Vhost配置
接下来我们安装phpMyAdmin,如下所示:
apt-get install phpmyadmin
您将看到以下问题:
Web服务器自动重新配置: < - select none(因为只有apache2和lighttpd可用作选项)
使用dbconfig-common配置phpmyadmin的数据库? < - 不
您现在可以在/ usr / share / phpmyadmin /目录中找到phpMyAdmin。 现在我们必须配置我们的vhost,以便nginx可以在该目录中找到phpMyAdmin。
打开/etc/nginx/sites-available/www.example.com.vhost ...
vi /etc/nginx/sites-available/www.example.com.vhost
...并将以下部分添加到服务器{}容器中:
server {
[...]
        location /phpmyadmin {
               root /usr/share/;
               index index.php index.html index.htm;
               location ~ ^/phpmyadmin/(.+\.php)$ {
                       try_files $uri =404;
                       root /usr/share/;
                       fastcgi_pass 127.0.0.1:9000;
                       fastcgi_index index.php;
                       fastcgi_param SCRIPT_FILENAME $document_root$fastcgi_script_name;
                       include /etc/nginx/fastcgi_params;
               }
               location ~* ^/phpmyadmin/(.+\.(jpg|jpeg|gif|css|png|js|ico|html|xml|txt))$ {
                       root /usr/share/;
               }
        }
        location /phpMyAdmin {
               rewrite ^/* /phpmyadmin last;
        }
[...]
} |
重新加载nginx:
/etc/init.d/nginx reload
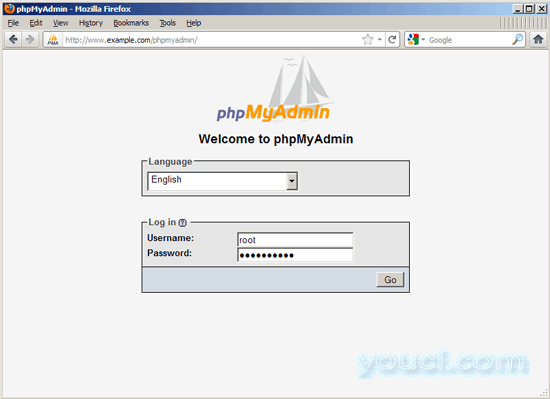
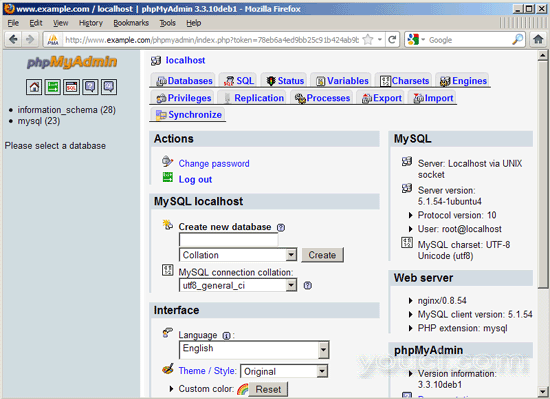
而已! 您现在可以在浏览器中访问http://www.example.com/phpmyadmin或http://www.example.com/phpMyAdmin ,如果一切顺利,您可以登录phpMyAdmin:
如果您的vhost使用http而不是http,则应在其上添加fastcgi_param行; 你的phpMyAdmin配置如下:
vi /etc/nginx/sites-available/www.example.com.vhost
server {
[...]
        location /phpmyadmin {
               root /usr/share/;
               index index.php index.html index.htm;
               location ~ ^/phpmyadmin/(.+\.php)$ {
                       try_files $uri =404;
                       root /usr/share/;
                       fastcgi_pass 127.0.0.1:9000;
                       fastcgi_param HTTPS on; # <-- add this line
                       fastcgi_index index.php;
                       fastcgi_param SCRIPT_FILENAME $document_root$fastcgi_script_name;
                       include /etc/nginx/fastcgi_params;
               }
               location ~* ^/phpmyadmin/(.+\.(jpg|jpeg|gif|css|png|js|ico|html|xml|txt))$ {
                       root /usr/share/;
               }
        }
        location /phpMyAdmin {
               rewrite ^/* /phpmyadmin last;
        }
[...]
} |
如果您的vhost使用http和https,则需要将以下部分添加到/etc/nginx/nginx.conf中的http {}部分(在两个包含行之前),该部分确定访问者是否使用http或https,相应地设置$ fastcgi_https变量(我们将在我们的www.example.com vhost中使用)
vi /etc/nginx/nginx.conf
[...]
http {
[...]
        ## Detect when HTTPS is used
        map $scheme $fastcgi_https {
          default off;
          https on;
        }
        ##
        # Virtual Host Configs
        ##
        include /etc/nginx/conf.d/*.conf;
        include /etc/nginx/sites-enabled/*;
}
[...] |
然后打开您的vhost配置文件,而不是fastcgi_param HTTPS on; 你添加行fastcgi_param HTTPS $ fastcgi_https; 以便您可以将phpMyAdmin用于http和https请求:
vi /etc/nginx/sites-available/www.example.com.vhost
server {
[...]
        location /phpmyadmin {
               root /usr/share/;
               index index.php index.html index.htm;
               location ~ ^/phpmyadmin/(.+\.php)$ {
                       try_files $uri =404;
                       root /usr/share/;
                       fastcgi_pass 127.0.0.1:9000;
                       fastcgi_param HTTPS $fastcgi_https; # <-- add this line
                       fastcgi_index index.php;
                       fastcgi_param SCRIPT_FILENAME $document_root$fastcgi_script_name;
                       include /etc/nginx/fastcgi_params;
               }
               location ~* ^/phpmyadmin/(.+\.(jpg|jpeg|gif|css|png|js|ico|html|xml|txt))$ {
                       root /usr/share/;
               }
        }
        location /phpMyAdmin {
               rewrite ^/* /phpmyadmin last;
        }
[...]
} |
以后不要忘记重新加载nginx:
/etc/init.d/nginx reload
5链接
- phpMyAdmin: http : //www.phpmyadmin.net/
- nginx: http : //nginx.org/
- nginx维基: http : //wiki.nginx.org/
- Debian: http : //www.debian.org/
- Ubuntu: http : //www.ubuntu.com/
关于作者

Falko Timme是所有者  Timme Hosting(超快nginx网页托管)。 他是youcl(自2005年以来)的主要维护者, 也是ISPConfig的核心开发人员之一 (自2000年起)。 他还为O'Reilly的“Linux系统管理”一书作出了贡献。


