Ceph-dash是基于Flask框架的用于监测Ceph集群的WSGI应用程序。 它使用Librados与Ceph集群进行通信。 Ceph-dash有一个漂亮的仪表板,它很容易安装有许多功能,包括InfluxDB和Graphite支持。
在本教程中,我将告诉您安装Ceph-dash并将其配置为在具有SSL和mod_auth支持的apache Web服务器下运行。 在第一个Ceph教程中 ,我们已经安装了“Ceph群集”,在本教程中,我们将在该设置的监视器主机' mon1 '上配置ceph-dash。
先决条件
- Ceph集群 - Ceph I教程
- 监视节点CentOS 7 - mon1
- 根权限
第1步 - 安装Ceph-dash依赖关系
在第一步中,我们将安装ceph-dash所需的依赖项,包括apache web服务器和mod_ssl。
从ceph-admin节点连接到mon1节点。
ssh mon1
使用yum命令安装所需的所有依赖项。
sudo yum -y install httpd mod_wsgi mod_ssl git
然后启动apache / httpd并将其添加到启动时启动。
sudo systemctl start httpd
sudo systemctl enable httpd
第2步 - 下载Ceph-dash
Ceph-dash是一个开源应用程序,可从github信息库获取。 将存储库克隆到/ var / www /目录。
cd /var/www/html/
git clone https://github.com/Crapworks/ceph-dash.git
默认情况下,apache / httpd在用户名“apache”下运行,所以我们需要将ceph-dash文件和目录的所有者更改为“apache”用户。
sudo chown -R /var/www/html/ceph-dash/
第3步 - 为Ceph-dash配置Apache虚拟主机
Ceph-dash在“contrib”目录中提供了apache和Nginx的虚拟主机配置示例。 我们将使用apache作为Ceph-dash的Web服务器,因此我们需要将apache的配置文件复制到apache / httpd目录。
cd /var/www/html/ceph-dash/
cp contrib/apache/cephdash /etc/httpd/conf.d/cephdash.conf
转到虚拟主机配置目录并编辑cephdash.conf文件。
cd /etc/httpd/conf.d/
vim cephdash.conf
将' ServerName '的值更改为您的域名 - 在我的情况下为ceph-mon.co
将wsgi守护进程作为apache用户更改为runn。
将cephdash.wsgi目录更改为“ /var/www/html/ceph-dash/contrib/wsgi/cephdash.wsgi” 。
将SSL配置目录更改为' / etc / httpd / ssl / '。
将ceph-dash目录更改为' / var / www / html / ceph-dash ',然后添加基本的auth配置。
以下是配置。
<VirtualHost *:80>
    ServerName ceph-mon.co

    RewriteEngine On
    RewriteCond %{REQUEST_URI} !^/server-status
    RewriteRule ^/?(.*) https://%{HTTP_HOST}/$1 [R,L]
</VirtualHost>

<VirtualHost *:443>
    ServerName ceph-mon.co

    WSGIDaemonProcess cephdash user=apache group=apache processes=1 threads=5
    WSGIScriptAlias / /var/www/html/ceph-dash/contrib/wsgi/cephdash.wsgi
    WSGIPassAuthorization On

    SSLEngine on
    SSLCertificateFile /etc/httpd/ssl/ssl.crt
    SSLCertificateKeyFile /etc/httpd/ssl/ssl.key

    <Directory /var/www/html/ceph-dash>
        WSGIProcessGroup cephdash
        WSGIApplicationGroup %{GLOBAL}
        Order deny,allow
        Allow from all

        AuthType Basic
        AuthName "Restricted Content"
        AuthUserFile /etc/apache2/.htpasswd
        Require valid-user
    </Directory>
</VirtualHost>
保存文件并退出编辑器。
第4步 - 配置SSL和Apache基本认证
在虚拟主机配置中,我们已经在/ etc / httpd / ssl目录中定义了SSL配置,因此我们需要在其中创建SSL证书和密钥。
mkdir -p /etc/httpd/ssl/
现在使用OpenSSL命令生成自签名SSL证书文件。
openssl req -x509 -nodes -days 365 -newkey rsa:2048 \
-keyout /etc/httpd/ssl/ssl.key -out \
/etc/httpd/ssl/ssl.crt
将证书文件的权限更改为600。
chmod 600 /etc/httpd/ssl/*
接下来,使用下面的htpasswd命令添加apache basic auth来密码保护Ceph-dash访问。
htpasswd -c /etc/httpd/htpasswd hakase
Type your password:
hakase是我选择的用户名。
如果全部完成,请使用apachectl命令测试apache配置文件,并确保结果为“ Syntax OK ”,然后重新启动apache。
apachectl configtest
sudo systemctl restart httpd
第5步 - 将HTTP和HTTPS端口添加到Firewalld
在监视节点' mon1 '上,firewalld启用。 我们必须为http和https连接打开一个新端口,以便我们可以从Web浏览器访问Ceph-dash。
使用firewall-cmd命令将http和https端口添加到firewalld。
sudo firewall-cmd --zone=public --add-port=80/tcp --permanent
sudo firewall-cmd --zone=public --add-port=443/tcp --permanent
重新加载firewalld配置。
sudo firewall-cmd --reload
第6步 - 测试
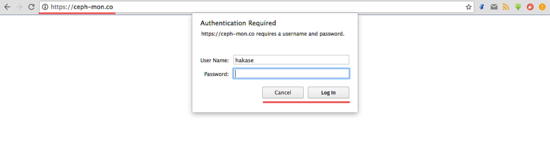
打开您的网络浏览器,并在地址栏中输入ceph-mon.co域(使用您为ceph-dash安装选择的域名),然后按Enter键。
您将被要求输入用户名和密码,输入您在htpasswd文件中使用的用户名和密码。
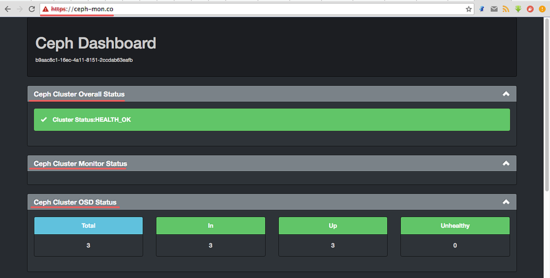
现在,您可以看到Ceph-dash仪表板。
群集健康状态,监视节点状态,OSD节点状态。
存储和PG状态。
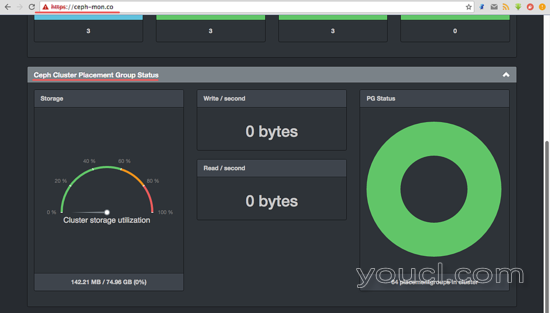
Ceph-dash已安装在监视器节点“ mon1 ”上的apache Web服务器下。


