要求
对于RHEL 7.0
对于CentOS 7.0
配置静态IP地址
本教程将指导你安装 Nginx的1.10.0的红帽企业或CentOS 7来源最新的稳定版本,因为官方的RHEL / CentOS 7仓库镜子不提供二进制包。 如果你想避免源安装您可以添加官方的Nginx的存储库,并如图所示Yum包管理器的帮助下安装二进制包(可用版本为 1.9.x的 ): 要启用RHEL / CentOS 7 nginx的官方的yum软件库,创建一个包含以下内容的文件 /etc/yum.repos.d/nginx.repo:[nginx] name=nginx repo baseurl=http://nginx.org/packages/mainline/centos/7/$basearch/ gpgcheck=0 enabled=1根据分布您正在使用,如图所示安装使用yum包管理器的nginx替换 “CentOS的”与 “RHEL”:
# yum install nginx重要提示:请注意,按照上述负责人的nginx的yum库会给你Nginx的旧版本,如果你真的想建立最新的Nginx的版本,那么我建议你遵循源安装,如下图所示。 使用源编译和安装有一些好处,由于您可以安装最新版本,您可以通过添加或删除模块,更改安装系统路径或其他重要设置来调整Nginx配置,换句话说,您有一个完全控制安装过程。
第1步:下载,编译和安装Nginx
1.在开始Nginx的编译和安装过程确保您有 C / C ++编译器,PCRE(Perl兼容的正则表达式 ),zlib压缩库和 OpenSSL(如果你打算使用SSL支持运行Nxing)通过发行计算机上安装的软件包以下命令。# yum -y install gcc gcc-c++ make zlib-devel pcre-devel openssl-devel
安装GCC和C ++编译器
Loaded plugins: fastestmirror Loading mirror speeds from cached hostfile * base: centos.mirror.net.in * extras: centos.mirror.net.in * updates: centos.mirror.net.in Package 1:make-3.82-21.el7.x86_64 already installed and latest version Resolving Dependencies --> Running transaction check ---> Package gcc.x86_64 0:4.8.5-4.el7 will be installed --> Processing Dependency: libgomp = 4.8.5-4.el7 for package: gcc-4.8.5-4.el7.x86_64 --> Processing Dependency: cpp = 4.8.5-4.el7 for package: gcc-4.8.5-4.el7.x86_64 --> Processing Dependency: libgcc >= 4.8.5-4.el7 for package: gcc-4.8.5-4.el7.x86_64 --> Processing Dependency: glibc-devel >= 2.2.90-12 for package: gcc-4.8.5-4.el7.x86_64 --> Processing Dependency: libmpfr.so.4()(64bit) for package: gcc-4.8.5-4.el7.x86_64 --> Processing Dependency: libmpc.so.3()(64bit) for package: gcc-4.8.5-4.el7.x86_64 ---> Package gcc-c++.x86_64 0:4.8.5-4.el7 will be installed --> Processing Dependency: libstdc++-devel = 4.8.5-4.el7 for package: gcc-c++-4.8.5-4.el7.x86_64 --> Processing Dependency: libstdc++ = 4.8.5-4.el7 for package: gcc-c++-4.8.5-4.el7.x86_64 ---> Package openssl-devel.x86_64 1:1.0.1e-51.el7_2.4 will be installed --> Processing Dependency: openssl-libs(x86-64) = 1:1.0.1e-51.el7_2.4 for package: 1:openssl-devel-1.0.1e-51.el7_2.4.x86_64 --> Processing Dependency: krb5-devel(x86-64) for package: 1:openssl-devel-1.0.1e-51.el7_2.4.x86_64 ---> Package pcre-devel.x86_64 0:8.32-15.el7 will be installed --> Processing Dependency: pcre(x86-64) = 8.32-15.el7 for package: pcre-devel-8.32-15.el7.x86_64 ---> Package zlib-devel.x86_64 0:1.2.7-15.el7 will be installed --> Processing Dependency: zlib = 1.2.7-15.el7 for package: zlib-devel-1.2.7-15.el7.x86_64 ...2.现在去 Nginx的官方网页,并使用 wget命令可抓取最新的稳定版本 (1.10.0 nginx的 ),解压TAR存档,进入Nginx的解压目录,使用以下命令序列。
# wget http://nginx.org/download/nginx-1.10.0.tar.gz
# tar xfz nginx-1.10.0.tar.gz
# cd nginx-1.10.0/
# ls -all
下载Nginx源码
--2016-03-21 09:30:15-- http://nginx.org/download/nginx-1.10.0.tar.gz Resolving nginx.org (nginx.org)... 206.251.255.63, 95.211.80.227, 2001:1af8:4060:a004:21::e3 Connecting to nginx.org (nginx.org)|206.251.255.63|:80... connected. HTTP request sent, awaiting response... 200 OK Length: 908954 (888K) [application/octet-stream] Saving to: ‘nginx-1.10.0.tar.gz’ 100%[=====================================================================================================================================================>] 9,08,954 81.0KB/s in 11s 2016-03-21 09:30:27 (77.4 KB/s) - ‘nginx-1.10.0.tar.gz’ saved [908954/908954]3.下一步是自主Nginx的安装过程。 使用 配置文件中使用以下命令来可视化需要为您的编译过程的配置选项及模块,并确保你在nginx的-1.6.0 /路径。
# ./configure --help
Nginx配置帮助
-help print this message --prefix=PATH set installation prefix --sbin-path=PATH set nginx binary pathname --modules-path=PATH set modules path --conf-path=PATH set nginx.conf pathname --error-log-path=PATH set error log pathname --pid-path=PATH set nginx.pid pathname --lock-path=PATH set nginx.lock pathname --user=USER set non-privileged user for worker processes --group=GROUP set non-privileged group for worker processes --build=NAME set build name --builddir=DIR set build directory --with-select_module enable select module --without-select_module disable select module --with-poll_module enable poll module --without-poll_module disable poll module --with-threads enable thread pool support --with-file-aio enable file AIO support --with-ipv6 enable IPv6 support --with-http_ssl_module enable ngx_http_ssl_module --with-http_v2_module enable ngx_http_v2_module ...4,现在是时候来编译Nginx的与您的具体配置和启用或禁用模块。本教程中使用了以下模块和规范,但您可以将编译器调整为适合您的需要。
- -user = nginx的-group = nginx的 =>系统用户和组的Nginx会运行。
- -prefix =的/ etc / nginx的 =>目录服务器文件(nginx.conf文件和其他配置文件) -默认是/ usr /本地/ nginx的目录中。
- -sbin路径= / usr / sbin目录/ nginx的 => Nginx的可执行文件的位置。
- -conf路径=的/ etc / nginx的/ nginx.conf =>设置为nginx.conf配置文件的名称-你可以改变它。
- -error-LOG-PATH =在/ var /日志/ nginx的/ error.log中 =>设置Nginx的错误日志文件的位置。
- -http-LOG-PATH = /无功/日志/ nginx的/ access.log的 =>设置Nginx的访问日志文件的位置。
- -pid路径=在/ var /运行/ nginx.pid =>设置主进程ID文件的名称。
- -lock-PATH = / var / run中/ nginx.lock =>为Nginx的锁定文件的名称。
- -with-http_ssl_module =>使构建HTTPS模块-不是建立在默认情况下并要求OpenSSL库。
- -with-PCRE =>设置路径PCRE库的源-默认情况下未建成并需要PCRE库。
--without-module_name现在启动通过发出以下命令,该命令将用全部的配置和上面所讨论的模块编译Nginx的( 确保在一行命令住宿 )。
# ./configure --user=nginx --group=nginx --prefix=/etc/nginx --sbin-path=/usr/sbin/nginx --conf-path=/etc/nginx/nginx.conf --error-log-path=/var/log/nginx/error.log --http-log-path=/var/log/nginx/access.log --pid-path=/var/run/nginx.pid --lock-path=/var/run/nginx.lock --with-http_ssl_module --with-pcre
使用模块配置Nginx
checking for OS + Linux 3.10.0-229.el7.x86_64 x86_64 checking for C compiler ... found + using GNU C compiler + gcc version: 4.8.5 20150623 (Red Hat 4.8.5-4) (GCC) checking for gcc -pipe switch ... found checking for -Wl,-E switch ... found checking for gcc builtin atomic operations ... found checking for C99 variadic macros ... found checking for gcc variadic macros ... found checking for gcc builtin 64 bit byteswap ... found checking for unistd.h ... found checking for inttypes.h ... found checking for limits.h ... found checking for sys/filio.h ... not found checking for sys/param.h ... found checking for sys/mount.h ... found checking for sys/statvfs.h ... found checking for crypt.h ... found checking for Linux specific features checking for epoll ... found checking for EPOLLRDHUP ... found checking for O_PATH ... found checking for sendfile() ... found checking for sendfile64() ... found checking for sys/prctl.h ... found checking for prctl(PR_SET_DUMPABLE) ... found checking for sched_setaffinity() ... found checking for crypt_r() ... found checking for sys/vfs.h ... found checking for poll() ... found checking for /dev/poll ... not found ...5.编译过程后验证所有必需的系统实用工具,比如GNU C编译器,PCRE和OpenSSL库,它创建 make.conf的文件,输出所有配置的摘要。
Nginx编译摘要
Configuration summary + using system PCRE library + using system OpenSSL library + md5: using OpenSSL library + sha1: using OpenSSL library + using system zlib library nginx path prefix: "/etc/nginx" nginx binary file: "/usr/sbin/nginx" nginx modules path: "/etc/nginx/modules" nginx configuration prefix: "/etc/nginx" nginx configuration file: "/etc/nginx/nginx.conf" nginx pid file: "/var/run/nginx.pid" nginx error log file: "/var/log/nginx/error.log" nginx http access log file: "/var/log/nginx/access.log" nginx http client request body temporary files: "client_body_temp" nginx http proxy temporary files: "proxy_temp" nginx http fastcgi temporary files: "fastcgi_temp" nginx http uwsgi temporary files: "uwsgi_temp" nginx http scgi temporary files: "scgi_temp"6.最后一步是建立使用 make命令二进制文件,这可能需要一些时间取决于您的机器的资源来完成,并 让你 的系统上安装Nginx的 安装命令。 请注意, 使安装需要root权限来执行安装,所以如果你不root帐号登录使用权限的用户使用 sudo。
# make
# make install
运行Nginx Make命令
make -f objs/Makefile
make[1]: Entering directory `/root/nginx-1.10.0'
make[1]: Warning: File `src/core/nginx.h' has modification time 3110036 s in the future
cc -c -pipe  -O -W -Wall -Wpointer-arith -Wno-unused-parameter -Werror -g  -I src/core -I src/event -I src/event/modules -I src/os/unix -I objs \
-o objs/src/core/nginx.o \
src/core/nginx.c
cc -c -pipe  -O -W -Wall -Wpointer-arith -Wno-unused-parameter -Werror -g  -I src/core -I src/event -I src/event/modules -I src/os/unix -I objs \
-o objs/src/core/ngx_log.o \
src/core/ngx_log.c
cc -c -pipe  -O -W -Wall -Wpointer-arith -Wno-unused-parameter -Werror -g  -I src/core -I src/event -I src/event/modules -I src/os/unix -I objs \
-o objs/src/core/ngx_palloc.o \
src/core/ngx_palloc.c
cc -c -pipe  -O -W -Wall -Wpointer-arith -Wno-unused-parameter -Werror -g  -I src/core -I src/event -I src/event/modules -I src/os/unix -I objs \
-o objs/src/core/ngx_array.o \
src/core/ngx_array.c
cc -c -pipe  -O -W -Wall -Wpointer-arith -Wno-unused-parameter -Werror -g  -I src/core -I src/event -I src/event/modules -I src/os/unix -I objs \
-o objs/src/core/ngx_list.o \
src/core/ngx_list.c
cc -c -pipe  -O -W -Wall -Wpointer-arith -Wno-unused-parameter -Werror -g  -I src/core -I src/event -I src/event/modules -I src/os/unix -I objs \
-o objs/src/core/ngx_hash.o \
src/core/ngx_hash.c
cc -c -pipe  -O -W -Wall -Wpointer-arith -Wno-unused-parameter -Werror -g  -I src/core -I src/event -I src/event/modules -I src/os/unix -I objs \
-o objs/src/core/ngx_buf.o \
src/core/ngx_buf.c
cc -c -pipe  -O -W -Wall -Wpointer-arith -Wno-unused-parameter -Werror -g  -I src/core -I src/event -I src/event/modules -I src/os/unix -I objs \
-o objs/src/core/ngx_queue.o \
...
运行Nginx make install命令
make -f objs/Makefile install
make[1]: Entering directory `/root/nginx-1.10.0'
make[1]: Warning: File `src/core/nginx.h' has modification time 3109935 s in the future
cc -c -pipe  -O -W -Wall -Wpointer-arith -Wno-unused-parameter -Werror -g  -I src/core -I src/event -I src/event/modules -I src/os/unix -I objs \
-o objs/src/core/nginx.o \
src/core/nginx.c
cc -c -pipe  -O -W -Wall -Wpointer-arith -Wno-unused-parameter -Werror -g  -I src/core -I src/event -I src/event/modules -I src/os/unix -I objs \
-o objs/src/core/ngx_log.o \
src/core/ngx_log.c
cc -c -pipe  -O -W -Wall -Wpointer-arith -Wno-unused-parameter -Werror -g  -I src/core -I src/event -I src/event/modules -I src/os/unix -I objs \
-o objs/src/core/ngx_palloc.o \
src/core/ngx_palloc.c
cc -c -pipe  -O -W -Wall -Wpointer-arith -Wno-unused-parameter -Werror -g  -I src/core -I src/event -I src/event/modules -I src/os/unix -I objs \
-o objs/src/core/ngx_array.o \
src/core/ngx_array.c
cc -c -pipe  -O -W -Wall -Wpointer-arith -Wno-unused-parameter -Werror -g  -I src/core -I src/event -I src/event/modules -I src/os/unix -I objs \
-o objs/src/core/ngx_list.o \
src/core/ngx_list.c
cc -c -pipe  -O -W -Wall -Wpointer-arith -Wno-unused-parameter -Werror -g  -I src/core -I src/event -I src/event/modules -I src/os/unix -I objs \
-o objs/src/core/ngx_hash.o \
src/core/ngx_hash.c
cc -c -pipe  -O -W -Wall -Wpointer-arith -Wno-unused-parameter -Werror -g  -I src/core -I src/event -I src/event/modules -I src/os/unix -I objs \
-o objs/src/core/ngx_buf.o \
src/core/ngx_buf.c
cc -c -pipe  -O -W -Wall -Wpointer-arith -Wno-unused-parameter -Werror -g  -I src/core -I src/event -I src/event/modules -I src/os/unix -I objs \
-o objs/src/core/ngx_queue.o \
...
第2步:调整Nginx并创建INIT脚本
在安装过程中已成功完成 7.在添加 Nginx的系统用户(使用 / etc / nginx的/他的主目录,并没有有效的shell),即Nginx的将运行通过发出以下命令的用户。# useradd -d /etc/nginx/ -s /sbin/nologin nginx

添加Nginx用户
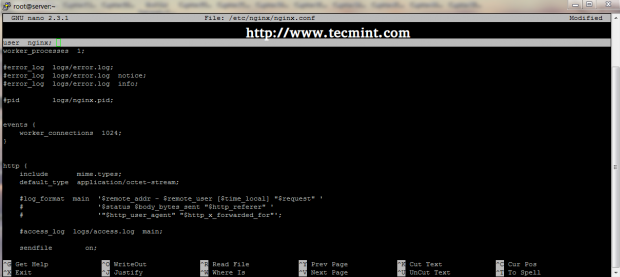
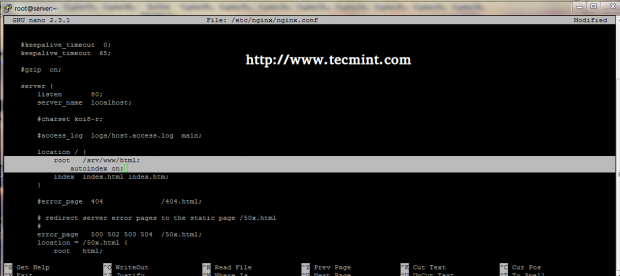
# nano /etc/nginx/nginx.conf这里找到并更改用户,以及文档根位置语句,具有以下选项。
user nginx;
location / {
root /srv/www/html;
autoindex on;
index index.html index.htm;

以用户身份运行Nginx

启用Nginx DocumentRoot
# mkdir -p /srv/www/html
# /usr/sbin/nginx
如果你想检查是否Nginx的是使用你的shell提示符下运行,运行 netstat命令来验证监听连接。
# netstat -tulpn | grep nginx

创建Nginx DocumentRoot
# firewall-cmd --add-service=http  ## For on-fly rule
# firewall-cmd --permanent --add-service=http  ## For permanent rule
# systemctl restart firewalld

验证Nginx安装
- nginx的-V =显示Nginx的模块和配置
- nginx的-h =帮助选项
- nginx的 =启动Nginx的过程
- nginx的-s停止 =停止Nginx的过程
- nginx的-s重装重装= Nginx的过程
# nginx -V
检查Nginx安装的版本
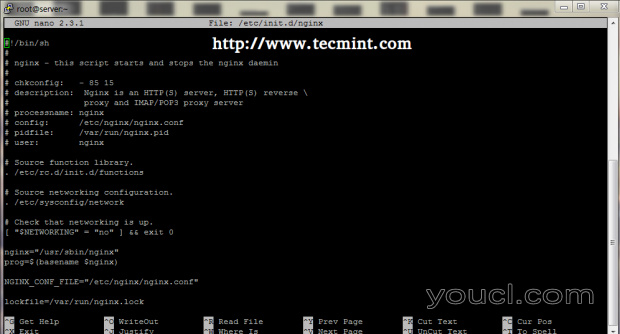
nginx version: nginx/1.10.0 built by gcc 4.8.5 20150623 (Red Hat 4.8.5-4) (GCC) built with OpenSSL 1.0.1e-fips 11 Feb 2013 TLS SNI support enabled configure arguments: --user=nginx --group=nginx --prefix=/etc/nginx --sbin-path=/usr/sbin/nginx --conf-path=/etc/nginx/nginx.conf --error-log-path=/var/log/nginx/error.log --http-log-path=/var/log/nginx/access.log --pid-path=/var/run/nginx.pid --lock-path=/var/run/nginx.lock --with-http_ssl_module --with-pcre12.如果你需要通过一个 初始化 RHEL / CentOS的脚本来管理Nginx的守护进程,创建 /etc/init.d/的系统路径以下nginx的文件,然后,你可以使用 的服务或 systemctl命令管理进程。
# nano /etc/init.d/nginx添加以下文件内容。
#!/bin/sh
#
# nginx - this script starts and stops the nginx daemon
#
# chkconfig:   - 85 15
# description:  Nginx is an HTTP(S) server, HTTP(S) reverse \
#               proxy and IMAP/POP3 proxy server
# processname: nginx
# config:      /etc/nginx/nginx.conf
# pidfile:     /var/run/nginx.pid
# user:        nginx
# Source function library.
. /etc/rc.d/init.d/functions
# Source networking configuration.
. /etc/sysconfig/network
# Check that networking is up.
[ "$NETWORKING" = "no" ] && exit 0
nginx="/usr/sbin/nginx"
prog=$(basename $nginx)
NGINX_CONF_FILE="/etc/nginx/nginx.conf"
lockfile=/var/run/nginx.lock
start() {
[ -x $nginx ] || exit 5
[ -f $NGINX_CONF_FILE ] || exit 6
echo -n $"Starting $prog: "
daemon $nginx -c $NGINX_CONF_FILE
retval=$?
echo
[ $retval -eq 0 ] && touch $lockfile
return $retval
}
stop() {
echo -n $"Stopping $prog: "
killproc $prog -QUIT
retval=$?
echo
[ $retval -eq 0 ] && rm -f $lockfile
return $retval
}
restart() {
configtest || return $?
stop
start
}
reload() {
configtest || return $?
echo -n $"Reloading $prog: "
killproc $nginx -HUP
RETVAL=$?
echo
}
force_reload() {
restart
}
configtest() {
$nginx -t -c $NGINX_CONF_FILE
}
rh_status() {
status $prog
}
rh_status_q() {
rh_status >/dev/null 2>&1
}
case "$1" in
start)
rh_status_q && exit 0
$1
;;
stop)
rh_status_q || exit 0
$1
;;
restart|configtest)
$1
;;
reload)
rh_status_q || exit 7
$1
;;
force-reload)
force_reload
;;
status)
rh_status
;;
condrestart|try-restart)
rh_status_q || exit 0
;;
*)
echo $"Usage: $0 {start|stop|status|restart|condrestart|try-restart|reload|force-reload|configtest}"
exit 2
esac

添加Nginx Init脚本
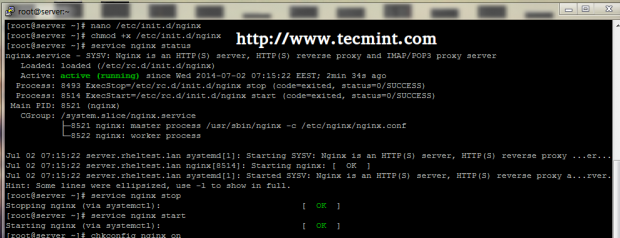
# chmod +x /etc/init.d/nginx
# service nginx start|stop|restart|reload|force_reload|configtest|condrestart
# systemctl start|stop|restart nginx

启动Nginx服务器
# chkconfig nginx on
OR
# systemctl enable nginx
就这样!现在您的RHEL / CentOS 7系统上安装了最新版本的Nginx。在下一个教程中,我将讨论如何通过Nginx FastCGI Gateway安装和启用PHP-FPM进程管理器。 另请参阅: 终极指南安全,哈登和改进Nginx的Web服务器性能


