PHP 7.0版已经发布。它比起PHP 5.x版有很多变化和改进,本文将帮助您在CentOS / RHEL 7.1和6.7操作系统中安装PHP 7,NGINX和MySQL 5.6。本教程已经在CentOS 7.1中测试过,因此所有的服务使用systemctl命令,CentOS 6的用户更改所有
systemctl命令。

第1步:设置Yum库
第一步,在你的系统中安装各种所需的yum库。在你的系统中添加REMI,EPEL,Webtatic和MySQL社区服务器存储库。
CentOS/ RHEL 7
# yum install epel-release
# rpm -Uvh http://rpms.famillecollet.com/enterprise/remi-release-7.rpm
# rpm -Uvh https://mirror.webtatic.com/yum/el7/webtatic-release.rpm
# rpm -Uvh http://repo.mysql.com/mysql-community-release-el7-5.noarch.rpm
CentOS/ RHEL 6
# yum install epel-release
# rpm -Uvh http://rpms.famillecollet.com/enterprise/remi-release-6.rpm
# rpm -Uvh https://mirror.webtatic.com/yum/el6/latest.rpm
# rpm -Uvh http://repo.mysql.com/mysql-community-release-el6-5.noarch.rpm
第2步:安装PHP 7
现在从webtatic RPM存储包安装PHP 7,使用以下命令。
# yum install php70w
现在安装需要的PHP模块。使用以下命令将在Yum库列出可用的模块。
# yum search php70w
现在检查在上面的命令中列出的所有模块和安装所需的模块,如下。
# yum install php70w-mysql php70w-xml php70w-soap php70w-xmlrpc
# yum install php70w-mbstring php70w-json php70w-gd php70w-mcrypt
第3步:安装NGINX
NGINX是在Linux系统上使用的流行的Web服务器。让您的系统上使用以下命令安装Nginx的网络服务器。
# yum install nginx
现在启动nginx的服务,并能使用下面的命令来启动时自动启动。
# systemctl enable nginx.service
# systemctl start nginx.service
第4步:安装MySQL 5.6
在第1步中,我们已经安装了所需的yum软件库在您的系统。让我们用下面的命令来在系统上安装MySQL服务器。
# yum install mysql-server
您需要安装使用下面的命令MySQL服务器后执行一次mysql_secure_installation。首先,它会提示设置root帐号密码,之后问几个问题,我建议都是(Y)所有。
# systemctl start mysqld.service
# mysql_secure_installation
现在重启MySQL服务,使启动系统启动。
# systemctl restart mysqld.service
# systemctl enable mysqld.service
第5步 - 安装PHP-FPM
现在,使用以下命令,使用以下命令来安装php7 FPM包。
# yum install php70w-fpm
第6步 - 创建Nginx虚拟主机
最后做Nginx的虚拟主机的配置。在这个例子中,我们正在编辑默认的配置文件。
$ sudo nano /etc/nginx/conf.d/example.conf
并作出如下改变。
server {
        listen   80;

        root /var/www;
        index index.php index.html index.htm;
        server_name  example.com www.example.com;

        location / {
                try_files $uri $uri/ /index.html;
        }

        error_page 404 /404.html;
        error_page 500 502 503 504 /50x.html;
        location = /50x.html {
              root /usr/share/nginx/www;
        }

        location ~ .php$ {
                try_files $uri =404;
                fastcgi_pass 127.0.0.1:9000;
                fastcgi_index index.php;
                fastcgi_param SCRIPT_FILENAME $document_root$fastcgi_script_name;
                include fastcgi_params;
        }
}
你所要做的配置的所有虚拟主机相同的更改。
第7步 - 重新启动服务
在系统上安装的所有服务后,启动所有必需的服务。
# systemctl restart nginx.service
# systemctl restart php-fpm.service
第8步:打开防火墙中的端口
对于HTTP最后打开防火墙端口(80)和https(443)使用的服务下面的命令。
# firewall-cmd --permanent --zone=public --add-service=http
# firewall-cmd --permanent --zone=public --add-service=https
# firewall-cmd --reload
第9步:验证安装
让我们用下面的命令逐个检查包的安装版本的系统。
# php -v

PHP 7.0.2 (cli) (built: Jan  9 2016 14:00:11) ( NTS )
Copyright (c) 1997-2015 The PHP Group
Zend Engine v3.0.0, Copyright (c) 1998-2015 Zend Technologies
# nginx -v

nginx version: nginx/1.6.3
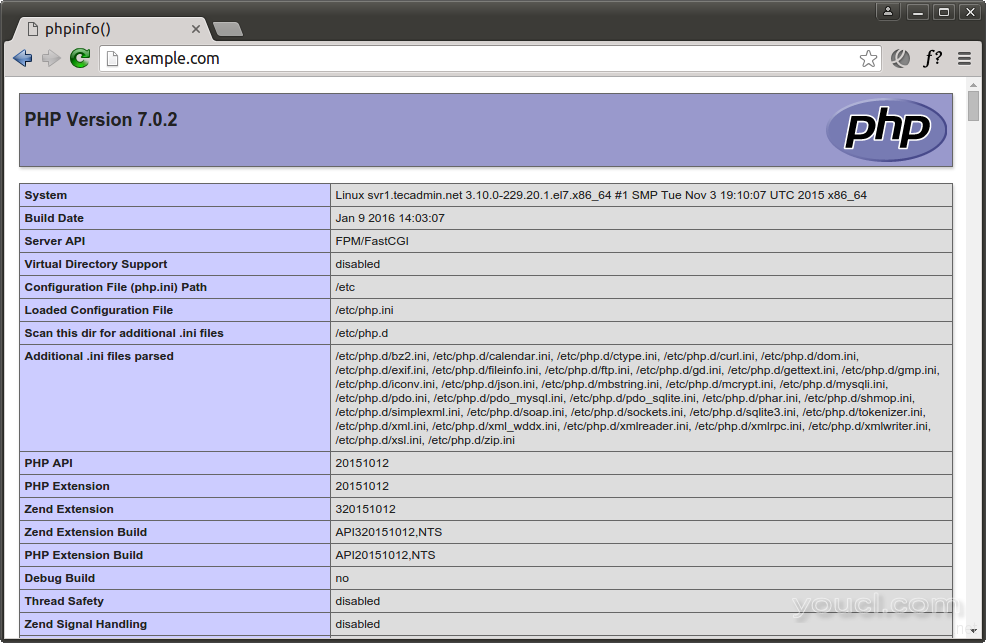
最后验证安装PHP 7与NGINX。让我们创建使用以下内容网站文档根目录文件的index.php。
<?php
phpinfo();
?>
现在浏览的网页浏览器此文件。它将让所有关于版本的安装细节。
 您已成功配置你的CentOS / RHEL 7.1和6.7系统的LEMP设置。

 您已成功配置你的CentOS / RHEL 7.1和6.7系统的LEMP设置。


