作者选择了开放互联网/言论自由基金作为Write for DOnations计划的一部分接受捐赠。
介绍
网络不断发展,现在可以实现以前只能在本机移动设备上使用的功能。 JavaScript 服务工作者的引入为Web提供了新的功能,可以执行后台同步,脱机缓存和发送推送通知等功能 。
推送通知允许用户选择接收移动和Web应用程序的更新。 它们还使用户能够使用自定义和相关内容重新使用现有应用程序。
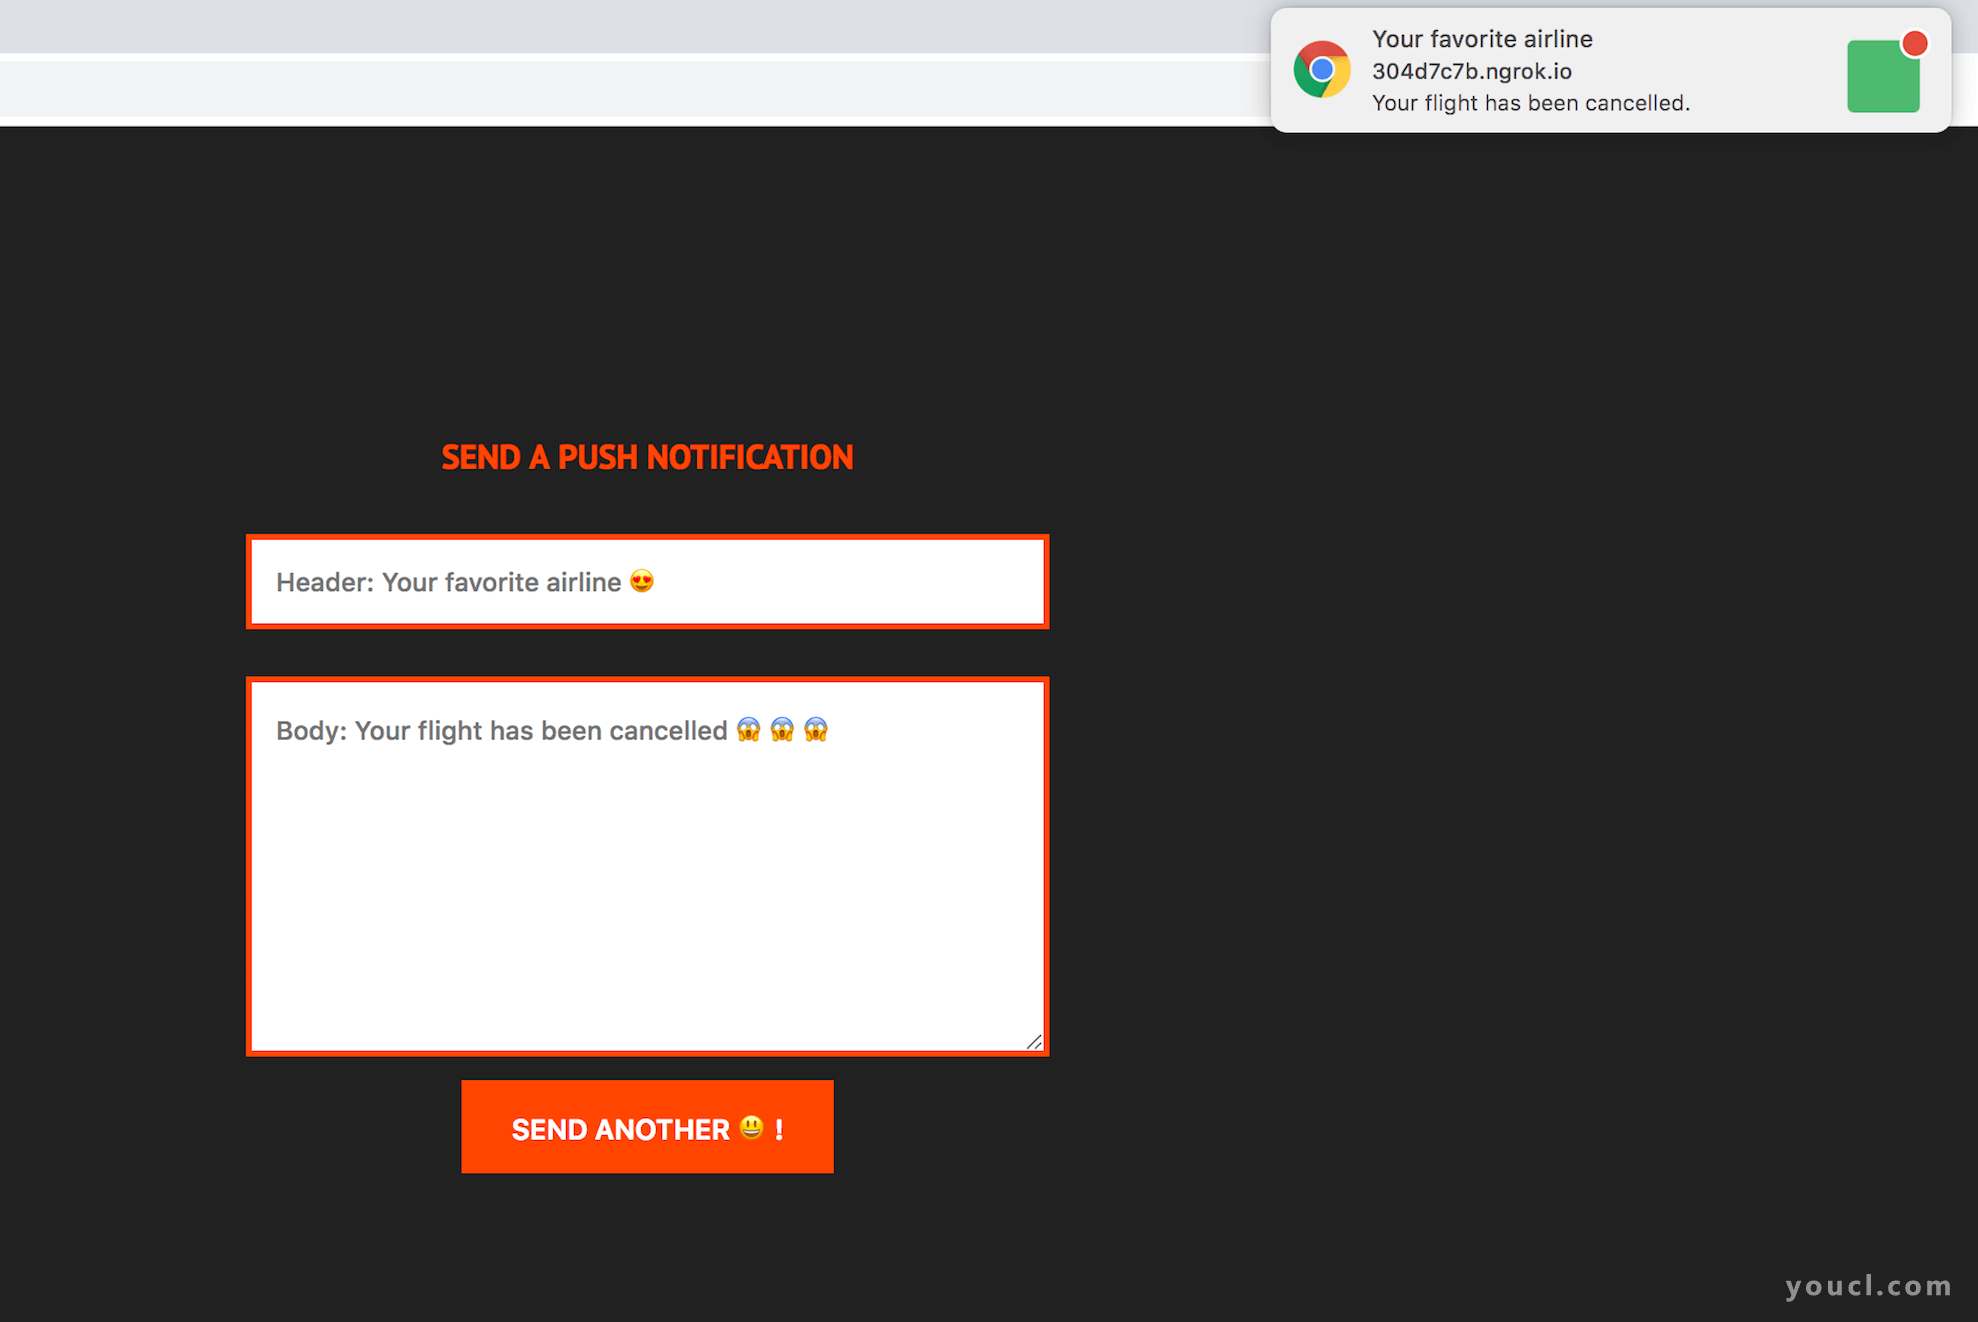
在本教程中,您将在Ubuntu 18.04上设置一个Django应用程序,只要有需要用户访问应用程序的活动,就会发送推送通知。 要创建这些通知,您将使用Django-Webpush包并设置和注册服务工作者以向客户端显示通知。 带通知的工作应用程序如下所示:
先决条件
在开始本指南之前,您需要以下内容:
- 一个Ubuntu 18.04服务器,具有非root用户和活动防火墙。 您可以按照此初始服务器设置指南中的准则获取有关如何创建Ubuntu 18.04服务器的更多信息。
- 按照这些指南安装
pip和venv。 - 在您的主目录中创建了一个名为
djangopush的Django项目,按照这些关于在Ubuntu 18.04上创建示例Django项目的指南进行设置。 请务必将您服务器的IP地址添加到settings.py文件中的ALLOWED_HOSTS指令中。
第1步 - 安装Django-Webpush并获取Vapid密钥
Django-Webpush是一个允许开发人员在Django应用程序中集成和发送Web推送通知的软件包。 我们将使用此包来触发和发送来自我们应用程序的推送通知。 在此步骤中,您将安装Django-Webpush并获取识别服务器所需的自愿应用程序服务器标识(VAPID)密钥,并确保每个请求的唯一性。
确保您位于先决条件中创建的~/ djangopush项目目录中:
cd ~/djangopush
激活您的虚拟环境:
source my_env/bin/activate
升级您的pip版本以确保它是最新的:
pip install --upgrade pip
安装Django-Webpush:
pip install django-webpush
安装软件包后,将其添加到settings.py文件中的应用程序列表中。 首先打开settings.py :
nano ~/djangopush/djangopush/settings.py
将webpush添加到INSTALLED_APPS列表中:
...

INSTALLED_APPS = [
    ...,
   'webpush',
]
...
保存文件并退出编辑器。
在应用程序上运行迁移以应用您对数据库模式所做的更改:
python manage.py migrate
输出将如下所示,表示迁移成功:
OutputOperations to perform:
  Apply all migrations: admin, auth, contenttypes, sessions, webpush
Running migrations:
  Applying webpush.0001_initial... OK
设置Web推送通知的下一步是获取VAPID密钥。 这些密钥标识应用程序服务器,可用于减少推送订阅URL的保密性,因为它们限制对特定服务器的订阅。
要获取VAPID密钥,请导航到wep-push-codelab Web应用程序。 在这里,您将获得自动生成的密钥。 复制私钥和公钥。
接下来,在settings.py为您的VAPID信息创建一个新条目。 首先,打开文件:
nano ~/djangopush/djangopush/settings.py
接下来,使用您的VAPID公钥和私钥以及您在AUTH_PASSWORD_VALIDATORS下面的电子邮件添加一个名为WEBPUSH_SETTINGS的新指令:
...

AUTH_PASSWORD_VALIDATORS = [
    ...
]

WEBPUSH_SETTINGS = {
   "VAPID_PUBLIC_KEY": "your_vapid_public_key",
   "VAPID_PRIVATE_KEY": "your_vapid_private_key",
   "VAPID_ADMIN_EMAIL": "admin@example.com"
}

# Internationalization
# https://docs.djangoproject.com/en/2.0/topics/i18n/

...
不要忘记使用您自己的信息替换占位符值your_vapid_public_key , your_vapid_private_key和admin@example.com 。 如果推送服务器遇到任何问题,您的电子邮件地址就是通知您的方式。
接下来,我们将设置视图,以显示应用程序的主页并向订阅用户触发推送通知。
第2步 - 设置视图
在此步骤中,我们将使用home的HttpResponse响应对象以及send_push视图设置基本home视图。 视图是从Web请求返回响应对象的函数。 send_push视图将使用Django-Webpush库发送包含用户在主页上输入的数据的推送通知。
导航到~/djangopush/djangopush文件夹:
cd ~/djangopush/djangopush
在文件夹中运行ls将显示项目的主文件:
Output/__init__.py
/settings.py
/urls.py
/wsgi.py
此文件夹中的文件由用于在先决条件中创建项目的django-admin实用程序自动生成。 settings.py文件包含项目范围的配置,如已安装的应用程序和静态根文件夹。 urls.py文件包含项目的URL配置。 您可以在此处设置路线以匹配您创建的视图。
在~/djangopush/djangopush目录中创建一个名为views.py的新文件,该文件将包含项目的视图:
nano ~/djangopush/djangopush/views.py
我们将做的第一个视图是home视图,它将显示用户可以发送推送通知的主页。 将以下代码添加到文件中:
from django.http.response import HttpResponse
from django.views.decorators.http import require_GET

@require_GET
def home(request):
    return HttpResponse('<h1>Home Page<h1>')
home视图由require_GET装饰器修饰,该装饰器仅将视图限制为GET请求。 视图通常会为每个请求返回响应。 此视图返回一个简单的HTML标记作为响应。
我们将创建的下一个视图是send_push ,它将使用django-webpush包处理发送的推送通知。 它仅限于POST请求,并且将免于跨站请求伪造 (CSRF)保护。 这样做将允许您使用Postman或任何其他RESTful服务测试视图。 但是,在生产中,您应该删除此装饰器,以避免您的视图容易受到CSRF的影响。
要创建send_push视图,首先添加以下导入以启用JSON响应并访问webpush库中的webpush函数:
from django.http.response import JsonResponse, HttpResponse
from django.views.decorators.http import require_GET, require_POST
from django.shortcuts import get_object_or_404
from django.contrib.auth.models import User
from django.views.decorators.csrf import csrf_exempt
from webpush import send_user_notification
import json
接下来,添加require_POST装饰器,它将使用用户发送的请求主体来创建和触发推送通知:
@require_GET
def home(request):
    ...


@require_POST
@csrf_exempt
def send_push(request):
    try:
        body = request.body
        data = json.loads(body)

        if 'head' not in data or 'body' not in data or 'id' not in data:
            return JsonResponse(status=400, data={"message": "Invalid data format"})

        user_id = data['id']
        user = get_object_or_404(User, pk=user_id)
        payload = {'head': data['head'], 'body': data['body']}
        send_user_notification(user=user, payload=payload, ttl=1000)

        return JsonResponse(status=200, data={"message": "Web push successful"})
    except TypeError:
        return JsonResponse(status=500, data={"message": "An error occurred"})
我们在send_push视图中使用了两个装饰器: require_POST装饰器,它将视图限制为仅仅POST请求,以及csrf_exempt装饰器,它将视图从CSRF保护中豁免。
此视图需要POST数据并执行以下操作:它获取请求的body ,并使用json包,使用json.loads将JSON文档反序列化为Python对象。 json.loads获取结构化的JSON文档并将其转换为Python对象。
视图期望请求主体对象具有三个属性:
-
head:推送通知的标题。 -
body:通知的正文。 -
id:请求用户的id。
如果缺少任何必需的属性,视图将返回具有404“未找到”状态的JSONResponse 。 如果具有给定主键的用户存在,则视图将使用django.shortcuts库中的get_object_or_404函数返回具有匹配主键的user 。 如果用户不存在,该函数将返回404错误。
该视图还使用了webpush库中的webpush函数。 该函数有三个参数:
-
User:推送通知的收件人。 -
payload:通知信息,包括通知head和body。 -
ttl:用户离线时应存储通知的最长时间(以秒为单位)。
如果没有错误发生,视图将返回具有200“成功”状态和数据对象的JSONResponse 。 如果发生KeyError ,视图将返回500“内部服务器错误”状态。 当对象的请求键不存在时,会发生KeyError 。
在下一步中,我们将创建相应的URL路由以匹配我们创建的视图。
第3步 - 将URL映射到视图
Django可以使用名为URLconf的Python模块创建连接到视图的URLconf 。 此模块将URL路径表达式映射到Python函数(您的视图)。 通常,在创建项目时会自动生成URL配置文件。 在此步骤中,您将更新此文件以包含您在上一步中创建的视图的新路由,以及django-webpush应用程序的URL,该应用程序将为订阅用户提供推送通知的端点。
有关视图的更多信息,请参阅如何创建Django视图 。
打开urls.py :
nano ~/djangopush/djangopush/urls.py
该文件将如下所示:
"""untitled URL Configuration

The `urlpatterns` list routes URLs to views. For more information please see:
    https://docs.djangoproject.com/en/2.1/topics/http/urls/
Examples:
Function views
    1. Add an import:  from my_app import views
    2. Add a URL to urlpatterns:  path('', views.home, name='home')
Class-based views
    1. Add an import:  from other_app.views import Home
    2. Add a URL to urlpatterns:  path('', Home.as_view(), name='home')
Including another URLconf
    1. Import the include() function: from django.urls import include, path
    2. Add a URL to urlpatterns:  path('blog/', include('blog.urls'))
"""
from django.contrib import admin
from django.urls import path

urlpatterns = [
    path('admin/', admin.site.urls),
]
下一步是将您创建的视图映射到URL。 首先,添加include import以确保将Django-Webpush库的所有路由添加到项目中:
"""webpushdjango URL Configuration
...
"""
from django.contrib import admin
from django.urls import path, include
接下来,导入您在上一步中创建的视图,并更新urlpatterns列表以映射您的视图:
"""webpushdjango URL Configuration
...
"""
from django.contrib import admin
from django.urls import path, include

from .views import home, send_push

urlpatterns = [
                  path('admin/', admin.site.urls),
                  path('', home),
                  path('send_push', send_push),
                  path('webpush/', include('webpush.urls')),
              ]
这里, urlpatterns列表注册django-webpush包的URL,并将您的视图映射到URL /send_push和/home 。
让我们测试/home视图以确保它按预期工作。 确保您位于项目的根目录中:
cd ~/djangopush
运行以下命令启动服务器:
python manage.py runserver your_server_ip:8000
导航到http:// your_server_ip :8000 。 您应该看到以下主页:

此时,您可以使用CTRL+C服务器,我们将继续创建模板并使用render函数在视图中呈现它们。
第4步 - 创建模板
Django的模板引擎允许您使用与HTML文件类似的模板定义应用程序的面向用户层。 在此步骤中,您将为主视图创建和呈现模板。
在项目的根目录中创建一个名为templates的文件夹:
mkdir ~/djangopush/templates
如果此时在项目的根文件夹中运行ls ,输出将如下所示:
Output/djangopush
/templates
db.sqlite3
manage.py
/my_env
在templates文件夹中创建一个名为home.html的文件:
nano ~/djangopush/templates/home.html
将以下代码添加到文件中以创建一个表单,用户可以在其中输入信息以创建推送通知:
{% load static %}
<!DOCTYPE html>
<html lang="en">
<head>
    <meta charset="UTF-8">
    <meta name="viewport" content="width=device-width, initial-scale=1.0">
    <meta http-equiv="X-UA-Compatible" content="ie=edge">
    <meta name="vapid-key" content="{{ vapid_key }}">
    {% if user.id %}
        <meta name="user_id" content="{{ user.id }}">
    {% endif %}
    <title>Web Push</title>
    <link href="https://fonts.googleapis.com/css?family=PT+Sans:400,700" rel="stylesheet">
</head>

<body>
<div>
    <form id="send-push__form">
        <h3 class="header">Send a push notification</h3>
        <p class="error"></p>
        <input type="text" name="head" placeholder="Header: Your favorite airline ????">
        <textarea name="body" id="" cols="30" rows="10" placeholder="Body: Your flight has been cancelled ????????????"></textarea>
        <button>Send Me</button>
    </form>
</div>
</body>
</html>
文件的body包括一个带有两个字段的表单: input元素将保存通知的头部/标题,而textarea元素将保存通知主体。
在文件的head部分中,有两个meta标记将保存VAPID公钥和用户的id。 注册用户并向其发送推送通知需要这两个变量。 此处需要用户的id,因为您将向服务器发送AJAX请求,并且id将用于标识用户。 如果当前用户是注册用户,则模板将创建一个meta标记作为内容的meta标记。
下一步是告诉Django在哪里找到你的模板。 为此,您将编辑settings.py并更新TEMPLATES列表。
打开settings.py文件:
nano ~/djangopush/djangopush/settings.py
将以下内容添加到DIRS列表以指定模板目录的路径:
...
TEMPLATES = [
    {
        'BACKEND': 'django.template.backends.django.DjangoTemplates',
        'DIRS': [os.path.join(BASE_DIR, 'templates')],
        'APP_DIRS': True,
        'OPTIONS': {
            'context_processors': [
                ...
            ],
        },
    },
]
...
接下来,在views.py文件中,更新home视图以呈现home.html模板。 打开文件:
nano ~/djangpush/djangopush/views.py
首先,添加一些其他导入,包括settings配置,其中包含settings.py文件中的所有项目settings.py ,以及来自django.shortcuts的render功能:
...
from django.shortcuts import render, get_object_or_404
...
import json
from django.conf import settings

...
接下来,删除您添加到home视图的初始代码并添加以下内容,该代码指定您刚创建的模板将如何呈现:
...

@require_GET
def home(request):
   webpush_settings = getattr(settings, 'WEBPUSH_SETTINGS', {})
   vapid_key = webpush_settings.get('VAPID_PUBLIC_KEY')
   user = request.user
   return render(request, 'home.html', {user: user, 'vapid_key': vapid_key})
代码分配以下变量:
-
webpush_settings:从settings配置中WEBPUSH_SETTINGS分配WEBPUSH_SETTINGS属性的值。 -
vapid_key:这从webpush_settings对象获取VAPID_PUBLIC_KEY值以发送到客户端。 根据私钥检查此公钥,以确保允许具有公钥的客户端从服务器接收推送消息。 -
user:此变量来自传入请求。 每当用户向服务器发出请求时,该用户的详细信息都存储在user字段中。
render函数将返回一个HTML文件和一个包含当前用户和服务器的vapid公钥的上下文对象 。 这里需要三个参数: request ,要呈现的template以及包含将在模板中使用的变量的对象。
通过创建模板并更新home视图,我们可以继续配置Django来提供静态文件。
第5步 - 提供静态文件
Web应用程序包括CSS,JavaScript和Django称为“静态文件”的其他图像文件。 Django允许您将项目中每个应用程序的所有静态文件收集到一个位置,从中提供服务。 此解决方案称为django.contrib.staticfiles 。 在这一步中,我们将更新我们的设置,告诉Django我们的静态文件将存储在哪里。
打开settings.py :
nano ~/djangopush/djangopush/settings.py
在settings.py ,首先确保已定义STATIC_URL :
...
STATIC_URL = '/static/'
接下来,添加一个名为STATICFILES_DIRS的目录列表,其中Django将查找静态文件:
...
STATIC_URL = '/static/'
STATICFILES_DIRS = [
    os.path.join(BASE_DIR, "static"),
]
您现在可以将STATIC_URL添加到urls.py文件中定义的路径列表中。
打开文件:
nano ~/djangopush/djangopush/urls.py
添加以下代码,该代码将导入static URL配置并更新urlpatterns列表。 这里的辅助函数使用我们在settings.py文件中提供的STATIC_URL和STATIC_ROOT属性来提供项目的静态文件:
...
from django.conf import settings
from django.conf.urls.static import static

urlpatterns = [
    ...
] + static(settings.STATIC_URL, document_root=settings.STATIC_ROOT)
通过配置我们的静态文件设置,我们可以继续设置应用程序主页的样式。
第6步 - 设置主页样式
在设置应用程序以提供静态文件后,您可以创建外部样式表并将其链接到home.html文件以设置主页样式。 所有静态文件都将存储在项目根文件夹中的static目录中。
在static文件夹中创建static文件夹和css文件夹:
mkdir -p ~/djangopush/static/css
在css文件夹styles.css打开一个名为styles.css的css文件:
nano ~/djangopush/static/css/styles.css
为主页添加以下样式:
body {
    height: 100%;
    background: rgba(0, 0, 0, 0.87);
    font-family: 'PT Sans', sans-serif;
}

div {
    height: 100%;
    display: flex;
    align-items: center;
    justify-content: center;
}

form {
    display: flex;
    flex-direction: column;
    align-items: center;
    justify-content: center;
    width: 35%;
    margin: 10% auto;
}

form > h3 {
    font-size: 17px;
    font-weight: bold;
    margin: 15px 0;
    color: orangered;
    text-transform: uppercase;
}

form > .error {
    margin: 0;
    font-size: 15px;
    font-weight: normal;
    color: orange;
    opacity: 0.7;
}

form > input, form > textarea {
    border: 3px solid orangered;
    box-shadow: unset;
    padding: 13px 12px;
    margin: 12px auto;
    width: 80%;
    font-size: 13px;
    font-weight: 500;
}

form > input:focus, form > textarea:focus {
    border: 3px solid orangered;
    box-shadow: 0 2px 3px 0 rgba(0, 0, 0, 0.2);
    outline: unset;
}

form > button {
    justify-self: center;
    padding: 12px 25px;
    border-radius: 0;
    text-transform: uppercase;
    font-weight: 600;
    background: orangered;
    color: white;
    border: none;
    font-size: 14px;
    letter-spacing: -0.1px;
    cursor: pointer;
}

form > button:disabled {
    background: dimgrey;
    cursor: not-allowed;
}
创建样式表后,您可以使用静态模板标记将其链接到home.html文件。 打开home.html文件:
nano ~/djangopush/templates/home.html
更新head部分以包含指向外部样式表的链接:
{% load static %}
<!DOCTYPE html>
<html lang="en">

<head>
    ...
    <link href="{% static '/css/styles.css' %}" rel="stylesheet">
</head>
<body>
    ...
</body>
</html>
确保您位于主项目目录中并再次启动服务器以检查您的工作:
cd ~/djangopush
python manage.py runserver your_server_ip:8000
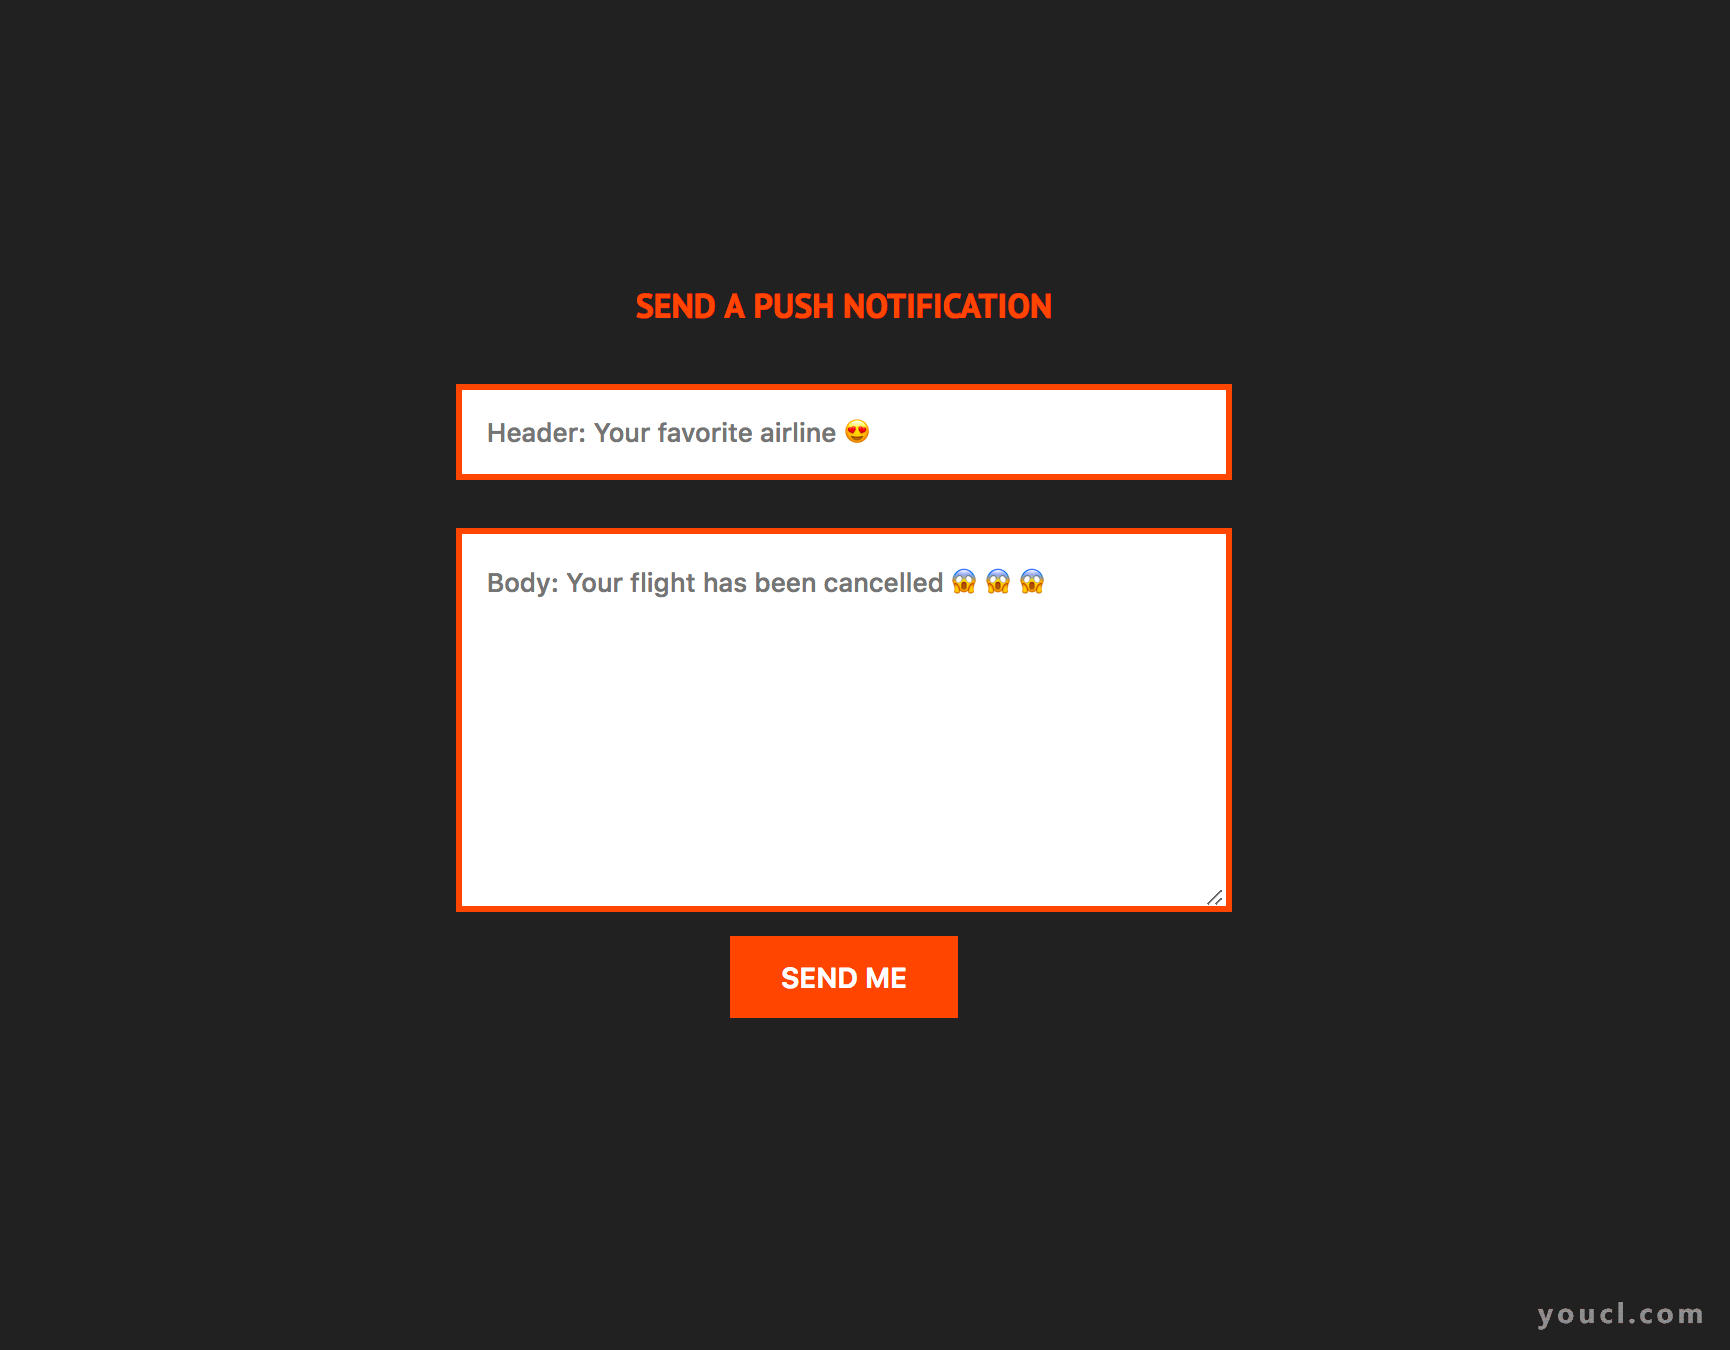
当您访问http:// your_server_ip :8000 ,它应如下所示:
同样,您可以使用CTRL+C服务器。
现在您已成功创建home.html页面并对其进行样式设置,您可以订阅用户在访问主页时推送通知。
第7步 - 注册服务工作者和订阅用户以推送通知
Web推送通知可以在订阅了应用程序的更新时通知用户,或者提示他们重新使用他们过去使用过的应用程序。 它们依赖于两种技术,即推送 API和通知 API。 这两种技术都依赖于服务工作者的存在。
当服务器向服务工作者提供信息并且服务工作者使用通知API显示此信息时,将调用推送。
我们将订阅我们的用户推送,然后我们将订阅的信息发送到服务器进行注册。
在static目录中,创建一个名为js的文件夹:
mkdir ~/djangopush/static/js
创建一个名为registerSw.js的文件:
nano ~/djangopush/static/js/registerSw.js
添加以下代码,在尝试注册服务工作者之前检查用户浏览器是否支持服务工作者:
const registerSw = async () => {
    if ('serviceWorker' in navigator) {
        const reg = await navigator.serviceWorker.register('sw.js');
        initialiseState(reg)

    } else {
        showNotAllowed("You can't send push notifications ☹️????")
    }
};
首先, registerSw函数在注册之前检查浏览器是否支持服务工作者。 注册后,它会使用注册数据调用initializeState函数。 如果浏览器不支持服务工作者,则调用showNotAllowed函数。
接下来,在registerSw函数下面添加以下代码,以检查用户是否有资格在尝试订阅之前接收推送通知:
...

const initialiseState = (reg) => {
    if (!reg.showNotification) {
        showNotAllowed('Showing notifications isn\'t supported ☹️????');
        return
    }
    if (Notification.permission === 'denied') {
        showNotAllowed('You prevented us from showing notifications ☹️????');
        return
    }
    if (!'PushManager' in window) {
        showNotAllowed("Push isn't allowed in your browser ????");
        return
    }
    subscribe(reg);
}

const showNotAllowed = (message) => {
    const button = document.querySelector('form>button');
    button.innerHTML = `${message}`;
    button.setAttribute('disabled', 'true');
};
initializeState函数检查以下内容:
- 用户是否已启用通知,使用
reg.showNotification的值。 - 用户是否已授予显示通知的应用程序权限。
- 浏览器是否支持
PushManagerAPI。 如果这些检查中的任何一个失败,则调用showNotAllowed函数并中止订阅。
showNotAllowed函数在按钮上显示一条消息,如果用户没有资格接收通知,则禁用该消息。 如果用户限制应用程序显示通知或浏览器不支持推送通知,它还会显示相应的消息。
一旦我们确保用户有资格接收推送通知,下一步就是使用pushManager订阅它们。 在showNotAllowed函数下面添加以下代码:
...

function urlB64ToUint8Array(base64String) {
    const padding = '='.repeat((4 - base64String.length % 4) % 4);
    const base64 = (base64String + padding)
        .replace(/\-/g, '+')
        .replace(/_/g, '/');

    const rawData = window.atob(base64);
    const outputArray = new Uint8Array(rawData.length);
    const outputData = outputArray.map((output, index) => rawData.charCodeAt(index));

    return outputData;
}

const subscribe = async (reg) => {
    const subscription = await reg.pushManager.getSubscription();
    if (subscription) {
        sendSubData(subscription);
        return;
    }

    const vapidMeta = document.querySelector('meta[name="vapid-key"]');
    const key = vapidMeta.content;
    const options = {
        userVisibleOnly: true,
        // if key exists, create applicationServerKey property
        ...(key && {applicationServerKey: urlB64ToUint8Array(key)})
    };

    const sub = await reg.pushManager.subscribe(options);
    sendSubData(sub)
};
调用pushManager.getSubscription函数将返回活动订阅的数据。 当存在活动订阅时,将sendSubData函数,并将订阅信息作为参数传入。
如果不存在活动订阅,则使用urlB64ToUint8Array函数将Base64 URL安全编码的VAPID公钥转换为urlB64ToUint8Array 。 然后使用VAPID公钥和userVisible值作为选项userVisible 。 您可以在此处阅读有关可用选项的更多信息。
成功订阅用户后,下一步是将订阅数据发送到服务器。 数据将被发送到django-webpush包提供的webpush/save_information端点。 在subscribe函数下面添加以下代码:
...

const sendSubData = async (subscription) => {
    const browser = navigator.userAgent.match(/(firefox|msie|chrome|safari|trident)/ig)[0].toLowerCase();
    const data = {
        status_type: 'subscribe',
        subscription: subscription.toJSON(),
        browser: browser,
    };

    const res = await fetch('/webpush/save_information', {
        method: 'POST',
        body: JSON.stringify(data),
        headers: {
            'content-type': 'application/json'
        },
        credentials: "include"
    });

    handleResponse(res);
};

const handleResponse = (res) => {
    console.log(res.status);
};

registerSw();
save_information端点需要有关订阅状态( subscribe和unsubscribe ),订阅数据和浏览器的信息。 最后,我们调用registerSw()函数开始订阅用户的过程。
完成的文件如下所示:
const registerSw = async () => {
    if ('serviceWorker' in navigator) {
        const reg = await navigator.serviceWorker.register('sw.js');
        initialiseState(reg)

    } else {
        showNotAllowed("You can't send push notifications ☹️????")
    }
};

const initialiseState = (reg) => {
    if (!reg.showNotification) {
        showNotAllowed('Showing notifications isn\'t supported ☹️????');
        return
    }
    if (Notification.permission === 'denied') {
        showNotAllowed('You prevented us from showing notifications ☹️????');
        return
    }
    if (!'PushManager' in window) {
        showNotAllowed("Push isn't allowed in your browser ????");
        return
    }
    subscribe(reg);
}

const showNotAllowed = (message) => {
    const button = document.querySelector('form>button');
    button.innerHTML = `${message}`;
    button.setAttribute('disabled', 'true');
};

function urlB64ToUint8Array(base64String) {
    const padding = '='.repeat((4 - base64String.length % 4) % 4);
    const base64 = (base64String + padding)
        .replace(/\-/g, '+')
        .replace(/_/g, '/');

    const rawData = window.atob(base64);
    const outputArray = new Uint8Array(rawData.length);
    const outputData = outputArray.map((output, index) => rawData.charCodeAt(index));

    return outputData;
}

const subscribe = async (reg) => {
    const subscription = await reg.pushManager.getSubscription();
    if (subscription) {
        sendSubData(subscription);
        return;
    }

    const vapidMeta = document.querySelector('meta[name="vapid-key"]');
    const key = vapidMeta.content;
    const options = {
        userVisibleOnly: true,
        // if key exists, create applicationServerKey property
        ...(key && {applicationServerKey: urlB64ToUint8Array(key)})
    };

    const sub = await reg.pushManager.subscribe(options);
    sendSubData(sub)
};

const sendSubData = async (subscription) => {
    const browser = navigator.userAgent.match(/(firefox|msie|chrome|safari|trident)/ig)[0].toLowerCase();
    const data = {
        status_type: 'subscribe',
        subscription: subscription.toJSON(),
        browser: browser,
    };

    const res = await fetch('/webpush/save_information', {
        method: 'POST',
        body: JSON.stringify(data),
        headers: {
            'content-type': 'application/json'
        },
        credentials: "include"
    });

    handleResponse(res);
};

const handleResponse = (res) => {
    console.log(res.status);
};

registerSw();
接下来,在home.html为registerSw.js文件添加script标记。 打开文件:
nano ~/djangopush/templates/home.html
在body元素的结束标记之前添加script标记:
{% load static %}
<!DOCTYPE html>
<html lang="en">

<head>
   ...
</head>
<body>
   ...
   <script src="{% static '/js/registerSw.js' %}"></script>
</body>
</html>
由于服务工作者尚不存在,如果您使应用程序继续运行或尝试再次启动它,您将看到错误消息。 让我们通过创建服务工作者来解决这个问题。
第8步 - 创建服务工作者
要显示推送通知,您需要在应用程序主页上安装活动服务工作程序。 我们将创建一个服务工作者,用于监听push事件并在准备好后显示消息。
因为我们希望服务工作者的范围是整个域,所以我们需要将其安装在应用程序的根目录中。 您可以在本文中详细了解如何注册服务工作者的过程 。 我们的方法是在templates文件夹中创建一个sw.js文件,然后我们将其注册为视图。
创建文件:
nano ~/djangopush/templates/sw.js
添加以下代码,告诉服务工作者监听推送事件:
// Register event listener for the 'push' event.
self.addEventListener('push', function (event) {
    // Retrieve the textual payload from event.data (a PushMessageData object).
    // Other formats are supported (ArrayBuffer, Blob, JSON), check out the documentation
    // on https://developer.mozilla.org/en-US/docs/Web/API/PushMessageData.
    const eventInfo = event.data.text();
    const data = JSON.parse(eventInfo);
    const head = data.head || 'New Notification ????????';
    const body = data.body || 'This is default content. Your notification didn\'t have one ????????';

    // Keep the service worker alive until the notification is created.
    event.waitUntil(
        self.registration.showNotification(head, {
            body: body,
            icon: 'https://www.youcl.com/uploads/MZM3K5w.png'
        })
    );
});
服务工作者监听推送事件。 在回调函数中, event数据将转换为文本。 如果事件数据没有,我们使用默认的title和body字符串。 showNotification函数将通知标题,要显示的通知的标题和选项对象作为参数。 options对象包含几个属性,用于配置通知的可视选项。
要使您的服务工作者能够在整个域中工作,您需要将其安装在应用程序的根目录中。 我们将使用TemplateView来允许服务工作者访问整个域。
打开urls.py文件:
nano ~/djangopush/djangopush/urls.py
在urlpatterns列表中添加新的import语句和路径以创建基于类的视图:
...
from django.views.generic import TemplateView

urlpatterns = [
                  ...,
                  path('sw.js', TemplateView.as_view(template_name='sw.js', content_type='application/x-javascript'))
              ] + static(settings.STATIC_URL, document_root=settings.STATIC_ROOT)
像TemplateView这样的基于类的视图允许您创建灵活,可重用的视图。 在这种情况下, TemplateView.as_view方法通过将最近创建的服务工作者作为模板并将application/x-javascript作为模板的content_type传递来为服务工作者创建路径。
您现在已经创建了一个服务工作者并将其注册为路由。 接下来,您将在主页上设置表单以发送推送通知。
第9步 - 发送推送通知
使用主页上的表单,用户应该能够在服务器运行时发送推送通知。 您还可以使用Postman等任何RESTful服务发送推送通知。 When the user sends push notifications from the form on the home page, the data will include a head and body , as well as the id of the receiving user. The data should be structured in the following manner:
{
    head: "Title of the notification",
    body: "Notification body",
    id: "User's id"
}
To listen for the submit event of the form and send the data entered by the user to the server, we will create a file called site.js in the ~/djangopush/static/js directory.
Open the file:
nano ~/djangopush/static/js/site.js
First, add a submit event listener to the form that will enable you to get the values of the form inputs and the user id stored in the meta tag of your template:
const pushForm = document.getElementById('send-push__form');
const errorMsg = document.querySelector('.error');

pushForm.addEventListener('submit', async function (e) {
    e.preventDefault();
    const input = this[0];
    const textarea = this[1];
    const button = this[2];
    errorMsg.innerText = '';

    const head = input.value;
    const body = textarea.value;
    const meta = document.querySelector('meta[name="user_id"]');
    const id = meta ? meta.content : null;
    ...
    // TODO: make an AJAX request to send notification
});
The pushForm function gets the input , textarea , and button inside the form. It also gets the information from the meta tag, including the name attribute user_id and the user's id stored in the content attribute of the tag. With this information, it can send a POST request to the /send_push endpoint on the server.
To send requests to the server, we'll use the native Fetch API. We're using Fetch here because it is supported by most browsers and doesn't require external libraries to function. Below the code you've added, update the pushForm function to include the code for sending AJAX requests:
const pushForm = document.getElementById('send-push__form');
const errorMsg = document.querySelector('.error');

pushForm.addEventListener('submit', async function (e) {
     ...
    const id = meta ? meta.content : null;

     if (head && body && id) {
        button.innerText = 'Sending...';
        button.disabled = true;

        const res = await fetch('/send_push', {
            method: 'POST',
            body: JSON.stringify({head, body, id}),
            headers: {
                'content-type': 'application/json'
            }
        });
        if (res.status === 200) {
            button.innerText = 'Send another ????!';
            button.disabled = false;
            input.value = '';
            textarea.value = '';
        } else {
            errorMsg.innerText = res.message;
            button.innerText = 'Something broke ????..  Try again?';
            button.disabled = false;
        }
    }
    else {
        let error;
        if (!head || !body){
            error = 'Please ensure you complete the form ????????'
        }
        else if (!id){
            error = "Are you sure you're logged in? ????. Make sure! ????????"
        }
        errorMsg.innerText = error;
    }
});
If the three required parameters head , body , and id are present, we send the request and disable the submit button temporarily.
The completed file looks like this:
const pushForm = document.getElementById('send-push__form');
const errorMsg = document.querySelector('.error');

pushForm.addEventListener('submit', async function (e) {
    e.preventDefault();
    const input = this[0];
    const textarea = this[1];
    const button = this[2];
    errorMsg.innerText = '';

    const head = input.value;
    const body = textarea.value;
    const meta = document.querySelector('meta[name="user_id"]');
    const id = meta ? meta.content : null;

    if (head && body && id) {
        button.innerText = 'Sending...';
        button.disabled = true;

        const res = await fetch('/send_push', {
            method: 'POST',
            body: JSON.stringify({head, body, id}),
            headers: {
                'content-type': 'application/json'
            }
        });
        if (res.status === 200) {
            button.innerText = 'Send another ????!';
            button.disabled = false;
            input.value = '';
            textarea.value = '';
        } else {
            errorMsg.innerText = res.message;
            button.innerText = 'Something broke ????..  Try again?';
            button.disabled = false;
        }
    }
    else {
        let error;
        if (!head || !body){
            error = 'Please ensure you complete the form ????????'
        }
        else if (!id){
            error = "Are you sure you're logged in? ????. Make sure! ????????"
        }
        errorMsg.innerText = error;
    }
});
Finally, add the site.js file to home.html :
nano ~/djangopush/templates/home.html
Add the script tag:
{% load static %}
<!DOCTYPE html>
<html lang="en">

<head>
   ...
</head>
<body>
   ...
   <script src="{% static '/js/site.js' %}"></script>
</body>
</html>
At this point, if you left your application running or tried to start it again, you would see an error, since service workers can only function in secure domains or on localhost . In the next step we'll use ngrok to create a secure tunnel to our web server.
Step 10 — Creating a Secure Tunnel to Test the Application
Service workers require secure connections to function on any site except localhost since they can allow connections to be hijacked and responses to be filtered and fabricated. For this reason, we'll create a secure tunnel for our server with ngrok .
Open a second terminal window and ensure you're in your home directory:
cd ~
If you started with a clean 18.04 server in the prerequisites, then you will need to install unzip :
sudo apt update && sudo apt install unzip
Download ngrok:
wget https://bin.equinox.io/c/4VmDzA7iaHb/ngrok-stable-linux-amd64.zip
unzip ngrok-stable-linux-amd64.zip
Move ngrok to /usr/local/bin , so that you will have access to the ngrok command from the terminal:
sudo mv ngrok /usr/local/bin
In your first terminal window, make sure that you are in your project directory and start your server:
cd ~/djangopush
python manage.py runserver your_server_ip:8000
You will need to do this before creating a secure tunnel for your application.
In your second terminal window, navigate to your project folder, and activate your virtual environment:
cd ~/djangopush
source my_env/bin/activate
Create the secure tunnel to your application:
ngrok http your_server_ip:8000
You will see the following output, which includes information about your secure ngrok URL:
Outputngrok by @inconshreveable                                                                                                                       (Ctrl+C to quit)

Session Status                online
Session Expires               7 hours, 59 minutes
Version                       2.2.8
Region                        United States (us)
Web Interface                 http://127.0.0.1:4040
Forwarding                    http://ngrok_secure_url -> 203.0.113.0:8000
Forwarding                    https://ngrok_secure_url -> 203.0.113.0:8000

Connections                   ttl     opn     rt1     rt5     p50     p90
                              0       0       0.00    0.00    0.00    0.00
Copy the ngrok_secure_url from the console output. You will need to add it to the list of ALLOWED_HOSTS in your settings.py file.
Open another terminal window, navigate to your project folder, and activate your virtual environment:
cd ~/djangopush
source my_env/bin/activate
Open the settings.py file:
nano ~/djangopush/djangopush/settings.py
Update the list of ALLOWED_HOSTS with the ngrok secure tunnel:
...

ALLOWED_HOSTS = ['your_server_ip', 'ngrok_secure_url']
...
Navigate to the secure admin page to log in: https:// ngrok_secure_url /admin/ . You will see a screen that looks like this:
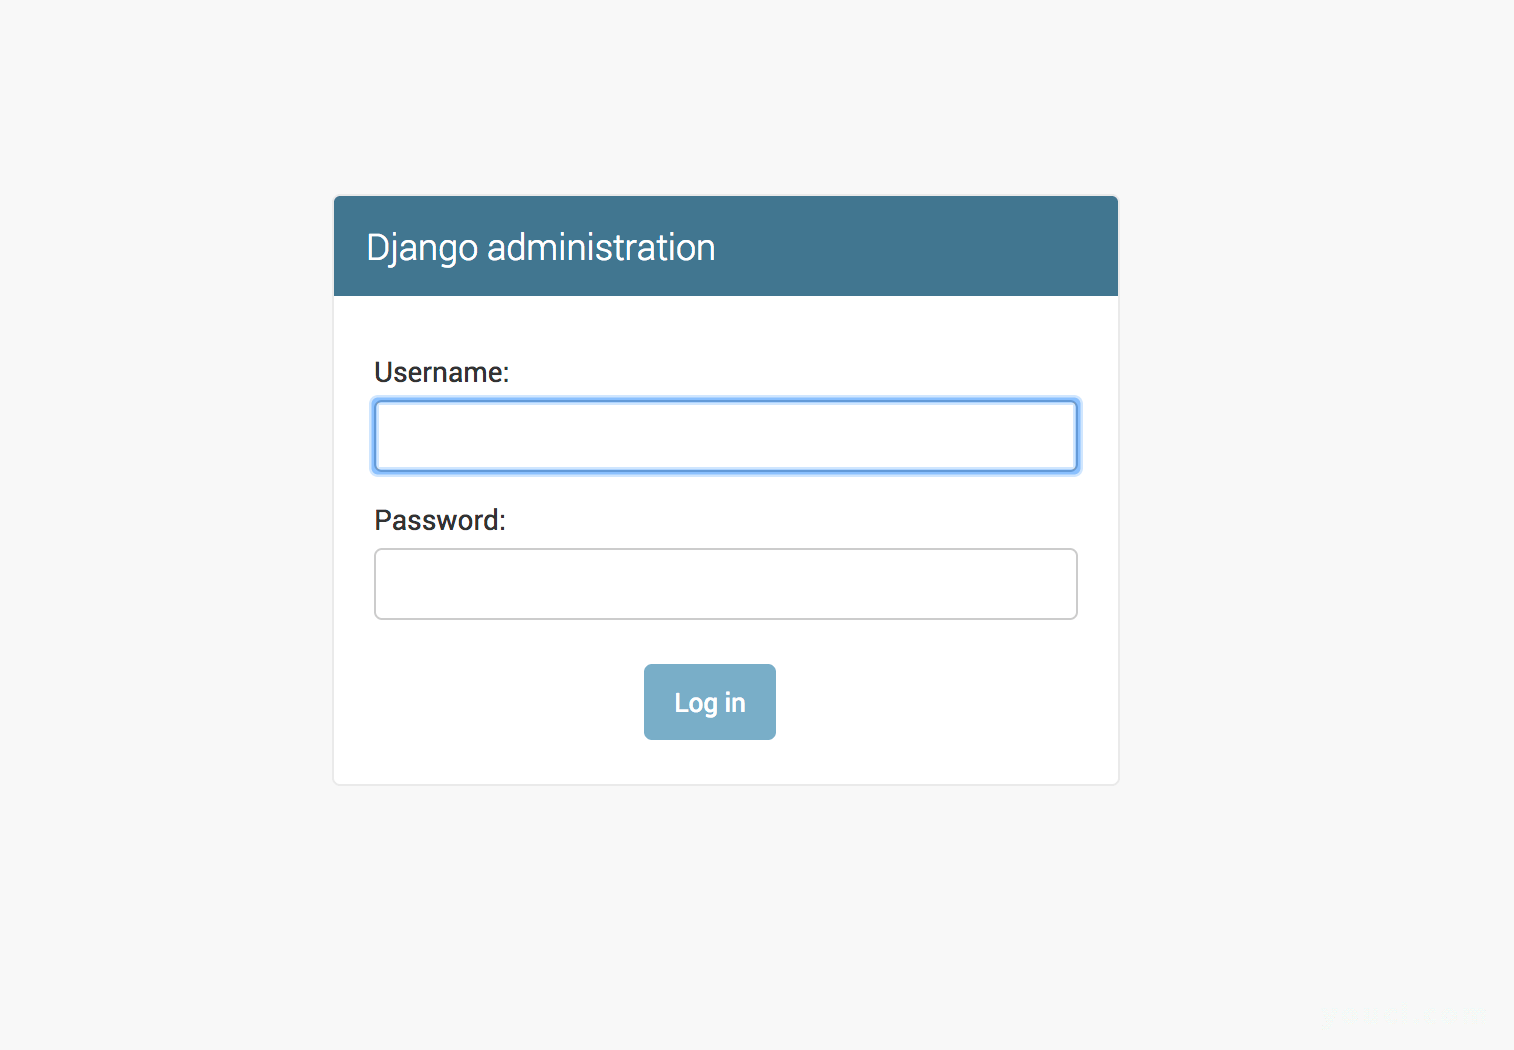
Enter your Django admin user information on this screen. This should be the same information you entered when you logged into the admin interface in the prerequisite steps . You are now ready to send push notifications.
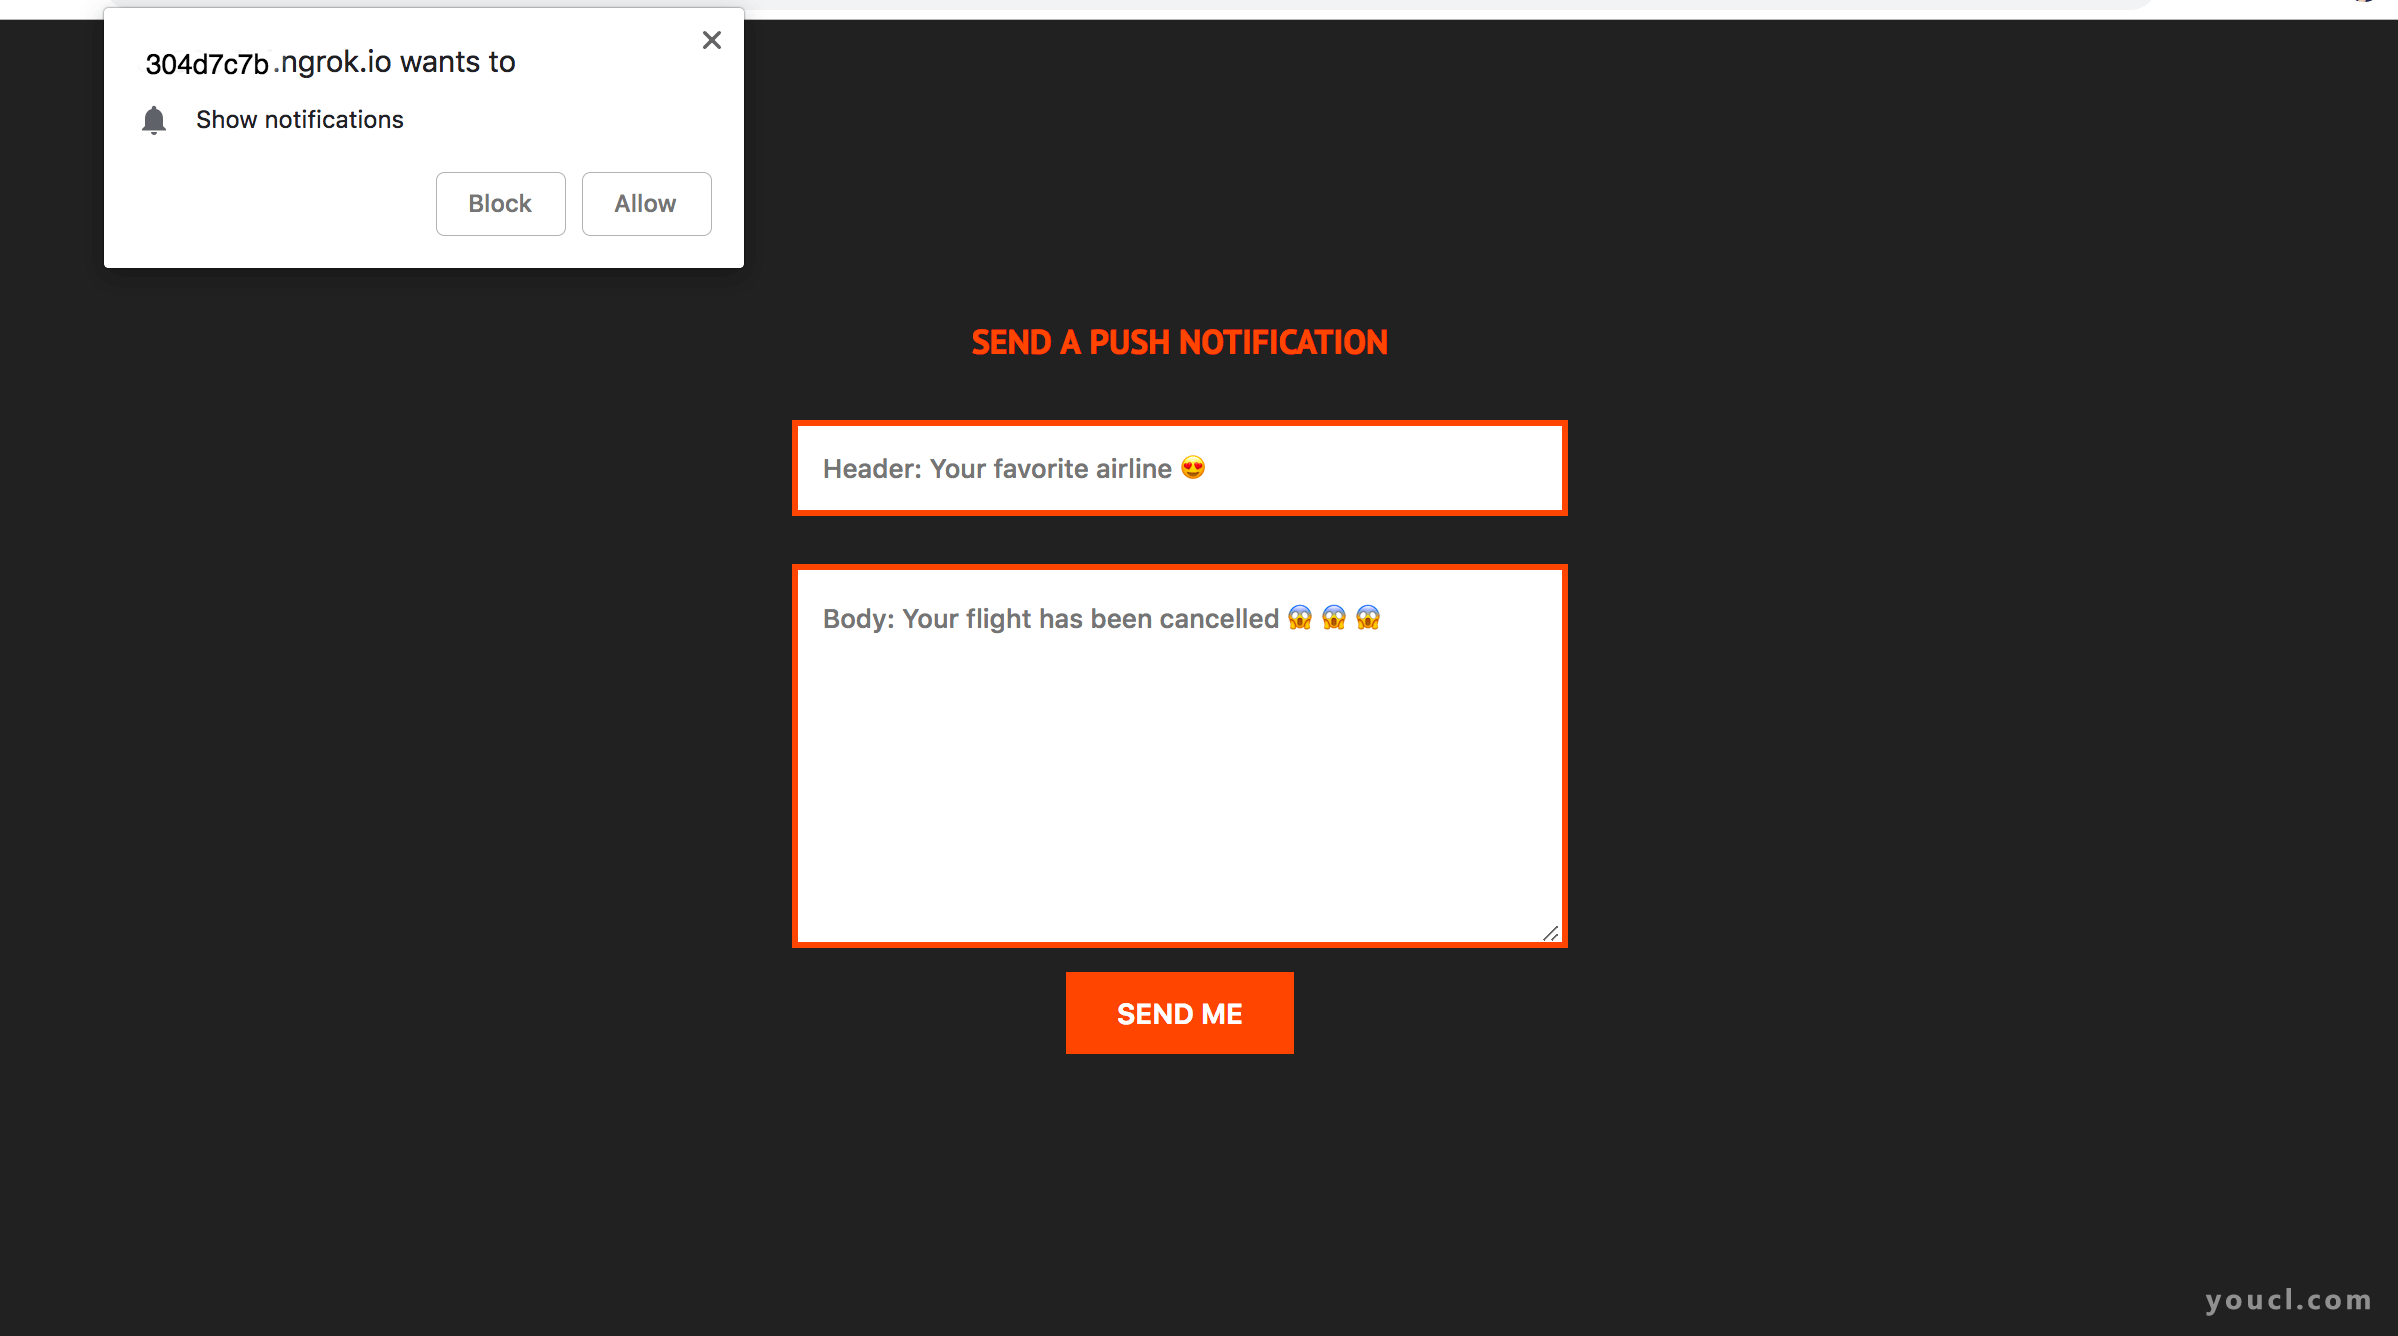
Visit https:// ngrok_secure_url in your browser. You will see a prompt asking for permission to display notifications. Click the Allow button to let your browser display push notifications:
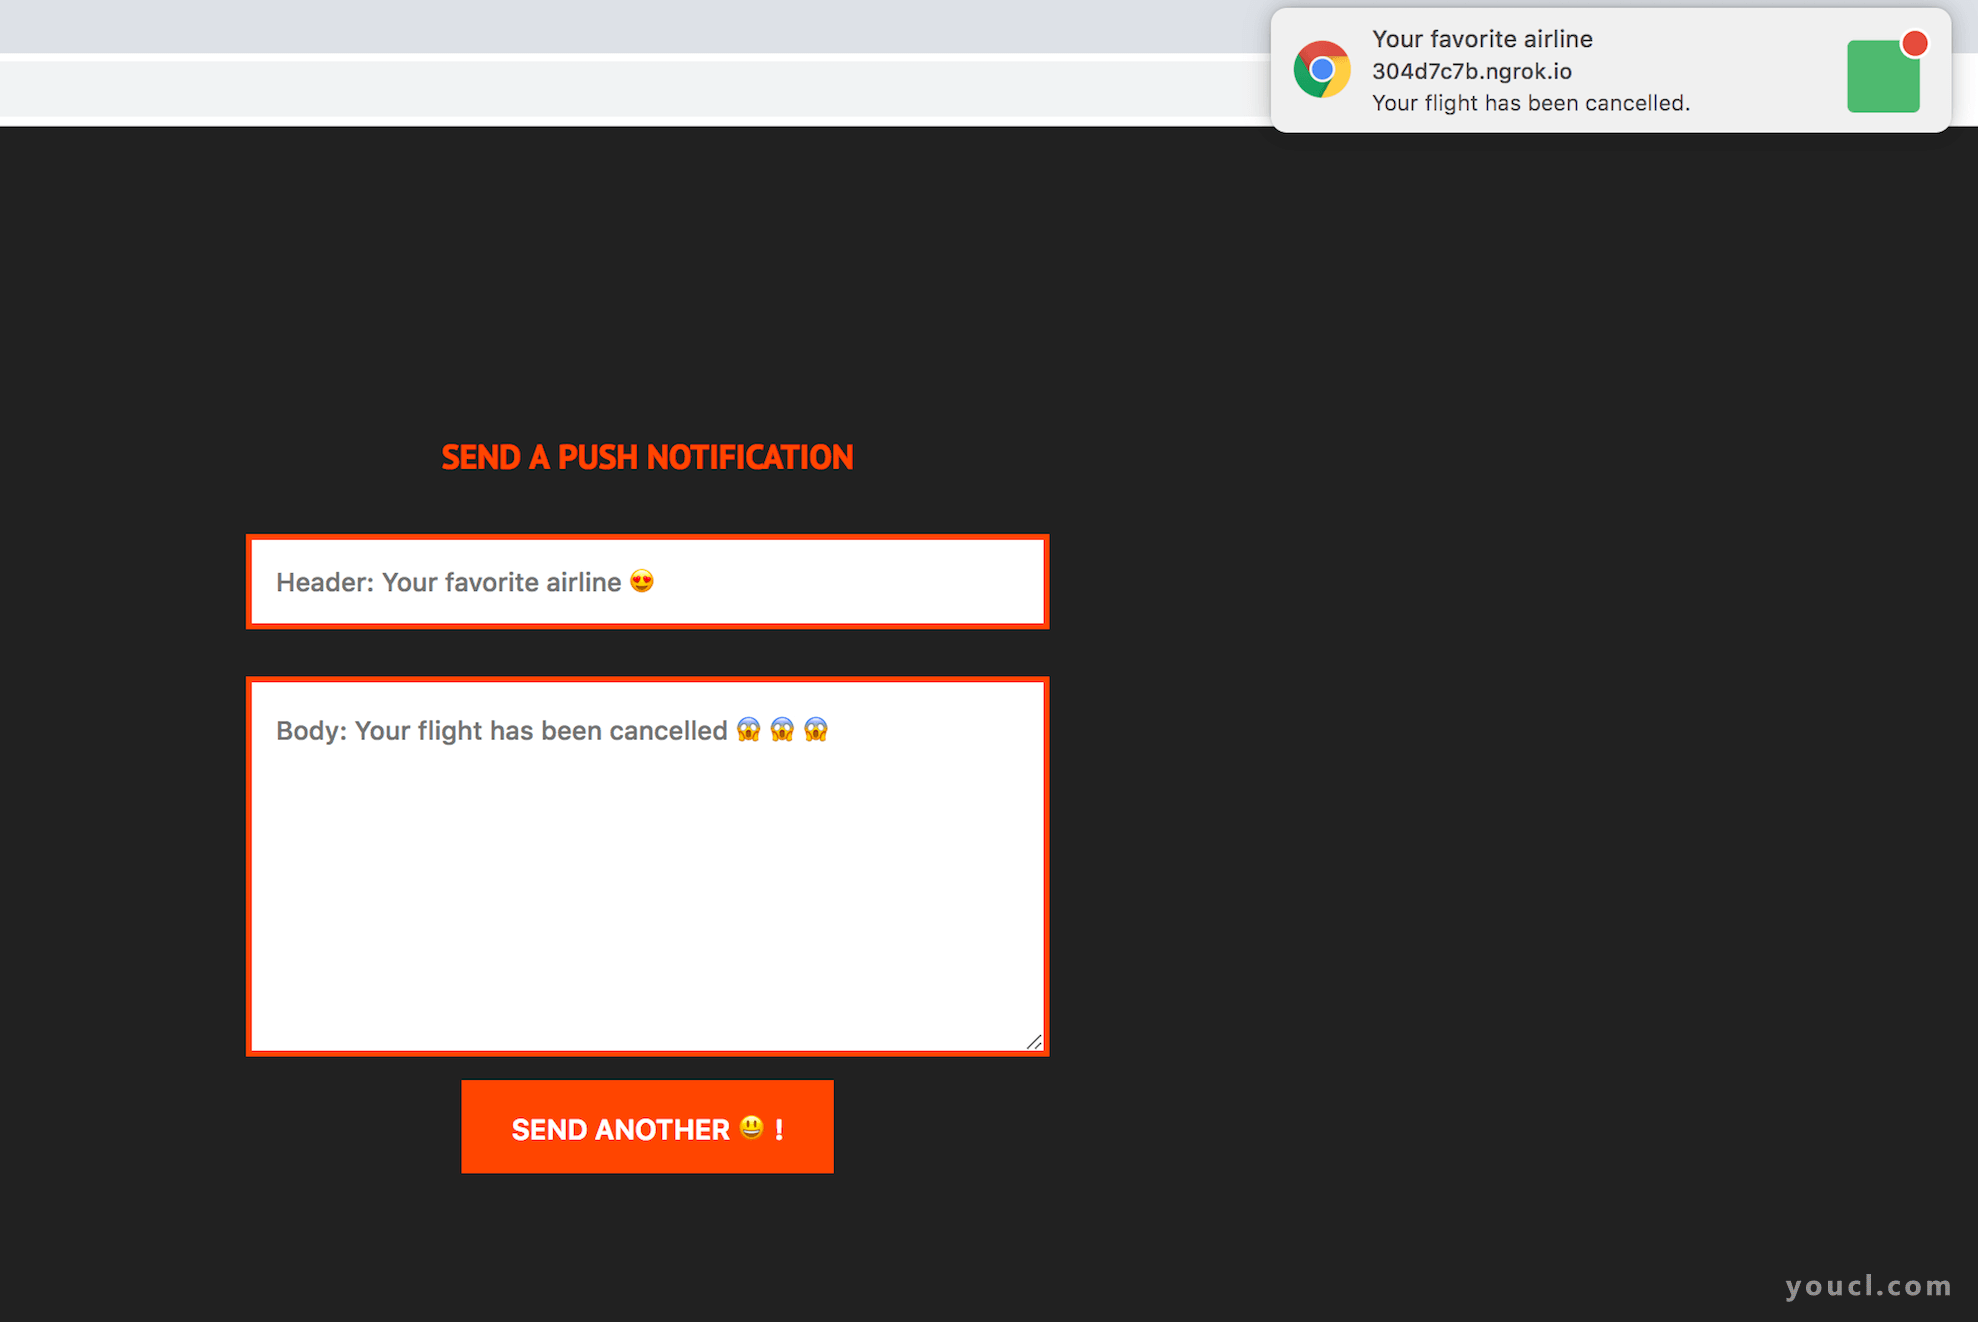
Submitting a filled form will display a notification similar to this:
Note: Be sure that your server is running before attempting to send notifications.
If you received notifications then your application is working as expected.
You have created a web application that triggers push notifications on the server and, with the help of service workers, receives and displays notifications. You also went through the steps of obtaining the VAPID keys that are required to send push notifications from an application server.
结论
In this tutorial, you've learned how to subscribe users to push notifications, install service workers, and display push notifications using the notifications API.
You can go even further by configuring the notifications to open specific areas of your application when clicked. The source code for this tutorial can be found here .


