在Linux中安装最新的MySQL 5.7.9
第1步:添加MySQL Yum存储库
1.我们将使用 MySQL官方 Yum软件仓库,这将提供RPM包安装最新版本的MySQL服务器,客户端,MySQL的工具,MySQL的工作台,连接器/ ODBC,以及连接器/ Python中的 RHEL / CentOS 7/6 / 5和 Fedora 23-21。 重要提示 :这些说明仅适用于新安装的MySQL服务器上,如果已经使用了第三方分布式RPM程序包安装的MySQL,那么我建议你升级或使用 MySQLYum库 “取代MySQL安装包。 在升级或更换旧MySQL包之前,不要忘记采取所有重要的数据库备份和配置文件。 2.现在下载和下面的 MySQLYum库添加到您的各自的Linux发行版系统的资料库列表安装最新版本的MySQL(即 5.7.9 2015年10月发布的 21)。--------------- On RHEL/CentOS 7 --------------- # wget http://dev.mysql.com/get/mysql57-community-release-el7-7.noarch.rpm
--------------- On RHEL/CentOS 6 ---------------
# wget http://dev.mysql.com/get/mysql57-community-release-el6-7.noarch.rpm
--------------- On RHEL/CentOS 5 ---------------
# wget http://dev.mysql.com/get/mysql57-community-release-el5-7.noarch.rpm
--------------- On Fedora 23 ---------------
# wget http://dev.mysql.com/get/mysql57-community-release-fc23-7.noarch.rpm
--------------- On Fedora 22 ---------------
# wget http://dev.mysql.com/get/mysql57-community-release-fc22-7.noarch.rpm
--------------- On Fedora 21 --------------- # wget http://dev.mysql.com/get/mysql57-community-release-fc21-7.noarch.rpm3.下载包为您的Linux平台后,现在用以下命令安装下载的软件包。
--------------- On RHEL/CentOS 7 ---------------
# yum localinstall mysql57-community-release-el7-7.noarch.rpm
--------------- On RHEL/CentOS 6 ---------------
# yum localinstall mysql57-community-release-el6-7.noarch.rpm
--------------- On RHEL/CentOS 5 ---------------
# yum localinstall mysql57-community-release-el5-7.noarch.rpm
--------------- On Fedora 23 ---------------
# dnf localinstall mysql57-community-release-fc23-7.noarch.rpm
--------------- On Fedora 22 ---------------
# dnf localinstall mysql57-community-release-fc22-7.noarch.rpm
--------------- On Fedora 21 ---------------
# yum localinstall mysql57-community-release-fc21-7.noarch.rpm
上述安装命令将 MySQL的Yum存储库系统的存储库列表,并下载GnuPG密钥验证软件包的完整性。 4.您可以验证的MySQL资料库Yum已使用以下命令添加成功。
# yum repolist enabled | grep "mysql.*-community.*"
# dnf repolist enabled | grep "mysql.*-community.*"      [On Fedora 22+ versions]
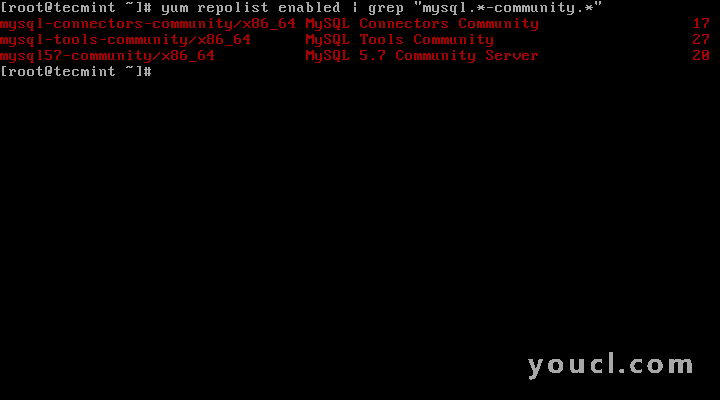
验证MySQL Yum存储库
第2步:安装最新的MySQL版本
5.使用以下命令安装最新版本的 MySQL(目前为 5.7)的。# yum install mysql-community-server # dnf install mysql-community-server [On Fedora 22+ versions]以上命令安装MySQL服务器mysql-community-server,mysql-community-client,mysql-community-common和mysql-community-libs所需的所有软件包。
第3步:安装MySQL发行版系列
6.您也可以使用MySQL社区服务器的不同子库安装不同的MySQL版本。 子库为近期MySQL的系列(目前 的MySQL 5.7),默认情况下启用,对于所有其他版本的子库(例如,MySQL的5.6或5.5系列)默认情况下禁用。 要安装特定子库中特定的版本,你可以用--enable或
--disable使用
yum-配置管理器或
DNF的配置管理器的选项,如下所示:
# yum-config-manager --disable mysql57-community
# yum-config-manager --enable mysql56-community
------------------ Fedora 22+ Versions ------------------
# dnf config-manager --disable mysql57-community
# dnf config-manager --enable mysql56-community
第4步:启动MySQL服务器
7.成功安装的MySQL后,是时候开始用下面的命令MySQL服务器:# service mysqld start您可以使用以下命令的帮助验证MySQL服务器的状态。
# service mysqld status这是在我的CentOS 7框下运行MySQL的示例输出。
Redirecting to /bin/systemctl status  mysqld.service
mysqld.service - MySQL Server
Loaded: loaded (/usr/lib/systemd/system/mysqld.service; enabled)
Active: active (running) since Thu 2015-10-29 05:15:19 EDT; 4min 5s ago
Process: 5314 ExecStart=/usr/sbin/mysqld --daemonize $MYSQLD_OPTS (code=exited, status=0/SUCCESS)
Process: 5298 ExecStartPre=/usr/bin/mysqld_pre_systemd (code=exited, status=0/SUCCESS)
Main PID: 5317 (mysqld)
CGroup: /system.slice/mysqld.service
└─5317 /usr/sbin/mysqld --daemonize
Oct 29 05:15:19 localhost.localdomain systemd[1]: Started MySQL Server.
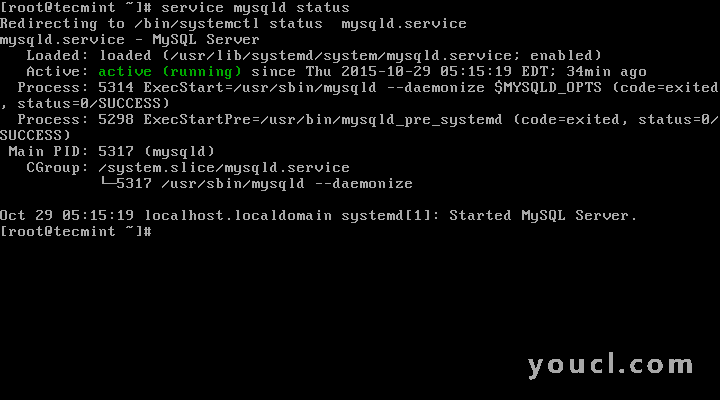
检查Mysql状态
# mysql --version
mysql  Ver 14.14 Distrib 5.7.9, for Linux (x86_64) using  EditLine wrapper
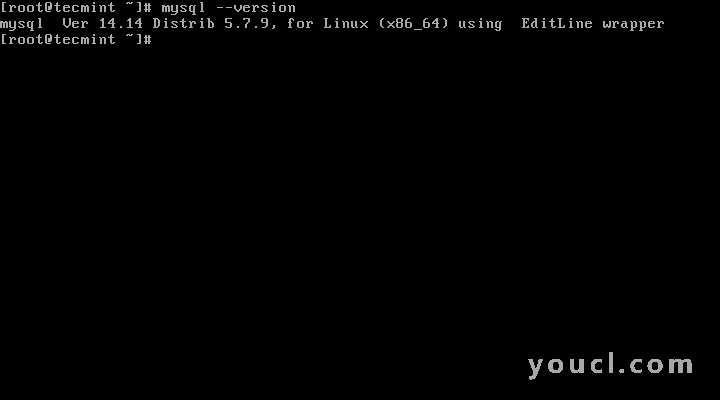
检查MySQL安装的版本
第5步:保护MySQL安装
9.命令 mysql_secure_installation允许您通过如设置root的密码,删除匿名用户,去掉root登录,等上执行重要的设置,以确保您的MySQL安装。 注 :MySQL的版本 5.7或更高版本生成一个临时的随机密码/var/log/mysqld.log后安装。 在运行mysql secure命令之前,使用以下命令查看密码。
# grep 'temporary password' /var/log/mysqld.log一旦你知道密码,你现在可以运行下面的命令来保护你的MySQL安装。
# mysql_secure_installation注 :输入新的Root密码是指从文件的临时密码
/var/log/mysqld.log 。 现在按照屏幕上的说明仔细,参考以上命令的输出。
示例输出
Securing the MySQL server deployment.
Enter password for user root: Enter New Root Password
VALIDATE PASSWORD PLUGIN can be used to test passwords
and improve security. It checks the strength of password
and allows the users to set only those passwords which are
secure enough. Would you like to setup VALIDATE PASSWORD plugin?
Press y|Y for Yes, any other key for No: y
There are three levels of password validation policy:
LOW    Length >= 8
MEDIUM Length >= 8, numeric, mixed case, and special characters
STRONG Length >= 8, numeric, mixed case, special characters and dictionary                  file
Please enter 0 = LOW, 1 = MEDIUM and 2 = STRONG: 2
Using existing password for root.
Estimated strength of the password: 50
Change the password for root ? ((Press y|Y for Yes, any other key for No) : y
New password: Set New MySQL Password
Re-enter new password: Re-enter New MySQL Password
Estimated strength of the password: 100
Do you wish to continue with the password provided?(Press y|Y for Yes, any other key for No) : y
By default, a MySQL installation has an anonymous user,
allowing anyone to log into MySQL without having to have
a user account created for them. This is intended only for
testing, and to make the installation go a bit smoother.
You should remove them before moving into a production
environment.
Remove anonymous users? (Press y|Y for Yes, any other key for No) : y
Success.
Normally, root should only be allowed to connect from
'localhost'. This ensures that someone cannot guess at
the root password from the network.
Disallow root login remotely? (Press y|Y for Yes, any other key for No) : y
Success.
By default, MySQL comes with a database named 'test' that
anyone can access. This is also intended only for testing,
and should be removed before moving into a production
environment.
Remove test database and access to it? (Press y|Y for Yes, any other key for No) : y
- Dropping test database...
Success.
- Removing privileges on test database...
Success.
Reloading the privilege tables will ensure that all changes
made so far will take effect immediately.
Reload privilege tables now? (Press y|Y for Yes, any other key for No) : y
Success.
All done!
第6步:连接到MySQL服务器
10.通过提供用户名和密码连接到新安装的MySQL服务器。# mysql -u root -p
样品输出:
Welcome to the MySQL monitor.  Commands end with ; or \g.
Your MySQL connection id is 19
Server version: 5.7.9 MySQL Community Server (GPL)
Copyright (c) 2000, 2015, Oracle and/or its affiliates. All rights reserved.
Oracle is a registered trademark of Oracle Corporation and/or its
affiliates. Other names may be trademarks of their respective
owners.
Type 'help;' or '\h' for help. Type '\c' to clear the current input statement.
mysql>
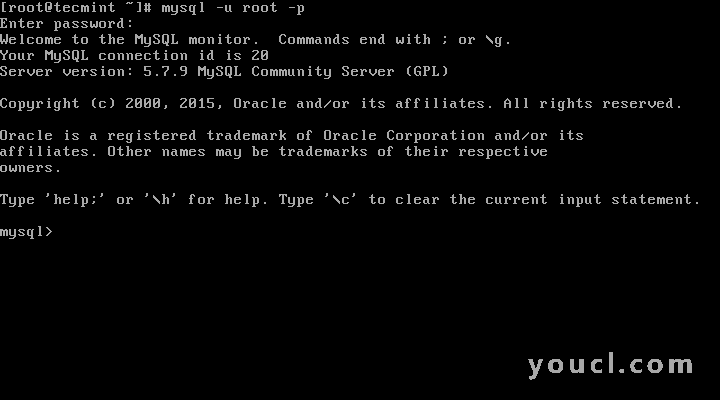
连接到MySQL服务器
第7步:用Yum更新MySQL
11.除了全新安装,你也可以做对MySQL的产品和组件的更新与下面的命令的帮助。# yum update mysql-server # dnf update mysql-server [On Fedora 22+ versions]
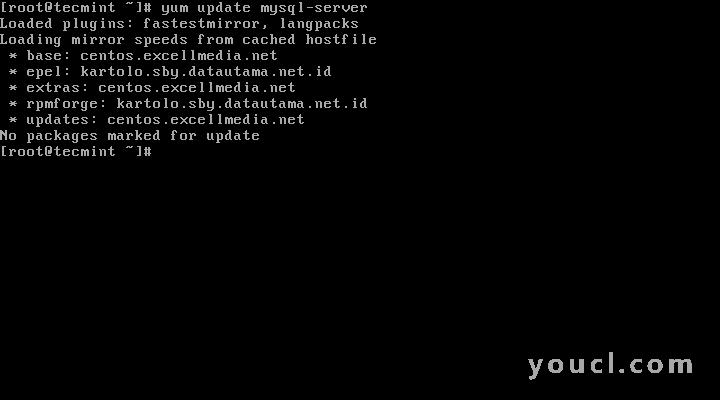
更新MySQL版本


