本教程将介绍如何使用Unison在两台Debian 8服务器之间设置文件同步。 Unison是一个类似于rsync的文件同步工具,最大的区别是它跟踪/同步两个方向的变化,即server1上更改的文件将被复制到server2,反之亦然。
1初步说明
在本教程中,我将使用以下两个Debian服务器:
-
server1.example.com,IP地址为192.168.1.101 -
server2.example.com,IP地址为192.168.1.102
我想同步两个服务器之间的目录/ var / www 。 我将在本教程中以root用户身份运行Unison,以便Unison具有足够的权限来同步用户和组权限。
本教程中的所有命令都以root用户身份运行。 以root身份登录到shell上的两个服务器,然后从第2步“ 安装Unison ”开始。
2安装Unison
server1 / server2:
Unison必须安装在server1和server2上 ; 因为我们使用SSH从server1连接到server2 ,所以我们还需要SSH包,我将在shell上安装nano编辑器进行文件编辑。 这可以实现如下:
apt-get -y install unison openssh-server ssh nano
3在服务器1上创建私钥/公钥对
server1:
现在我们在server1.example.com上创建一个私钥/公钥对:
ssh-keygen -t dsa
root @ server1:〜#ssh-keygen -t dsa 生成公共/私有dsa密钥对。 输入要保存密钥的文件(/root/.ssh/id_dsa): < - ENTER
创建目录“/root/.ssh”。 输入密码(无密码为空): < - ENTER
再次输入相同的密码: < - ENTER
您的身份已保存在/root/.ssh/id_dsa中。 您的公钥已保存在/root/.ssh/id_dsa.pub中。 关键指纹是: ba:82:e1:a1:42:9b:d4:c8:99:c8 :bd:8b:7d:4d:d4:66 root @ server1 关键的randomart形象是: + --- [DSA 1024] ---- + | | | | | 。 | | 。 E | | + *。 S | |哦哦 | ooo +。 + | | oo = ... o | | .. oo .. | + ----------------- + root @ server1:〜#
重要的是,您不要输入密码,否则在没有人工交互的情况下镜像将无法正常工作,因此只需按ENTER键 !
接下来,我们将公钥复制到server2.example.com :
ssh-copy-id -i $HOME/.ssh/id_dsa.pub root@192.168.1.102
# ssh-copy-id -i $HOME/.ssh/id_dsa.pub root@192.168.1.102The authenticity of host '192.168.1.102 (192.168.1.102)' can't be established.
ECDSA key fingerprint is 51:7f:b4:ed:bd:e3:fc:16:2f:55:5c:e1:2c:d7:3d:a9.
Are you sure you want to continue connecting (yes/no)? <-- yes (you will see this only if this is the first time you connect to server2)
/usr/bin/ssh-copy-id: INFO: attempting to log in with the new key(s), to filter out any that are already installed
/usr/bin/ssh-copy-id: INFO: 1 key(s) remain to be installed -- if you are prompted now it is to install the new keys
root@192.168.1.102's password: <-- server2 root password
Number of key(s) added: 1
Now try logging into the machine, with: "ssh 'root@192.168.1.102'"
and check to make sure that only the key(s) you wanted were added.
现在检查server2的 server1的公钥是否正确传输:
server2:
cat $HOME/.ssh/authorized_keys
root@server2:/home/administrator# cat $HOME/.ssh/authorized_keys
ssh-dss AAAAB3NzaC1kc3MAAACBAKHLdAztIr8muZIlQYuE/4f75kmgTwWqJRZJ1dTqHDnHWsy48emDU8v85hxAPg43k9aF7/zAwpA0MNNNk5T9Tx/DyUkK/KcyVP2f4p8tvovrkUvoxsZACkTUmFqKdq2x6/AGfjsCRmkpLhZuad7r5rKEXHRh8KYGHqD1Id8wcpy5AAAAFQCww3OekKcKMshMAwBK3XQmmYEGUwAAAIEAgjztlwh8OFYxwQve/RrhI2sceCXwS/yjQyH7q0zdWB9Fr4s/16T2PLBT+7M3vb+JlPDO3JRqgaYbel1kS2F2iKrY0EX0FI3/9fVDfWoz3mhCscPLriqy5AcsHitxQNfiZgA5wDiSjWpk1v+FbIC+VuqbKdQuE4MBKj19N9YALIUAAACABQ4NDsa2UBc8jsxvghjoLhUWF7HChaCksXQcL6i98VNRcemtPC6wpIri75iR4Uhv1666bDOBAdmIBX9Qf7A/+czPKPaj4CGI1hVy1pgYMa3btnEvoSnH/ONtjpOz9q+3up1OOOn+5fud7xjJn+Fq8WoGROgarBpCbQU3w2GUUnM= root@server1
4跑步统一
server1:
我们现在可以首次运行Unison来同步两个服务器上的/ var / www目录。 在server1上运行:
unison /var/www ssh://192.168.1.102//var/www
输出将类似于这一个 - 您可能必须回答几个问题,因为这是第一次Unison正在运行:
root@server1:/var/www# unison /var/www ssh://192.168.1.102//var/www
Contacting server...
Connected [//server1//var/www -> //server2//var/www]
Looking for changes
Warning: No archive files were found for these roots, whose canonical names are:
 /var/www
 //server2//var/www
This can happen either
because this is the first time you have synchronized these roots,
or because you have upgraded Unison to a new version with a different
archive format.
Update detection may take a while on this run if the replicas are
large.
Unison will assume that the 'last synchronized state' of both replicas
was completely empty. This means that any files that are different
will be reported as conflicts, and any files that exist only on one
replica will be judged as new and propagated to the other replica.
If the two replicas are identical, then no changes will be reported.
If you see this message repeatedly, it may be because one of your machines
is getting its address from DHCP, which is causing its host name to change
between synchronizations. See the documentation for the UNISONLOCALHOSTNAME
environment variable for advice on how to correct this.
Donations to the Unison project are gratefully accepted:
http://www.cis.upenn.edu/~bcpierce/unison
Press return to continue.[<spc>] <-- Press Enter
Waiting for changes from server
Reconciling changes
local server2
dir ----> example.com [f] <-- Press Enter
dir ----> example.de [f] <-- Press Enter
Proceed with propagating updates? [] <-- Enter "y"
Propagating updates
UNISON 2.40.102 started propagating changes at 10:17:17.94 on 25 Sep 2015
[BGN] Copying example.com from /var/www to //server2//var/www
[BGN] Copying example.de from /var/www to //server2//var/www
Shortcut: copied /var/www/example.de/web/index.html from local file /var/www/.unison.example.com.d3783bddaaf59b9ba4d2ed0433f9db63.unison.tmp/web/index.html
[END] Copying example.de
[END] Copying example.com
UNISON 2.40.102 finished propagating changes at 10:17:17.94 on 25 Sep 2015
Saving synchronizer state
Synchronization complete at 10:17:17 (2 items transferred, 0 skipped, 0 failed)
现在检查server1和server2上的/ var / www目录,你应该会发现它们现在在同步。
当然,我们不想以交互方式运行Unison,因此我们可以创建一个首选项文件( /root/.unison/default.prf ),其中包含我们在命令行上必须指定的所有设置:
nano /root/.unison/default.prf
# Roots of the synchronization
root = /var/www
root = ssh://192.168.1.102//var/www

# Paths to synchronize
#path = current
#path = common
#path = .netscape/bookmarks.html

# Some regexps specifying names and paths to ignore
#ignore = Path stats    ## ignores /var/www/stats
#ignore = Path stats/*  ## ignores /var/www/stats/*
#ignore = Path */stats  ## ignores /var/www/somedir/stats, but not /var/www/a/b/c/stats
#ignore = Name *stats   ## ignores all files/directories that end with "stats"
#ignore = Name stats*   ## ignores all files/directories that begin with "stats"
#ignore = Name *.tmp    ## ignores all files with the extension .tmp

#          When set to true, this flag causes the user interface to skip
#          asking for confirmations on non-conflicting changes. (More
#          precisely, when the user interface is done setting the
#          propagation direction for one entry and is about to move to the
#          next, it will skip over all non-conflicting entries and go
#          directly to the next conflict.)
auto=true

#          When this is set to true, the user interface will ask no
#          questions at all. Non-conflicting changes will be propagated;
#          conflicts will be skipped.
batch=true

#          !When this is set to true, Unison will request an extra
#          confirmation if it appears that the entire replica has been
#          deleted, before propagating the change. If the batch flag is
#          also set, synchronization will be aborted. When the path
#          preference is used, the same confirmation will be requested for
#          top-level paths. (At the moment, this flag only affects the
#          text user interface.) See also the mountpoint preference.
confirmbigdel=true

#          When this preference is set to true, Unison will use the
#          modification time and length of a file as a `pseudo inode
#          number' when scanning replicas for updates, instead of reading
#          the full contents of every file. Under Windows, this may cause
#          Unison to miss propagating an update if the modification time
#          and length of the file are both unchanged by the update.
#          However, Unison will never overwrite such an update with a
#          change from the other replica, since it always does a safe
#          check for updates just before propagating a change. Thus, it is
#          reasonable to use this switch under Windows most of the time
#          and occasionally run Unison once with fastcheck set to false,
#          if you are worried that Unison may have overlooked an update.
#          The default value of the preference is auto, which causes
#          Unison to use fast checking on Unix replicas (where it is safe)
#          and slow checking on Windows replicas. For backward
#          compatibility, yes, no, and default can be used in place of
#          true, false, and auto. See the section "Fast Checking" for more
#          information.
fastcheck=true

#          When this flag is set to true, the group attributes of the
#          files are synchronized. Whether the group names or the group
#          identifiers are synchronizeddepends on the preference numerids.
group=true

#          When this flag is set to true, the owner attributes of the
#          files are synchronized. Whether the owner names or the owner
#          identifiers are synchronizeddepends on the preference
#          extttnumerids.
owner=true

#          Including the preference -prefer root causes Unison always to
#          resolve conflicts in favor of root, rather than asking for
#          guidance from the user. (The syntax of root is the same as for
#          the root preference, plus the special values newer and older.)
#          This preference is overridden by the preferpartial preference.
#          This preference should be used only if you are sure you know
#          what you are doing!
prefer=newer

#          When this preference is set to true, the textual user interface
#          will print nothing at all, except in the case of errors.
#          Setting silent to true automatically sets the batch preference
#          to true.
silent=true

#          When this flag is set to true, file modification times (but not
#          directory modtimes) are propagated.
times=true
评论应该使文件自我解释,除了路径指令。 如果不指定路径指令,则根指令中的目录将被同步。 如果指定路径指令,则路径是相对于根路径(例如, root = / var / www和path = current转换为/ var / www / current ),只有这些子目录将被同步,而不是指定的整个目录在根指令中。
通过查看Unison的手册页,可以找到有关可用选项的更多信息:
man unison
现在我们把所有的设置放在一个首选项文件(特别是root (和可选的路径 )指令)中,我们可以运行Unison而不用任何参数:
unison
5创建一个Cron作业来统一
server1:
我们希望自动化同步,这就是为什么我们在server1.example.com上创建一个cron作业的原因 :
crontab -e
*/5 * * * * /usr/bin/unison &> /dev/null
这将每5分钟运行一次; 根据您的需要进行调整(见
man 5 crontab
)。 我在这里使用完整的路径( / usr / bin / unison ),以确保cron知道在哪里找到一致 。 您的一致位置可能不同。 跑
which unison
找出你的位置。
6测试统一
现在我将测试Unison的2路同步,看看设置是否完全正常。
在server1上运行以下命令创建一个包含“Test 1”的测试文件:
Server1
echo "Test 1" > /var/www/test.txt
现在等待至少5分钟(因为我们创建了一个每5分钟运行一次的cronjob)。 然后在server2上运行:
cat /var/www/test.txt
在屏幕上显示test.txt文件的内容。 输出应该类似于这个截图。

现在在server2上运行此命令,将该测试文件的内容更新为“Test 2”:
Server2
echo "Test 2" > /var/www/test.txt
并等待至少5分钟。 然后在server1上运行cat命令:
Server1
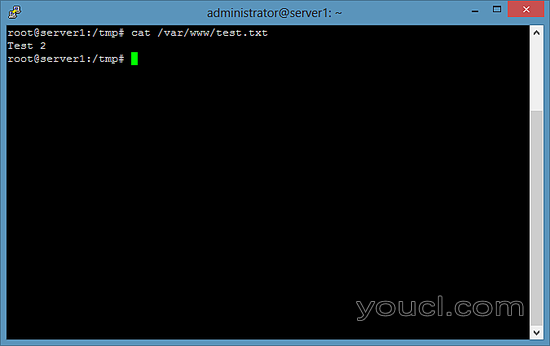
cat /var/www/test.txt
输出应该如屏幕截图所示。
7链接
- Unison: http : //www.cis.upenn.edu/~bcpierce/unison/
- Debian: http : //www.debian.org/


