您可能知道,ISPConfig是可用于在单服务器和多服务器环境中管理Linux托管服务器的最佳免费开源托管控制面板之一。
使用版本3.1,引入了很多伟大的功能,您可以在http://www.ispconfig.org/上获得完整列表
今天,您将看到如何使用ispconfig_setup脚本来部署和安装这个惊人的控制面板。 该脚本可在GitHub上免费获取 ,网址为: https ://github.com/servisys/ispconfig_setup,在社区的帮助下,由Matteo Temporini开发和维护免费Servisys。
该脚本适用于许多Linux发行版:
- Debian 7
- Debian 8
- Ubuntu 14.10
- Ubuntu 15.10
- Ubuntu 16.04
- Centos 7
在本文中,我们将在Ubuntu 16.04中看到如何使用它(16.10将很快支持...)。
先决条件
使用此脚本需要一些先决条件:
- 安装仅在新安装的(空)服务器上工作,因此如果您已经安装了某些东西(如Apache,MySql或ISPConfig所需的其他东西),则安装脚本可能无法正常工作,或导致奇怪的事情。
- 对于安装服务器,在开始之前,我会提醒您按照本指南https://www.youcl.com/tutorial/ubuntu-minimal-server-install/
- 在您的服务器上工作的互联网连接。
下载并准备
现在我们下载并解压缩安装所需的文件,为此,我们以root用户身份执行以下命令:
apt-get update && apt-get -y upgrade
apt-get install -y unzip
cd /tmp
wget --no-check-certificate -O installer.tgz "https://github.com/servisys/ispconfig_setup/tarball/master"
tar zxvf installer.tgz
cd *ispconfig*
bash install.sh
现在,您的/ tmp目录中有一个名为servisys-ispconfig_setup- SOMETHING的文件夹, SOMETHING将以您正在使用的版本号的形式更改,但不要担心。
ISPConfig 3.1安装
现在是时候使用自动安装脚本安装我们的ISPConfig控制面板了。 脚本有两种安装模式:标准模式和专家模式。
这两种模式是相似的,主要区别在于在标准模式下,ISPConfig安装是完全无人值守的,通过专家模式,您可以为特殊环境配置ISPConfig,如多服务器设置,镜像或仅选择一些要配置的服务。
在标准设置中,将安装以下组件:
- Web服务器(Apache或Nginx)
- FTP服务器(带pureftpd)
- DNS服务器(bind9)
- MySQL服务器作为数据库服务器
- Awstats统计用途
- Clamavd用于防病毒
- 加密证书生成
- IMAP和POP3(与Express或鸽子)
- 网络邮件(与RoundCube或squirellmail)
- ...显然是ISPConfig
我们从两种模式的常用命令开始,然后我们从两种模式中进行安装过程。
在这一点上,进程已经开始了,现在我们可以看到以下输出
Welcome to ISPConfig Setup Script v.2.2.1
This software is developed by Temporini Matteo
with the support of the community.
You can visit my website at the followings URLS
http://www.servisys.it http://www.temporini.net
and contact me with the following information
contact email/hangout: temporini.matteo@gmail.com
skype: matteo.temporini
=========================================
ISPConfig 3 System installer
=========================================

This script will do a nearly unattended intallation of
all software needed to run ISPConfig 3.
When this script starts running, it'll keep going all the way
So before you continue, please make sure the following checklist is ok:

- This is a clean standard clean installation for supported systems
- Internet connection is working properly


The detected Linux Distribution is: Ubuntu 16.04.1 LTS

Is this correct? (y/n)
此时,安装过程将检查您的分发,以检测安装的操作系统是否与脚本兼容,在我的情况下,它会检测到Ubuntu 16.04.1 LTS。
如果这是正确的,你按'y',现在你会被问到一些问题,然后自动安装过程开始。 如果您不知道问题的答案,请直接按Enter键选择默认值。
- 您将被要求获取Mysql版本:Mysql o Mariadb
- 您将被要求输入MySql密码
- 接下来,您必须在Apache和Nginx之间进行选择
- 接下来,您将被要求使用Xcache(PHP的压缩系统)
- 接下来,您将被要求安装PHPMyAdmin
- 接下来,您必须选择邮件服务器类型dovecot或Express
- 接下来,你必须选择更新病毒定义(建议说是)
- 接下来,您必须选择启用或不启用配额(建议说是)
- 本章的最后一件事是安装标准或专家模式
标准模式
因此,我们选择标准模式安装,在启用所有功能的单个服务器设置中安装ISPConfig的最快速,最简单的方法。
如果您不知道该回答什么问题,只需按Enter键,默认值在大多数情况下都是好的。
- 接下来你必须选择安装Jailkit(注意:Jailkit作为普通的安装,现在只能安装)
- 接下来,您必须为您的数据写入ispconfig的SSL证书:国家,州,地区,组织,组织单位
- 接下来,您将被要求SSL配置:国家,州,地区,组织,组织单位
现在你可以去喝咖啡放松,等待安装过程完成。
当安装所有内容时,您可以在控制台上看到类似的东西:
Checking internet connection... OK

Installing pre-required packages
whiptail found: OK

Updating apt and upgrading currently installed packages... [DONE]

Installing basic packages...
Lettura elenco dei pacchetti...
Generazione albero delle dipendenze...
Lettura informazioni sullo stato...
Il pacchetto "apparmor-utils" non è installato e quindi non è stato rimosso
I seguenti pacchetti saranno RIMOSSI:
 apparmor liblxc1 lxc-common lxd snapd ubuntu-core-launcher
0 aggiornati, 0 installati, 6 da rimuovere e 0 non aggiornati.
 Dopo quest'operazione, verranno liberati 53,5 MB di spazio su disco.
(Lettura del database... 91867 file e directory attualmente installati.) (Lettura del database...
Rimozione di snapd (2.15.2ubuntu1)...
Warning: Stopping snapd.service, but it can still be activated by:
 snapd.socket
Rimozione di ubuntu-core-launcher (1.0.27.1)...
Rimozione di lxd (2.0.4-0ubuntu1~ubuntu16.04.1)...
Warning: Stopping lxd.service, but it can still be activated by:
 lxd.socket
Rimozione di lxc-common (2.0.4-0ubuntu1~ubuntu16.04.2)...
Rimozione di apparmor (2.10.95-0ubuntu2.2)...
Rimozione di liblxc1 (2.0.4-0ubuntu1~ubuntu16.04.2)...
Elaborazione dei trigger per man-db (2.7.5-1)...
Elaborazione dei trigger per libc-bin (2.23-0ubuntu3)...
Reconfigure dash... [DONE]

Installing MySQL... [DONE]

Installing Apache and Modules... [DONE]

Installing PHP and Modules... [DONE]

Installing needed Programs for PHP and Apache... [DONE]

===========================================================================================
Attention: When asked 'Configure database for phpmyadmin with dbconfig-common?' select 'NO'
Due to a bug in dbconfig-common, this can't be automated.
===========================================================================================
Press ENTER to continue...
由于dbconfig-common中的错误,我们现在无法自动执行PHPMyAdmin安装。 点击“输入”,下一个问题选择“否”(注意,因为默认为“是”)。
最后一个问题是完成安装所需。
作为ispconfig的一个新功能,本机支持Let's加密,已经介绍,它允许您完全免费创建SSL证书,并支持所有主要浏览器。
要完成脚本certbot的安装,将出现以下警告消息:
Elaborazione dei trigger per libc-bin (2.23-0ubuntu3)...
===========================================================================================
Attention: answer no to next Question Dialog
===========================================================================================
Press ENTER to continue...
点击“进入”并等待一些包装被安装后,您将被要求
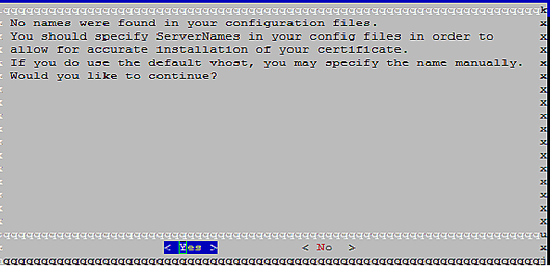
这里选择“否”。
一段时间后,Ispconfig 3.1将会开始安装并请求Mysql Port和Admin密码。
您可以同时按下Enter键,或者如果需要更改。 在将来的ispconfig版本中,这个问题将被删除,以便您可以跳过这个问题。
专业级
与标准模式的唯一区别是ISPconfig安装脚本,该脚本尚未自动运行,必须手动运行。 如前所述,这对于多服务器设置,仅运行一些服务和集群设置的单个服务器设置是必需的。
有关ISPConfig的详细安装过程,可参考以下文章https://www.youcl.com/tutorial/perfect-server-debian-8-jessie-apache-bind-dovecot-ispconfig-3/3/
多服务器和群集设置注意事项
这种配置已经在这个脚本中实现了,但是目前它们只适用于Debian 8,没有其他的发行版本。
对于安装和使用,您需要有两个服务器,从哪里运行此脚本。
最后考虑
安装完所有内容后,您可以使用命令检查错误或奇怪的事情
cat /var/log/ispconfig_setup.log
由于该脚本是开发人员,任何帮助或建议将不胜感激,您可以通过URL https://github.com/servisys/ispconfig_setup在GitHub上关注我们,或者在ISPconfig论坛上与我们联系。


