为了介绍这个技巧,让我们嗅出客户机和我们取得无辜的错误使用数据库root用户的在我们的上一篇文章凭据在登录Debian的8服务器之间的HTTP流量: 变化与安全的默认phpMyAdmin的登录URL
正如我们在上一个提示中提到的,如果您不想公开您的凭据,请不要试图这样做。 要开始嗅探流量,我们键入以下命令并按Enter键:
# tcpdump port http -l -A | egrep -i 'pass=|pwd=|log=|login=|user=|username=|pw=|passw=|passwd=|password=|pass:|user:|username:|password:|login:|pass |user ' --line-buffered -B20
它不会多久我们认识到, 用户名和密码以纯文本格式发送过线,你可以在截断输出看到的tcpdump下面的图像中。
请注意,我们有root密码用蓝色标记了它的隐蔽部分:

嗅探HTTP流量
为了避免这种情况,让我们使用证书保护登录页面。 要做到这一点,在基于CentOS的发行版安装了mod_ssl包。
# yum install mod_ssl
虽然我们将使用Debian / Ubuntu的路径和名称,如果更换下面CentOS的等价的命令和路径相同的程序是有效的为CentOS和RHEL。
创建一个目录来存储密钥和证书:
# mkdir /etc/apache2/ssl    [On Debian/Ubuntu based systems]
# mkdir /etc/httpd/ssl      [On CentOS based systems]
创建密钥和证书:
----------- On Debian/Ubuntu based systems -----------
# openssl req -x509 -nodes -days 365 -newkey rsa:2048 -keyout /etc/apache2/ssl/apache.key -out /etc/apache2/ssl/apache.crt
----------- On CentOS based systems -----------
# openssl req -x509 -nodes -days 365 -newkey rsa:2048 -keyout /etc/httpd/ssl/apache.key -out /etc/httpd/ssl/apache.crt
示例输出
........................+++
.....................................................+++
writing new private key to '/etc/httpd/ssl/apache.key'
-----
You are about to be asked to enter information that will be incorporated
into your certificate request.
What you are about to enter is what is called a Distinguished Name or a DN.
There are quite a few fields but you can leave some blank
For some fields there will be a default value,
If you enter '.', the field will be left blank.
-----
Country Name (2 letter code) [XX]:IN
State or Province Name (full name) []:Maharashtra
Locality Name (eg, city) [Default City]:Mumbai
Organization Name (eg, company) [Default Company Ltd]:youcl
Organizational Unit Name (eg, section) []:youcl
Common Name (eg, your name or your server's hostname) []:youcl
Email Address []:admin@youcl.com
接下来,验证密钥和证书。
# cd /etc/apache2/ssl/   [On Debian/Ubuntu based systems]
# cd /etc/httpd/ssl/     [On CentOS based systems]
# ls -l
total 8
-rw-r--r--. 1 root root 1424 Sep  7 15:19 apache.crt
-rw-r--r--. 1 root root 1704 Sep  7 15:19 apache.key
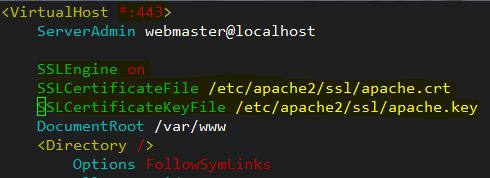
在于Debian / Ubuntu,确保Apache是在默认网站(/etc/apache2/sites-available/000-default.conf)监听端口443,并添加虚拟主机声明中的3 SSL相关的线路:
SSLEngine on
SSLCertificateFile /etc/apache2/ssl/apache.crt
SSLCertificateKeyFile /etc/apache2/ssl/apache.key

在虚拟主机上启用SSL
在基于CentOS的发行,告诉Apache监听端口443,并期待在/etc/httpd/conf/httpd.conf中的Listen指令,并在其下面添加上述行。
SSLEngine on
SSLCertificateFile /etc/httpd/ssl/apache.crt
SSLCertificateKeyFile /etc/httpd/ssl/apache.key
保存更改,上加载的Debian / Ubuntu的发行版的SSL Apache模块(CentOS中,当你之前安装了mod_ssl这是自动加载):
# a2enmod ssl
力phpMyAdmin来使用SSL,确保下面一行出现在/etc/phpmyadmin/config.inc.php或/etc/phpMyAdmin/config.inc.php文件:
$cfg['ForceSSL'] = true;
并重新启动Web服务器:
# systemctl restart apache2   [On Debian/Ubuntu based systems]
# systemctl restart httpd     [On Debian/Ubuntu based systems]
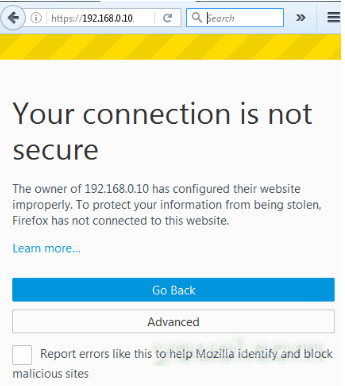
接下来,打开浏览器并输入https://<ip address>/my (了解如何更改phpMyAdmin的登录URL ),如下图所示。
重要提示 :请注意,它只是说,因为我们使用的是自签名证书的连接是不安全的。 点击高级 ,确认安全例外:

启用PhpMyAdmin HTTPS
确认安全异常后,并在登录之前,让我们开始嗅探HTTP和HTTPS流量:
# tcpdump port http or port https -l -A | egrep -i 'pass=|pwd=|log=|login=|user=|username=|pw=|passw=|passwd=|password=|pass:|user:|username:|password:|login:|pass |user ' --line-buffered -B20
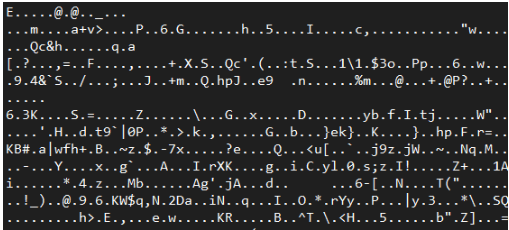
然后使用与之前相同的凭据登录。 交通嗅探器只会最多捕获乱码:

嗅探HTTP和HTTPS流量
这就是它现在,在明年文章中,我们将分享你限制使用用户名/密码访问的phpMyAdmin ,直到然后敬请关注youcl。


