在Linux中安装Sarg Squid日志分析器
在Linux中安装Sarg - Squid日志分析器
我假设你已经安装,配置和测试 Squid服务器作为透明代理和 DNS在缓存模式的名称解析。 如果没有,请安装和移动 特别行政区政府进一步安装之前先对其进行配置。 重要提示:请记住没有 Squid和 DNS设置,没有使用该系统将不会在所有的工作中安装特区政府的。 所以,这是进一步着手 特区政府安装之前先安装它们的请求。 按照以下指南在Linux系统中安装DNS和Squid:安装仅缓存DNS服务器
将Squid安装为透明代理
第1步:从源安装Sarg
在“ 特区政府 ”包在默认情况下不包含在基于 RedHat的发行版,所以我们需要手动编译和源码包安装。为此,我们需要在从源代码编译之前在系统上安装一些其他先决条件包。在RedHat / CentOS / Fedora上
# yum install –y gcc gd gd-devel make perl-GD wget httpd一旦你安装了所有需要的软件包,下载最新的 特区政府源码包 ,或者您可以使用以下命令 的wget下载和如下图所示安装。
# wget http://liquidtelecom.dl.sourceforge.net/project/sarg/sarg/sarg-2.3.10/sarg-2.3.10.tar.gz
# tar -xvzf sarg-2.3.10.tar.gz
# cd sarg-2.3.10
# ./configure
# make
# make install
在Debian / Ubuntu / Linux Mint
在基于 Debian的发行版, 特区政府包可以很容易地使用 apt-get的包管理器默认仓库安装。$ sudo apt-get install sarg
第2步:配置Sarg
现在是时候来编辑 特区政府主要的配置文件的一些参数。该文件包含大量可编辑的选项,但我们只会编辑必需的参数,如:- 访问日志路径
- 输出目录
- 日期格式
- 覆盖同一日期的报告。
# vi /usr/local/etc/sarg.conf [On RedHat based systems]
$ sudo nano /etc/sarg/sarg.conf [On Debian based systems]现在取消注释和原来的路径添加到您的 Squid访问日志文件。
# sarg.conf
#
# TAG:  access_log file
#       Where is the access.log file
#       sarg -l file
#
access_log /var/log/squid/access.log
接下来,添加正确的 输出目录路径保存在该目录中生成Squid报告。 请注意,在基于 Debian的发行版 Apache的Web根目录 “/无功/网络 ”。所以,请注意,在您的Linux发行版下添加正确的Web根路径。
# TAG:  output_dir
#       The reports will be saved in that directory
#       sarg -o dir
#
output_dir /var/www/html/squid-reports
设置报告的正确 日期格式 。 例如 ,“DATE_FORMAT E'将显示 ”DD / MM / YY'格式的报告。
# TAG:  date_format
#       Date format in reports: e (European=dd/mm/yy), u (American=mm/dd/yy), w (Weekly=yy.ww)
#
date_format e
其次,取消并设置为“ 是”覆盖报告。
# TAG: overwrite_report yes|no
#      yes - if report date already exist then will be overwritten.
#       no - if report date already exist then will be renamed to filename.n, filename.n+1
#
overwrite_report yes
而已!保存并关闭文件。
第3步:生成Sarg报告
一旦您完成了配置部分,就可以使用以下命令生成squid日志报告。# sarg -x [On RedHat based systems]
# sudo sarg -x [On Debian based systems]
示例输出
[root@localhost squid]# sarg -x
SARG: Init
SARG: Loading configuration from /usr/local/etc/sarg.conf
SARG: Deleting temporary directory "/tmp/sarg"
SARG: Parameters:
SARG:           Hostname or IP address (-a) =
SARG:                    Useragent log (-b) =
SARG:                     Exclude file (-c) =
SARG:                  Date from-until (-d) =
SARG:    Email address to send reports (-e) =
SARG:                      Config file (-f) = /usr/local/etc/sarg.conf
SARG:                      Date format (-g) = USA (mm/dd/yyyy)
SARG:                        IP report (-i) = No
SARG:             Keep temporary files (-k) = No
SARG:                        Input log (-l) = /var/log/squid/access.log
SARG:               Resolve IP Address (-n) = No
SARG:                       Output dir (-o) = /var/www/html/squid-reports/
SARG: Use Ip Address instead of userid (-p) = No
SARG:                    Accessed site (-s) =
SARG:                             Time (-t) =
SARG:                             User (-u) =
SARG:                    Temporary dir (-w) = /tmp/sarg
SARG:                   Debug messages (-x) = Yes
SARG:                 Process messages (-z) = No
SARG:  Previous reports to keep (--lastlog) = 0
SARG:
SARG: sarg version: 2.3.7 May-30-2013
SARG: Reading access log file: /var/log/squid/access.log
SARG: Records in file: 355859, reading: 100.00%
SARG:    Records read: 355859, written: 355859, excluded: 0
SARG: Squid log format
SARG: Period: 2014 Jan 21
SARG: Sorting log /tmp/sarg/172_16_16_55.user_unsort
......
注 :“ 特区政府-x”命令将读取 “sarg.conf”配置文件,并采取了Squid“ 的access.log”路径和生成html格式的报告。
第4步:评估Sarg报告
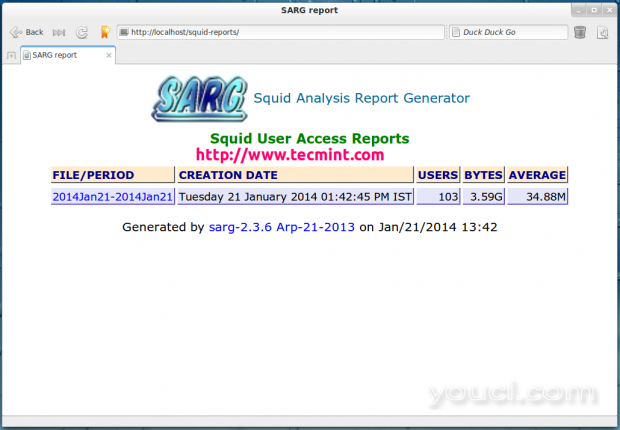
之下生成的报告“ 的/ var / www / html等/Squid报道/”或 “/无功/网络/Squid报告/',可使用该地址Web浏览器进行访问。http://localhost/squid-reports OR http://ip-address/squid-reports
Sarg主窗口
Sarg主窗口
具体日期
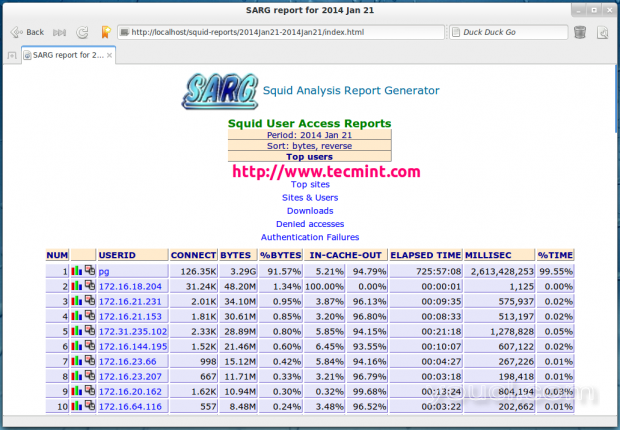
日期明智报告
用户报告
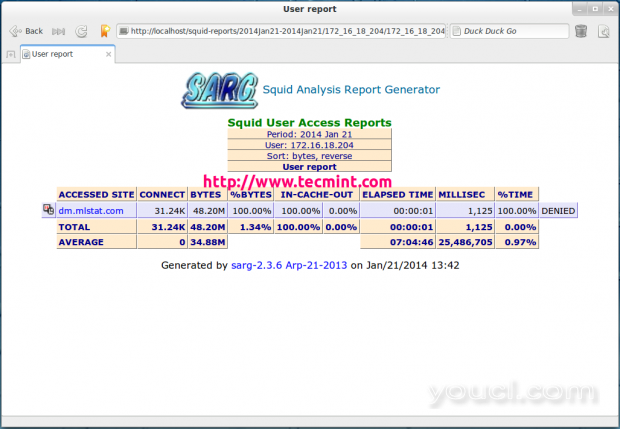
用户带宽报告
热门访问的网站
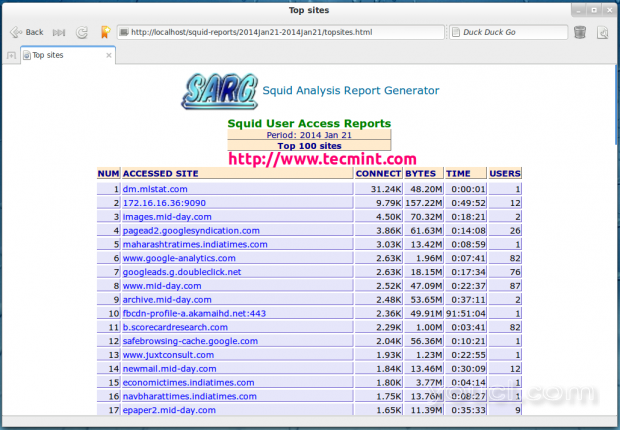
热门访问的网站
热门网站和用户
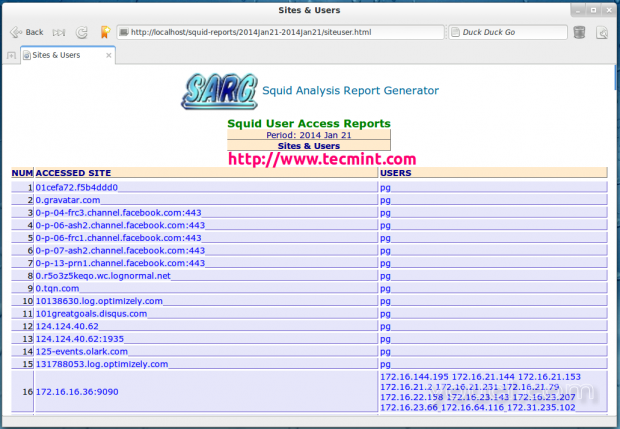
热门访问的网站和用户
顶部下载
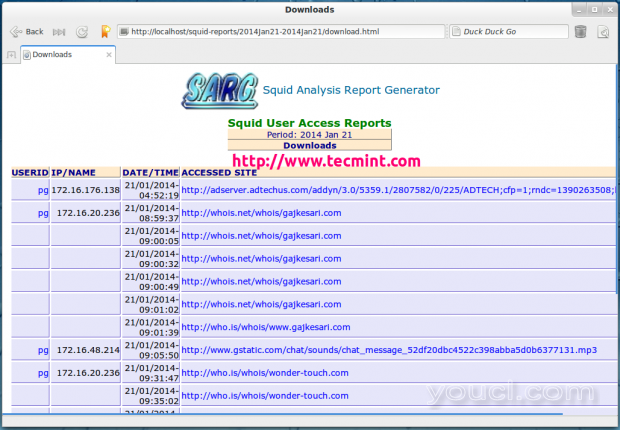
顶部下载
拒绝访问
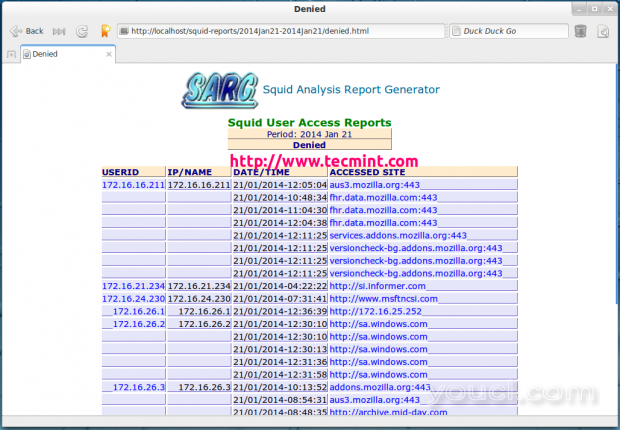
拒绝访问站点
认证失败
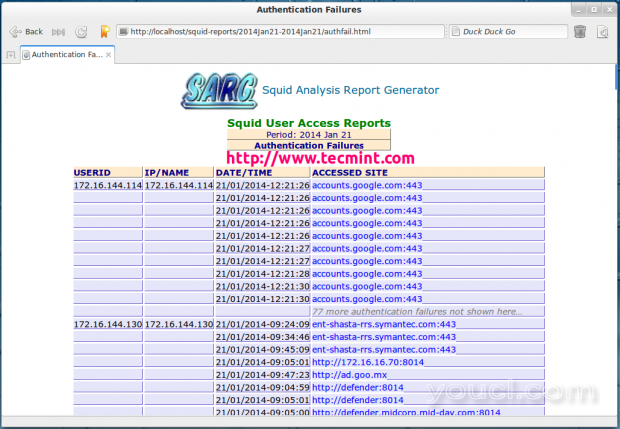
代理验证失败
第5步:自动生成Sarg报告
要通过自动化生成的时间跨度给出 特区政府报告的过程 cron作业 。 例如,假设你想自动生成 每小时的报告,要做到这一点,你需要配置一个 cron作业。# crontab -e接下来,在文件底部添加以下行。保存并关闭它。
* */1 * * * /usr/local/bin/sarg -x以上 的Cron规则将产生每隔 1小时 特区政府报告。


