如果你是一个数据库管理员(DBA),或者是负责维护,备份和恢复数据库,你知道你不能丢失数据。 原因很简单:丢失数据不仅意味着重要信息的丢失,而且可能会损害您的企业财务。
MySQL / MariaDB和PostgreSQL备份/恢复
因此,您必须始终确保:
1.你的数据库定期备份,
2.这些备份存储在一个安全的地方,
3.您经常进行恢复演练。
这最后一个活动不应该被忽视,因为你不想遇到一个大问题,没有练习在这种情况下需要做什么。
在本教程中,我们将分别为您介绍两个漂亮的实用程序备份的MySQL / MariaDB的和PostgreSQL数据库,:automysqlbackup和autopostgresqlbackup。
因为后者是基于前者,我们将专注于automysqlbackup我们的解释,并强调与autopgsqlbackup差异,如果有的话在所有。
强烈建议备份保存在安装网络共享备份目录中,以便在全系统崩溃的情况下,你仍然会被覆盖。
阅读以下有用的MySQL指南:
安装MySQL / MariaDB / PostgreSQL数据库
1.本手册假设您必须的MySQL / MariaDB的 / PostgreSQL的实例中运行,如果没有,请安装以下软件包:
基于Fedora的发行版:
# yum update && yum install mariadb mariadb-server mariadb-libs postgresql postgresql-server postgresql-libs
Debian和衍生:
# aptitude update && aptitude install mariadb-client mariadb-server mariadb-common postgresql-client postgresql postgresql-common
2.你有一个测试的MySQL / MariaDB的 / PostgreSQL数据库,你可以使用(建议您不要使用任何automysqlbackup或在生产环境中autopostgresqlbackup,直到你已经成为熟悉这些工具)。
否则,创建两个示例数据库并在继续之前用数据填充它们。 在本文中,我将使用以下数据库和表:
CREATE DATABASE mariadb_db;
CREATE TABLE youcl_tbl (UserID INT AUTO_INCREMENT PRIMARY KEY,
UserName VARCHAR(50),
IsActive BOOL);
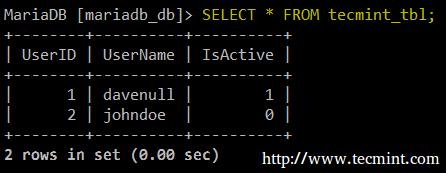
创建MySQL数据库
CREATE DATABASE postgresql_db;
CREATE TABLE youcl_tbl (
UserID SERIAL PRIMARY KEY,
UserName VARCHAR(50),
IsActive BOOLEAN);
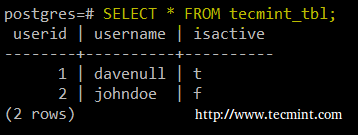
创建PostgreSQL数据库
在CentOS 7和Debian 8中安装automysqlbackup和autopgsqlbackup
3.在Debian 8 ,这两种工具都在仓库可用,所以安装它们就像运行简单:
# aptitude install automysqlbackup autopostgresqlbackup
而在CentOS 7,您将需要下载安装脚本和运行它们。 在下面的章节,我们将专注于安装,配置,自Debian的8测试在CentOS 7这些工具-在这里他们几乎开箱,我们将在稍后进行必要的澄清这篇文章。
在CentOS 7中安装和配置automysqlbackup
4.让我们开始创建一个内部工作目录/opt下载安装脚本并运行它:
# mkdir /opt/automysqlbackup
# cd /opt/automysqlbackup
# wget http://ufpr.dl.sourceforge.net/project/automysqlbackup/AutoMySQLBackup/AutoMySQLBackup%20VER%203.0/automysqlbackup-v3.0_rc6.tar.gz
# tar zxf automysqlbackup-v3.0_rc6.tar.gz
# ./install.sh
。
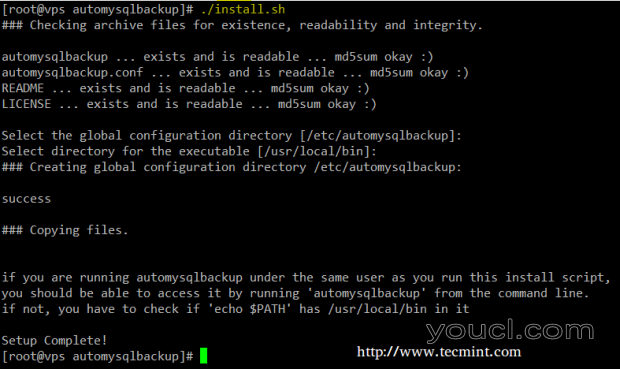
在CentOS-7中安装AutoMysqlBackup
5. automysqlbackup的配置文件位于里面的/ etc / automysqlbackup名myserver.conf下。 让我们来看看最相关的配置指令:
# Username to access the MySQL server
CONFIG_mysql_dump_username='root'
# Password
CONFIG_mysql_dump_password='YourPasswordHere'
# Host name (or IP address) of MySQL server
CONFIG_mysql_dump_host='localhost'
# Backup directory
CONFIG_backup_dir='/var/backup/db/automysqlbackup'
# List of databases for Daily/Weekly Backup e.g. ( 'DB1' 'DB2' 'DB3' ... )
# set to (), i.e. empty, if you want to backup all databases
CONFIG_db_names=(AddYourDatabase Names Here)
# List of databases for Monthly Backups.
# set to (), i.e. empty, if you want to backup all databases
CONFIG_db_month_names=(AddYourDatabase Names Here)
# Which day do you want monthly backups? (01 to 31)
# If the chosen day is greater than the last day of the month, it will be done
# on the last day of the month.
# Set to 0 to disable monthly backups.
CONFIG_do_monthly="01"
# Which day do you want weekly backups? (1 to 7 where 1 is Monday)
# Set to 0 to disable weekly backups.
CONFIG_do_weekly="5"
# Set rotation of daily backups. VALUE*24hours
# If you want to keep only today's backups, you could choose 1, i.e. everything older than 24hours will be removed.
CONFIG_rotation_daily=6
# Set rotation for weekly backups. VALUE*24hours. A value of 35 means 5 weeks.
CONFIG_rotation_weekly=35
# Set rotation for monthly backups. VALUE*24hours. A value of 150 means 5 months.
CONFIG_rotation_monthly=150
# Include CREATE DATABASE statement in backup?
CONFIG_mysql_dump_create_database='no'
# Separate backup directory and file for each DB? (yes or no)
CONFIG_mysql_dump_use_separate_dirs='yes'
# Choose Compression type. (gzip or bzip2)
CONFIG_mysql_dump_compression='gzip'
# What would you like to be mailed to you?
# - log   : send only log file
# - files : send log file and sql files as attachments (see docs)
# - stdout : will simply output the log to the screen if run manually.
# - quiet : Only send logs if an error occurs to the MAILADDR.
CONFIG_mailcontent='quiet'
# Email Address to send mail to? (user@domain.com)
CONFIG_mail_address='root'
# Do you wish to encrypt your backups using openssl?
#CONFIG_encrypt='no'
# Choose a password to encrypt the backups.
#CONFIG_encrypt_password='password0123'
# Command to run before backups (uncomment to use)
#CONFIG_prebackup="/etc/mysql-backup-pre"
# Command run after backups (uncomment to use)
#CONFIG_postbackup="/etc/mysql-backup-post"
一旦配置automysqlbackup根据您的需求,您是强烈建议要看看在/ etc / automysqlbackup / README中的README文件。
MySQL数据库备份
6.当你准备好,继续运行程序,通过配置文件作为参数:
# automysqlbackup /etc/automysqlbackup/myserver.conf
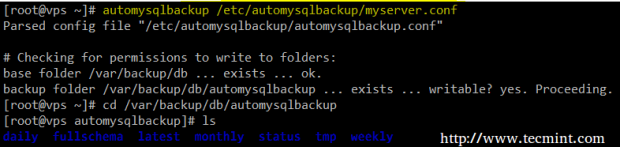
在CentOS 7上配置Automysqlbackup
每天目录将显示automysqlbackup的快速检查已成功运行:
# pwd
# ls -lR daily
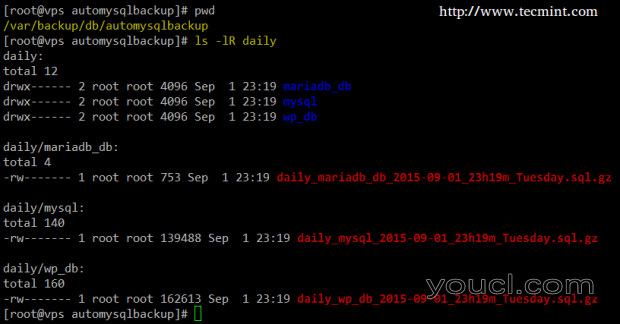
MySQL每日数据库备份
当然,你可以添加一个crontab条目在一天的时间,最适合您的需要(每天都在下面的例子上午1点30分 )运行automysqlbackup:
30 01 * * * /usr/local/bin/automysqlbackup /etc/automysqlbackup/myserver.conf
恢复MySQL备份
7.现在让我们砸目的mariadb_db数据库:
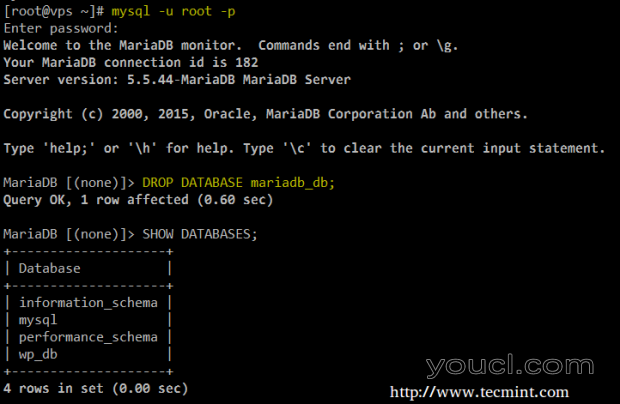
删除MariaDB数据库
让我们再次创建它并恢复备份。 在MariaDB提示符下,键入:
CREATE DATABASE mariadb_db;
exit
然后找到:
# cd /var/backup/db/automysqlbackup/daily/mariadb_db
# ls

找到MariaDB数据库备份
并恢复备份:
# mysql -u root -p mariadb_db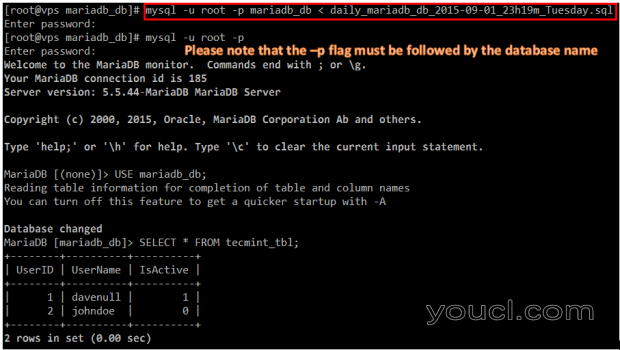
Restore MariaDB Backup
Installing and configuring autopostgresqlbackup in CentOS 7
8. In order for autopostgresql to work flawlessly in CentOS 7, we will need to install some dependencies first:
# yum install mutt sendmailThen let's repeat the process as before:
# mkdir /opt/autopostgresqlbackup # cd /opt/autopostgresqlbackup # wget http://ufpr.dl.sourceforge.net/project/autopgsqlbackup/AutoPostgreSQLBackup/AutoPostgreSQLBackup-1.0/autopostgresqlbackup.sh.1.0 # mv autopostgresqlbackup.sh.1.0 /opt/autopostgresqlbackup/autopostgresqlbackup.shLet's make the script executable and start / enable the service:
# chmod 755 autopostgresqlbackup.sh # systemctl start postgresql # systemctl enable postgresqlFinally, we will edit the value of the backup directory setting to:
autopostgresqlbackup.sh - Configure AutopostgresqlbackupBACKUPDIR="/var/backup/db/autopostgresqlbackup"After having through the configuration file of automysqlbackup, configuring this tool is very easy (that part of the task is left up to you).
9. In CentOS 7, as opposed to Debian 8, autopostgresqlbackup is best run as the postgres system user, so in order to do that you should either switch to that account or add a cron job to its crontab file:
# crontab -u postgres -e30 01 * * * /opt/autopostgresqlbackup/autopostgresqlbackup.shThe backup directory, by the way, needs to be created and its permissions and group ownership must be set recursively to 0770 and postgres (again, this will NOT be necessary in Debian):
# mkdir /var/backup/db/autopostgresqlbackup # chmod -R 0770 /var/backup/db/autopostgresqlbackup # chgrp -R postgres /var/backup/db/autopostgresqlbackupThe result:
# cd /var/backup/db/autopostgresqlbackup
# pwd
# ls -lR daily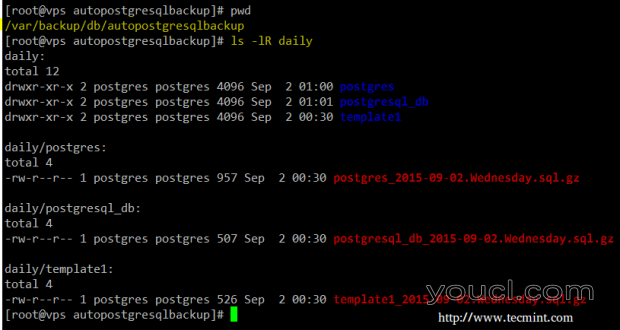
PostgreSQL Daily Database Backup
10. Now you can restore the files when needed (remember to do this as user postgres after recreating the empty database):
# gunzip -c postgresql_db_2015-09-02.Wednesday.sql.gz | psql postgresql_dbConsiderations in Debian 8
As we mentioned earlier, not only the installation of these tools in Debian is more straightforward, but also their respective configurations. You will find the configuration files in:
- Automysqlbackup: /etc/default/automysqlbackup
- Autopostgresqlbackup: /etc/default/autopostgresqlbackup
Summary
In this article we have explained how to install and use automysqlbackup and autopostgresqlbackup (learning how to use the first will help you master the second as well), two great database back up tools that can make your tasks as a DBA or system administrator / engineer much easier.
Please note that you can expand on this topic by setting up email notifications or sending backup files as attachments via email – not strictly required, but may come in handy sometimes.
As a final note, remember that the permissions of configuration files should be set to the minimum (0600 in most cases). We look forward to hearing what you think about this article. Feel free to drop us a note using the form below.

还原MariaDB备份
在CentOS 7中安装和配置autopostgresqlbackup
8.为了autopostgresql在CentOS 7完美的工作,我们需要先安装一些依赖关系:
# yum install mutt sendmail
然后让我们重复这个过程:
# mkdir /opt/autopostgresqlbackup # cd /opt/autopostgresqlbackup # wget http://ufpr.dl.sourceforge.net/project/autopgsqlbackup/AutoPostgreSQLBackup/AutoPostgreSQLBackup-1.0/autopostgresqlbackup.sh.1.0 # mv autopostgresqlbackup.sh.1.0 /opt/autopostgresqlbackup/autopostgresqlbackup.sh
让我们把可执行脚本和启动 / 启用该服务:
# chmod 755 autopostgresqlbackup.sh # systemctl start postgresql # systemctl enable postgresql
最后,我们将备份目录设置的值编辑为:
BACKUPDIR="/var/backup/db/autopostgresqlbackup"
通过automysqlbackup的配置文件有后,配置此工具是很容易的(任务的一部分是留给你)。
9.在CentOS 7,而不是Debian的8,autopostgresqlbackup是Postgres系统用户的最佳运行,所以为了做到这一点,你要么切换到该帐户或cron作业添加到其crontab文件:
# crontab -u postgres -e
30 01 * * * /opt/autopostgresqlbackup/autopostgresqlbackup.sh
备份目录,顺便说一句,需要创建和它的权限和组所有权必须递归设置为0770和Postgres的 (同样,这将不会是必要的,Debian的 ):
# mkdir /var/backup/db/autopostgresqlbackup # chmod -R 0770 /var/backup/db/autopostgresqlbackup # chgrp -R postgres /var/backup/db/autopostgresqlbackup
结果:
# cd /var/backup/db/autopostgresqlbackup # pwd # ls -lR daily

PostgreSQL每日数据库备份
10.现在,您可以还原文件需要时(还记得重新创建空数据库后,要做到这一点用户postgres):
# gunzip -c postgresql_db_2015-09-02.Wednesday.sql.gz | psql postgresql_db
Debian 8中的注意事项
正如我们前面所提到的,不仅在Debian中这些工具的安装更简单,而且它们各自的配置。 您将在以下位置找到配置文件:
- Automysqlbackup:在/ etc /默认/ automysqlbackup
- Autopostgresqlbackup:在/ etc /默认/ autopostgresqlbackup
概要
在这篇文章中,我们介绍了如何安装和使用automysqlbackup和autopostgresqlbackup(学习如何使用第一个将帮助你掌握了第二次为好),两个伟大的数据库备份工具,可以使您的工作作为一个DBA或系统管理员/工程师更容易。
请注意,您可以通过设置电子邮件通知或发送备份文件,通过电子邮件附件关于这一主题展开-没有严格要求,但可能会派上用场的时候。
最后一点,请记住,配置文件的权限应(在大多数情况下,0600)被设置为最小。 我们期待听到你对这篇文章的看法。 请随时使用下面的表格给我们留言。


